
DIY Art Tutorial: How to Make a Disco Ball Painting

DIY Art Tutorial: How to Make a Disco Ball Painting
Hey, it's a new year and what better opportunity to make your new year sparkle than a brand new disco ball?! And no, I am not suggesting that you hang disco balls all over your house - that might be a little too much sparkle! Just the right amount of art sparkle should do!
I am talking about the new trending painting project: Disco balls. My daughter often finds fun projects on TikTok and sends them my way. This one did not disappoint. Make them any color combo that works for you!
Yes, you can totally DIY disco ball paintings right from your kitchen table. If I can do it, you can, too! This is a great project for older kids with more advanced skill levels (not for the under 11 age group).
The thing I love most about disco ball paintings is that each and every one looks completely different. I did this project with my middle school class and each student had a unique design.
One child turned her disco ball into a clock! A few chose to make a few small mini disco balls - those were so cool, too! I also started seeing Instagram disco ball art everywhere. The algorithm scares me!!
But seriously, this one did not disappoint...
What you'll need to create your own disco ball painting
My first piece of advice is the only use high-quality materials. I do not usually give this advice with beginner projects, but I made a few of these myself and the higher quality paints create effects like texture and shine that can't happen with cheap paint.
Affiliate disclaimer: Although I stand by all of the products I use, I can receive a small commission from any products purchased via my affiliate links.
Supply List:
Wooden round (18"-20" is the perfect place to start)
Gesso or white paint
Acrylic paints in several colors (you'll need 3-5 colors to choose from)
Table covering
Pencils
Ruler (optional - only if you want to measure - I did not measure)
Plastic cup for water
Masking tape or washi tape to tape the sides
Look online and find images of disco ball paintings to use as a disco ball print. I found it easiest to print in black and white and in gray. Seeing where the light hits is particularly helpful.
If you need more ideas for color combinations, there are plenty of people making these over on the Etsy app. Once you've got your images, the world of disco ball paintings will be changed forever!
For your very first disco ball painting, do not aim for perfection. I kept changing mine and modifying mine and then I realized that when I looked at my painting from a few feet away, it totally looked like a real disco ball.
Step by step Instructions to create a disco ball painting
Sand your wooden round and use a damp cloth to wipe off any dust that may have accumulated.
Prime the wood round with thick white paint or gesso. Let dry.

Prime the wood round
3. Choose three colors and paint the background of the disco ball. Try to place the darker colors in the same spot as the darker colors on the print out.
Blend the colors together. Do not aim for perfection - this is simply underpainting.

Choose three colors for the underpainting coat
4. Using a colored pencil, draw curved lines similar to a disco ball. For a wooden round the size of a dinner plate, you should need around 20 rows.

Draw curved lines similar to a disco ball using a colored pencil
5. For the next step, begin marking the individual squares. They should be around 1" each.
Be sure to stagger the lines - you do not want the space between each tile to line up - think about the way bricks are staggered and do it the same way.

Mark individual squares
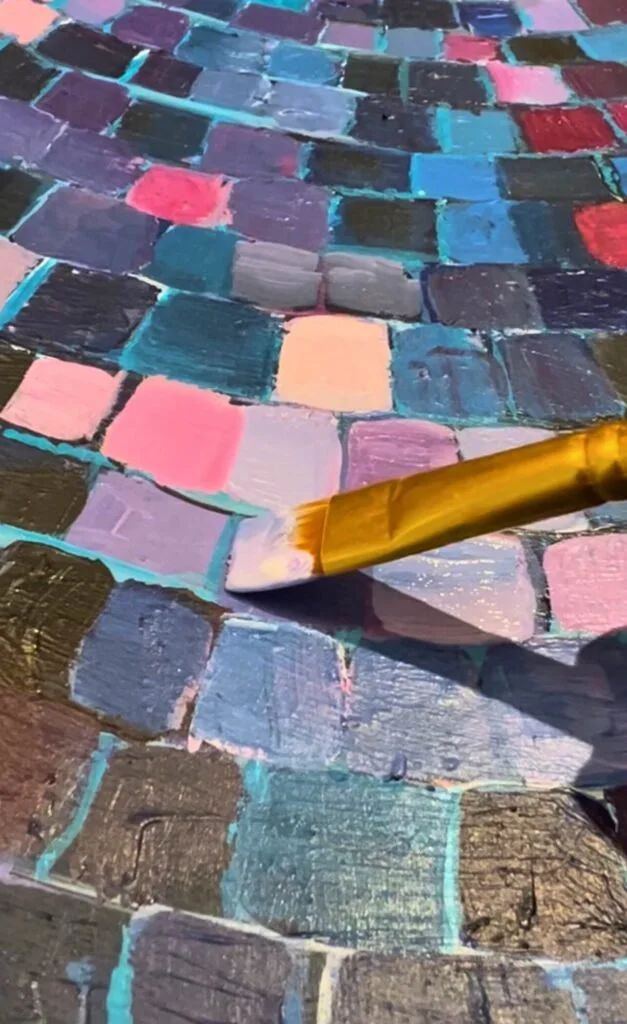
6. Using the edge of your brush, paint the lines you've drawn using a light colored paint (baby blue, light pink, etc). Do not worry if you aren't perfect - you can totally paint over them. Where you see light areas in the printed out images, you can add slightly darker lines.

Paint the lines using a light color
7. Now you'll start adding more paint to the individual tiles. Prepare colors on your paint palette. Also add white to lighten some colors.
Try not to cover the lines you've worked so hard to paint. If you use, let's say, green for example, try to make a few different shades of green so that each individual tile doesn't look the same.
Keep the light green where the areas are light in the printout. Use darker green in the areas that are darker in the printout.
Do not overthink it! And take your time, this is a project that requires patience! And if you don't like the way one tile looks, wait for the paint to dry and paint over it.
Paint the individual tiles in different shades
8. Once you've scattered several shades of the same color to different parts of your disco ball, move onto the next color.
As you paint, you might notice some of the lines you've drawn don't look curved or look out of balance. Feel free to change those, too.
9. Continue moving on to more colors until the disco ball is filled with color. Once complete, step all the way back from your work and see if it needs anything.
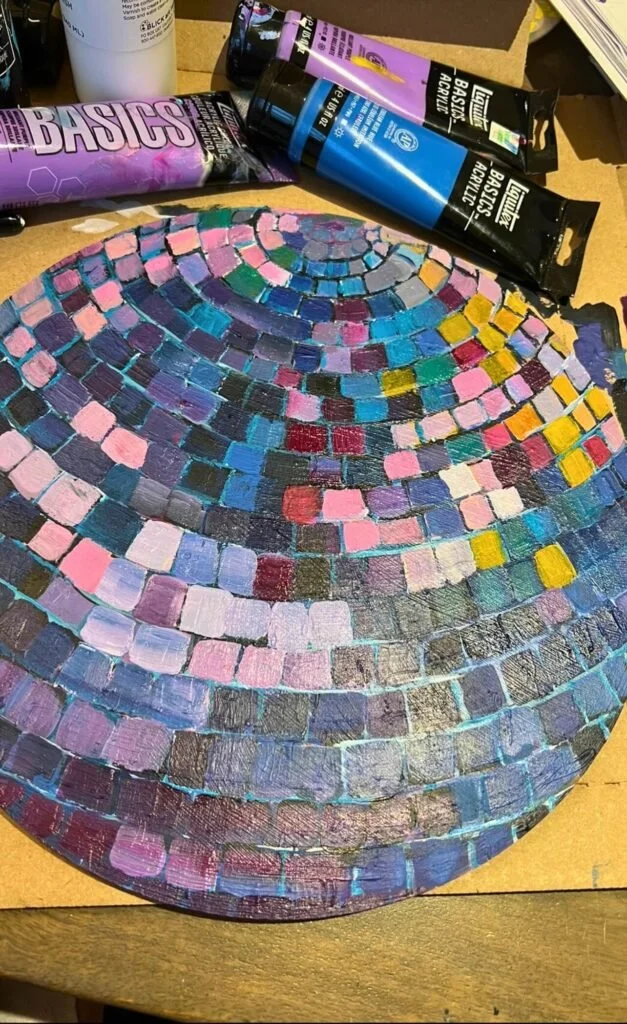
Determine if you need any finishing touches
10. Once you are satisfied with the painting, add a layer of mod podge or shiny sealant. This will give the disco ball extra shine. Feel free to add glitter or holographic pigment to the mod podge. Do a small test spot to make sure you like the way it looks.

Finish with a layer of ModPodge or shiny sealant
Tips and Tricks:
You can totally add silver glitter paint or just regular silver paint to the grout lines to add some extra sparkle
A creative way to embellish the disco ball is by adding iridescent sealer to the top - I believe Montana glass paint makes a version
You can also make a disco ball using mirror tiles and alcohol ink - tutorial coming soon!
And...that's it! Now you've got disco vibes all over your home decor. These are the perfect size to make a simple disco ball painting, but once you've been doing this for a long time, you can totally go big!
And now it's time to plan your next party!
Want to do more disco ball crafts? Check out this Disco Ball Cactus Jewelry Holder!