Do you like sushi and candles? Why not combine the two and make DIY sushi candles! We’re big sushi lovers in my family, so this project is a favorite of ours. I’ve made these beeswax candle creations with my entire family and my students, and they’ve all loved it! Candle making using beeswax sheets is a fun and easy activity for all ages and skill levels. It’s a fantastic DIY craft project that makes a great handmade gift for occasions like Christmas, Valentine’s Day, or Mother’s Day. In this post, you’ll learn how to make maki, California rolls, and tuna rolls out of beeswax honeycomb sheets.
Before we get started, let’s answer some common questions about making DIY sushi candles with rolled beeswax.
What are the benefits of beeswax candles?

There are many advantages to using beeswax to make candles over paraffin wax, including:
Natural & Non-Toxic:
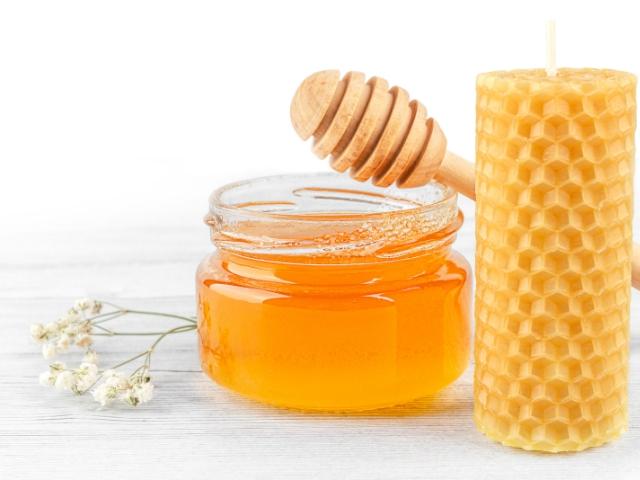
Beeswax is a natural substance produced by bees, which means it doesn’t contain the synthetic chemicals often found in paraffin candles. This makes beeswax candles a healthier option to breathe around, especially for those with sensitivities or allergies. The natural fragrance isn’t overpowering.
Clean Burning:
Beeswax candles produce minimal soot and smoke when burned properly. This clean burn contributes to better indoor air quality and reduces the need for constant cleaning or maintenance.
Longer Burn Time:
Beeswax candles typically burn slower and last longer than other types of candles. Their dense composition allows them to burn more efficiently, providing hours of cozy illumination.
Drip-Resistance:
Beeswax has a higher melting point than many other waxes, making beeswax candles more resistant to dripping and creating a mess.
Easy to Work With:
Beeswax is pliable and easy to mold, making it an ideal material for crafting candles. It can be rolled into sheets, molded into different shapes, and customized with colors or scents.
What do I need to make DIY sushi candles?
Affiliate disclaimer: Although I stand by all of the products I use, I can receive a small commission from any products purchased via my affiliate links.
To make your DIY candles, you will need:
– Colored beeswax honeycomb sheets (black, white, red, orange, yellow, green, pink)
– Cotton Wicks
– Chopsticks
- Ruler
– Exacto knife or rolling cutter
– Skewer
– Blow Dryer
Where can I find beeswax sheets?

No surprise here – you can actually buy colored beeswax sheets on Amazon! (What can’t you buy on Amazon?!) You can also find beeswax sheets at bee supply stores, or you can make your own from a solid block of beeswax.
If you’re going to be making a lot of candles, try this kit from Amazon. It’s practically a beeswax sushi candle kit, minus the chopsticks!
Are there different sushi candle designs I can create?
Totally! In this post, I’ll show you how to make three different traditional Japanese candles, but you can experiment with your own candles by creating your favorite sushi roll, sashimi, or nagiri. Once you learn the technique, the possibilities are endless!
Kid-Friendly Instructions for Making DIY Sushi Candles
Before you get started, check out these tips and tricks for making rolled beeswax candles.
Tips & Tricks for Making Beeswax Candles
- Only light candles under the supervision of adult—fire hazard!
- Use a blow dryer on a low setting to gently soften the wax if it is stiff, brittle or cold.
- Use caution at all times when cutting the wax. Small children should use pre-cut wax strips.
- Broken wax can still be used for details and embellishments.
How to Make a California Roll DIY Candle:

These instructions make one piece of sushi. If you want to make a 6 piece sushi roll, multiply these instructions by 6.
First, make the avocado:
1. Using the ruler, cut your green beeswax into two 1.5” strips. Starting at one end, roll the beeswax all the way until it is tightly rolled.

2. Using the ruler, cut your white beeswax into two 1.5” strips. Starting at one end, roll the beeswax all the way until it is tightly rolled.

3. Take your green and white rolls and push them together into the shape of an oval or a teardrop Repeat for the remaining green and white beeswax rolls.

Next, make the crab meat:
4. Cut your red beeswax into a 2” strip.
5. Cut the pink beeswax so that it measures 4” long.

6. Cut these strips finely so that you have a lot of thin strips. Then squish them together with the avocado using your fingers.
Assemble the California roll:
7. Place the crab meat on top of the wick with the avocado on the bottom. Gently push them together.

8. Cut a 5” strip of black wax to be used as the nori (seaweed). Place the pink and red crab mixture and the avocado next to one another.

9. Gently roll the wax until you have left 1” unrolled at the end.

10. Cut a strip of white beeswax to be used as the rice. It should be 9” long. Fold over 1” of the rice strip. Place the folded end on top of the 1” of nori you left unrolled. Now roll the whole thing, using your blow dryer as you go. If your wax strips are too small, you can always just attach another piece and continue rolling.

How to Make a Tuna Roll DIY Candle
These instructions make one piece of sushi. If you want to make a 6-piece sushi roll, multiply these instructions by 6.
1. Cut the red wax into 8” strips to be used as tuna.
2. Cut the white wax into 8” strips to be used as rice.
3. Cut black wax into 4.5” strips to be used as nori.
Assemble the tuna roll:
4. Cut the wick to the length of 1.5”
5. Place the wick on one end of the red wax.

6. Gently roll the red wax tightly around the wick. Form into a roll.
7. Use your white wax to be used as rice. Place the freshly rolled red wax onto the edge of the white wax. Roll the white wax around the tuna (red wax).

8. Place the freshly rolled white/red roll onto the edge of the black wax. Roll the wax around the rice. Remember to roll tightly and use your blow dryer if needed to soften the wax.

How to Make a Rectangular Maki DIY Candle

These instructions make one piece of rectangular maki—multiply to make more than one. Use pink for salmon, red for tuna and yellow for tamago. Be creative!
1. Cut the red wax into 2” strips. You will need 4 pieces of red wax strips. This will serve as the tuna. If you choose to make this a salmon roll, you can swap out the red for pink.
2. Cut the white wax into 2” strips. You will need 6 pieces of white wax. This will serve as the rice.
3. You will need one 6.5” strip of black wax. This will serve as the nori.
4. You will need one 1.5” strip of wick.

Assemble the rectangular maki:
5. Stack 3 of the white strips, one on top of another.
6. Next, add 2 pieces of red wax directly on top of the white.

7. Place a 1.5” piece of wick on top of the red wax. You can place this right in the middle.
8. Continue layering the wax by adding the remaining 2 pieces of red wax and the remaining 3 pieces of the white wax.

9. Place the freshly stacked white/red rice on top of the black nori. Roll gently while keeping the shape of the rectangle. Use your blow dryer if the wax is too brittle.

What can I use my DIY sushi candles for?

Now that you’ve made an assortment of sushi candles, arrange your sushi pieces on a plate with chopsticks or in a takeout box. Use them as a centerpiece for a sushi night in at home, a thoughtful handmade Christmas gift for the sushi lover in your family, or as unique birthday candles! Have fun making these creative candle creations with your family, friends, or students.
Want more handmade gift ideas? Check out this post for handmade gifts that are great for Mother’s Day, Father’s Day, or Christmas!

