
Easy Miniature Polymer Clay Cakes Tutorial

Easy Miniature Polymer Clay Cakes Tutorial
Did you know there's a whole world of polymer clay miniature food items out there? My students love making delicious looking polymer clay desserts! Like the novelty of tiny toys, there's just something fun about miniature food.
We make these Miniature Polymer Clay Cakes for enjoyment in my art class, but these could totally be used as a dollhouse miniature item.
They would be perfect for doll food in a dollhouse kitchen or even a pretend tea party for young children. Plus, crafting these adorable treats provides an excellent opportunity to hone your sculpting skills and experiment with different techniques.
From intricate cakes to scrumptious pastries, the possibilities are endless when it comes to creating your miniature culinary delights. So, grab your clay and get ready to whip up some fun and whimsical creations that will delight both young and old alike!
In this blog post, I'm sharing how to make miniature cakes using polymer clay. I chose to make rainbow layered cakes, but you can adapt this tutorial to any type of cake.
What's the best clay to use for polymer clay miniature food items?
My absolute favorite clay to use for polymer clay miniature food items is Sculpey polymer clay. Sculpey clay is a breeze to work with. It's super pliable, so you can shape it just right, and it bakes up strong, ensuring your realistic mini food will last through countless hours of use.
Plus, the range of colors means you can easily adapt this tutorial to fit all different kinds of miniature cake creations!
I have a full beginner’s guide on working with Sculpey here.
What you'll need to make a Miniature Polymer Clay Cakes
Affiliate disclaimer: Although I stand by all of the products I use, I can receive a small commission from any products purchased via my affiliate links.
White clay (I prefer Sculpey)
Assorted colors of polymer clay (I’m using the whole rainbow!)
Clay tool or toothpicks
Clay slicer
Clay tile work surface
Acrylic rolling pin
Round cookie cutter (circle cutter)
Aluminum foil or wax paper
Oven thermometer (optional, but getting the temp right is super important)
I love ordering craft supplies on Amazon because there are tons of selection results, free shipping (typically ships within a few business days) and it’s never final sale so if you change your mind, you can send the supplies back.
Check out my favorite items on my Amazon storefront. You’ll find a full page of all of my favorite things!
How to make tiny polymer clay cakes
1. The first step is to choose your colors. Roll each color of clay into a ball the size of a gumball.

Roll each color into a ball
I'm making a rainbow layered cake, but you could also make a vanilla cake, red velvet cake, chocolate cake, and even more!
2. On your clay work surface, place two depth guides on either side of the ball. Using the acrylic rolling pin, form a slab by rolling out the clay until it is the thickness of the depth guide.
Continue to flip and rotate the clay while you roll it out. Once complete, set aside.

Roll each color into a flat slab
Repeat this step for each color of clay.
3. Use your circle cutter to cut each color of clay into a circle. These will be your cake layers.
4. Choose the color of your frosting and repeat the same instructions, but use the 3mm depth guides for a thinner layer of frosting.
For a 6 layer cake, you will need 5 circles for frosting.

Use white clay for vanilla frosting or dark brown clay for chocolate icing.
5. Begin layering your circles. Place your first colored circle and put a white (or whichever color your frosting may be) layer on top. Repeat until you have layered all of the colors.

Assemble your layer cake
6. Using your 3mm slab levels, roll out a layer of frosting. Gently drape this on top of your cake (this will be the fondant). You can leave the bottom of the cake as it is.

Drape clay “fondant” on top
7. Using your clay cutter, cut a slice of cake out of the full cake. Use a small piece of aluminum foil and your clay tools to add texture.
The more texture you add, the more realistic the cake will look.
Add texture to the piece of cake
8. Line a baking sheet with aluminum foil or parchment paper. Place the cake slice and full cake onto the baking sheet.
9. For the best baking results, bake at 225 degrees for 30-40 minutes and let cool completely.
The baking process varies per oven, but be sure not to raise the temperature - burnt clay has an awful smell! Use an oven thermometer to be sure the temp is right.

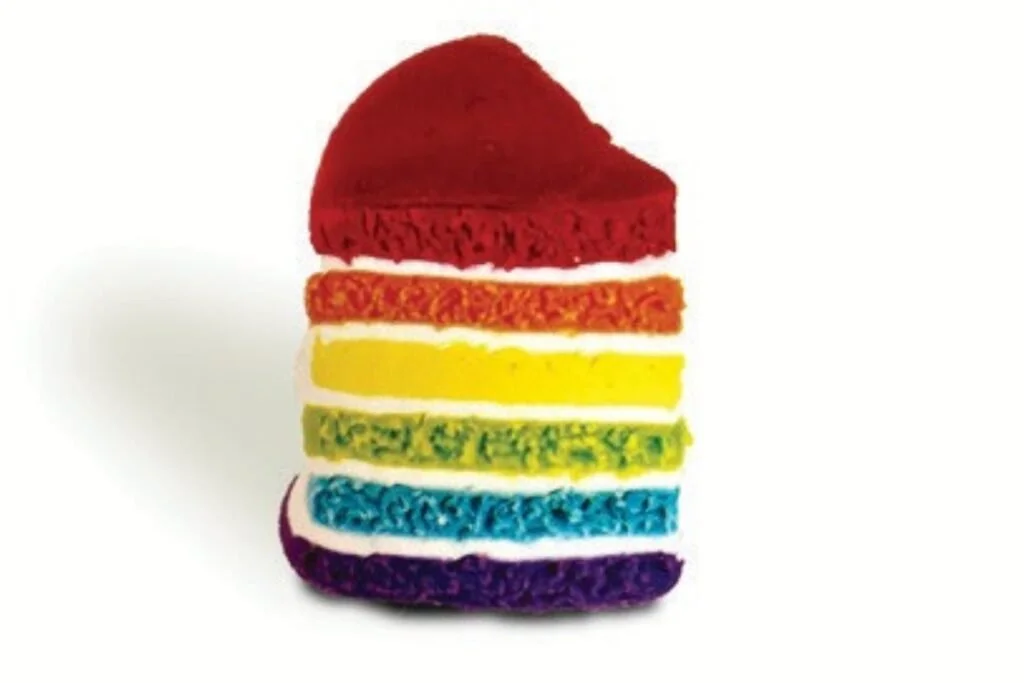
Finished polymer clay rainbow layer cake
How realistic is this rainbow layer cake?! It looks just like the real thing!
Some other types of cakes my students made were carrot cake and confetti cake.

Optional steps
- The fun part about making miniature desserts with polymer clay is the creativity you can use. Here's a few ideas to take your miniature cakes to the next level!
- se excess clay to make a polymer clay cake topper and add it to the top of the cake before baking
- Make the icing look like it's dripping by adding translucent liquid Sculpey. This translucent clay has a thinner consistency.
- Use pink clay to add some realistic butter cream rosettes to the top of the cake.
- Make a red velvet cake using red and white clay as a handmade Valentine's Day gift!
More polymer clay miniature food ideas
Need some inspiration for your miniature polymer clay dessert creations? The possibilities are endless! Start with classic favorites like cupcakes, cookies, and slices of cake.
Experiment with different shapes, sizes, and toppings to make each treat unique. How about trying your hand at crafting miniature donuts, complete with colorful icing and sprinkles?
Or perhaps you'd like to create a tray of delectable macarons in an array of vibrant colors? For those with a sweet tooth, why not sculpt tiny pies, tarts, or even lollipops?
And don't forget about seasonal treats like gingerbread cookies for the holidays or heart-shaped chocolates for Valentine's Day.
Whether you're a beginner or an experienced crafter, polymer clay desserts offer endless possibilities for creativity and fun!
Want to do another delicious looking polymer clay dessert project or need to make more dollhouse foods? Check out this post on how to make an ice cream cone pen using polymer clay!
Frequently Asked Questions (FAQs) about miniature polymer clay cakes
Can I use air dry clay to make miniature layered cakes?
Absolutely, you can give air dry clay a try for your realistic mini food. It's a fun alternative to polymer clay and doesn't require baking. Just keep in mind that air dry clay tends to be a bit more delicate than polymer clay once it dries, so handle your miniature food items with care.
Can I use polymer clay paste to make miniature cakes?
I wouldn't use polymer clay paste to form the cake base for this project. You could polymer clay paste as icing or frosting, or even use it to add some more intricate designs to your full cake.
What's the best way to seal and protect my delicious looking polymer clay cakes?
After baking, you can use a clear sealant or varnish to protect your polymer clay cakes from wear and tear. This step also gives it a lovely glossy finish. Simply follow the instructions on your chosen sealant product for the best results.
Tips & tricks for working with Sculpey polymer clay
You can clean up Sculpey using a baby wipe or any household cleaners.
Sculpey does not dry out.
Store extra clay in aluminum foil or a Ziploc bag. Do not store in an acrylic container.
Want to do more polymer clay projects? You’ll love making clay trinket bowls, coasters, or earrings!
Check out this post for even more polymer clay ideas!