This might sound crazy, but I started needle felting with my students at the age of ten. Typically my classes consist of hard-core crafters and if I think they’re mature enough, I let them needle felt. The felting process is relaxing and deeply therapeutic. There are so many different ways to approach needle felting and I’ve tried them all. For this tutorial, I’ll be sharing my favorite dry felting method and I’ll get to wet felting in a future post.
What materials do I need for needle felting?
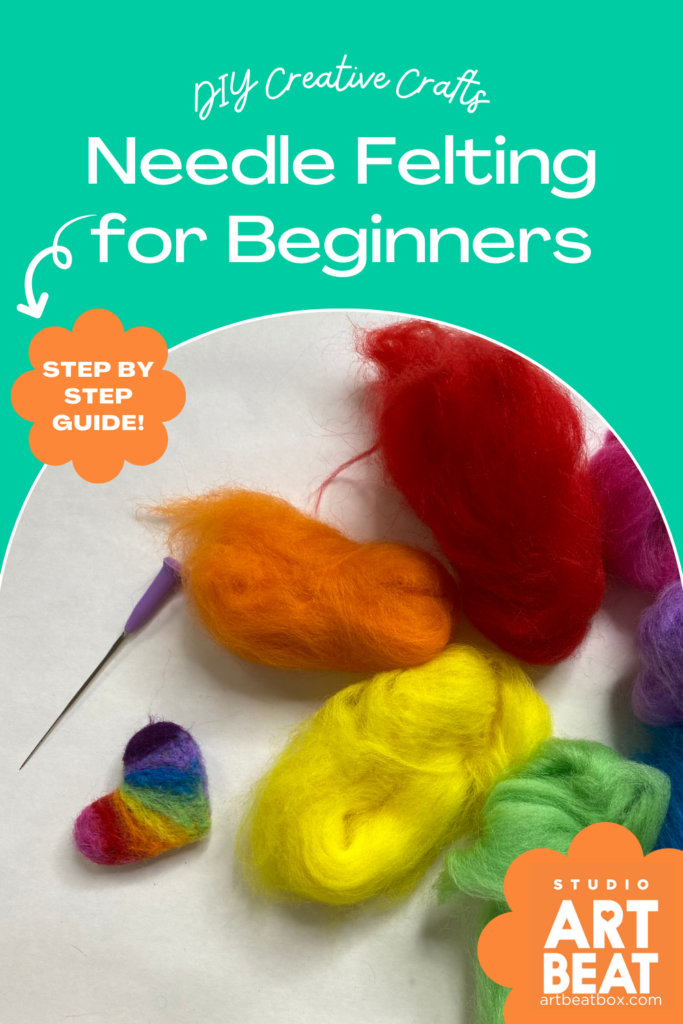
- A sweater (wool or cashmere work best – but cotton seems to work well, too)
- Felting needles (I like to use a single needle plus a multi-needle tool, so this kit has it all). You’ll want to always have extras on hand because they break…often! Only purchase the right gauge needles because these are made specifically for tufts of wool. Do not attempt to use a straight pin or safety pin.
- Crafting foam or felting mat
- Heart cookie cutter (around 3”)
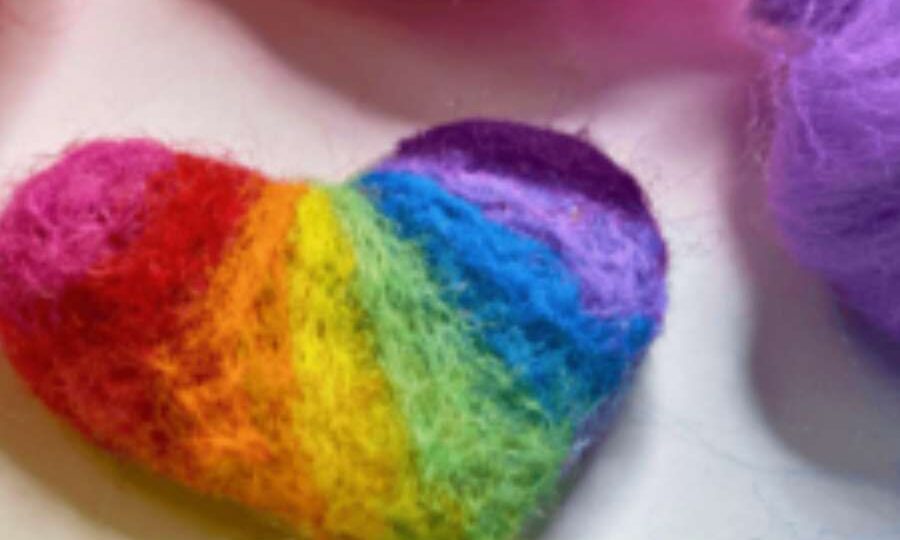
- Red or Pink roving wool or just get the whole rainbow!*
- Iron
- Water
- A variety of needles (coarse needles, fine needles): These are barbed needles specifically designed for felting. They come in a variety of guages depending on the precision you are looking for. You cannot use a sewing needle. It is best to buy the needles in bulk rather than a single needle. They often break and the top tip snaps off. It is good to have backups.
- Cookie cutter (optional if you want defined lines)
- Little balls of coarse wool for roving: Wool roving is unspun, loose wool. Because these fibers are loose, the wool can be sculpted and molded. The higher the quality of the wool, the better the results. Pure wool products are much easier to work with and yield a better result than synthetics.
- Felting mat or foam pad: This protects your work surface and your hands. The pad acts as a cushion and allows the needle to push through the wool without resistance or breakage.
OPTIONAL SUPPLIES
- Finger protectors: These are to protect your fingers from getting stabbed during felting. They come in different thicknesses and are typically made from either leather or rubber or silicone.
- Clover’s needle felting tools with multiple thin needles
This is all you need to get started. With the proper tools and materials, you will be ready to jump into the world of needle felting. Needle felting is a fun and creative craft that allows you to create unique and personalized projects. With a few basic tools and some wool fibers, you can easily learn how to do needle felting and start making your own adorable creations.
How do I choose the right type of wool for needle felting?

Choosing wool for felting is very important because low quality wool yields low quality work products. When it comes to needle felting, choosing the right type of wool is essential for achieving the best results. Be sure when you purchase your felting wool that it is not synthetic. Natural wool works best. Different sheep create different textures of wool (ie Merino, Romney, etc). Play around with different breeds and see what works best for you.
Staple Length: The staple length refers to the length of the individual wool fibers. For needle felting, shorter staple lengths are generally easier to work with as they tangle and compact more efficiently. Look for wool fibers with staple lengths between 2.5 to 4 inches for optimal results.
Fiber Quality: The quality of the wool fibers can significantly impact the outcome of your needle felting project. Look for wool that is clean, free from debris, and has a consistent texture. High-quality wool will felt more easily and create smoother, more defined shapes.
Ultimately, the right type of wool for needle felting depends on the specific project and your personal preferences. It’s always a good idea to experiment with different brands to find what works best for you. Remember to have fun and let your creativity guide you as you embark on your needle felting journey!
What are the basic needle felting techniques?
- Take a chunk of roving wool and pull it apart into thin wispy pieces. Roll or shape the wool into your desired shape. The final shape will be entirely dependent upon how closely you follow the cookie cutter if you’re using one.
- Using your felting needle, begin stabbing the wool into the sweater. Be sure to only work in a vertical motion. If you begin to hold the tip of the needle at an angle, the needle will break – be prepared for breakage as you learn to felt. Watch out for your hands – the needles are sharp and they can really hurt! Pay careful attention here – sometimes when trying to gather stray fibers; you can totally prick yourself!

Continue poking the wool with the needle, focusing on areas that need more felting. You can use different needles with varying gauges to achieve different effects – finer needles for finer details and larger needles for faster felting. Remember to always poke straight down into the wool to avoid breaking the needle.
3. Once all of the wool has been molded together, add more wool. For the middle sections it is easier to use the multi-needle tool. For the areas near the cookie cutter, use the single needle for more precision. Be especially careful around the curved edges of the cookie cutter. As you continue to fill in your space or mend your hole, be sure to cover the edges of the hole as well as the inside. If your felting tool breaks at any point, grab another – this is why I typically buy a large base of all felting needles.
4. Continue adding felt until there are no bald spots. Use the single needle to add precision and to clean up any blurry edges. Once you have clear margins, feel free to remove the cookie cutter and do some patching of any spots that need filling. Repeat with different colors to make a design.
5. As you work, the wool will become more firm and compact. Shape and sculpt the wool as desired, adding more layers of roving if needed.

Is needle felting for beginners?
Starting needle felting as a beginner is an exciting and creative journey. It’s a great craft for beginners because it is easy and fast to learn. This unique craft allows you to sculpt and shape wool fibers into art using special barbed needles. To dive into the world of needle felting, follow the steps above.

Remember, practice makes perfect! As you gain more experience and confidence, you can explore more complex projects, experiment with different fibers, and even create your own designs.
What are some common needle felting projects for beginners?
When starting out with needle felting, there are several common projects that are perfect for beginners to try their hand at. These projects are not only fun and rewarding, but they also provide a great opportunity to practice basic needle felting techniques. Here are a few common needle felting projects for beginners:

- Animals: Creating small animals, such as a dog, turtle, or cat, is a popular choice for beginners. The basic shapes and simple details make these projects achievable and incredibly adorable. Start with a single-colored wool and gradually add layers to shape the body, head, and limbs. Use different felting needles to create specific textures, such as fluffy fur or smooth features.
- Miniature Food: Needle felting can be used to create realistic-looking miniature food items like fruits, cupcakes, or sushi. These projects are not only fun to make but can also be used as charming decorative elements. Begin by forming the desired shape using a core wool, and then add layers of colored wool to create the detailed textures of the food item. Don’t forget to add small details like seeds or frosting.
- Decorative Brooches: Needle felting can be used to make beautiful and unique brooches that can be worn or used as decorative elements on clothing, bags, or hats. Choose a design, such as a flower, leaf, or animal, and use different colors of wool to create the desired shape and texture. Attach a pin back to the finished piece, and it’s ready to wear or showcase.
- Felted Landscape: Another popular project for beginners is creating a felted landscape, such as a simple meadow or forest scene. This project allows for creativity and experimentation with different colors and textures. Start by using a base layer of wool to create the background and then add details like trees, flowers, or animals using various shades and types of wool. This project is a great way to explore different felting techniques and showcase your artistic skills.
- Elbow patches: See this post for my favorite felted elbow patches. The end result? No need to toss those sweaters with holes!
Remember, needle felting is all about practice and experimentation. Feel free to modify and personalize these projects to suit your own style and preferences. With time and practice, you’ll soon be able to create more intricate and advanced needle felting projects. Happy felting!
What are some tips and tricks for needle felting?
- Take a small amount of wool and gently roll it between your palms to form a loose ball or shape. This is your starting point for creating your desired object.
- Hold the loose wool ball or shape in one hand and position the felting needle in the other hand. The felting needle has barbs along its length, which help interlock the wool fibers when it is inserted into the wool.
- Only use thin layers of wool at a time to ensure a smooth finish. In order to sculpt wool, the needle felter needle will create a thick layer over time, but your creation will be a smaller size and more compact. Feel free to keep adding more sheep’s wool as you go.
- Your barbed needle is likely to break during the process. Be sure to have extras and keep them in a special box. They make a cylinder shaped container to be used for needle holders. As always, pay close attention to your work surface when working with needles.
- Keep extra bandaids around with needle felting. As a general rule, if you look away or get distracted, you’re more likely to hurt your fingers.
- To create more intricate details or add additional layers of wool, repeat the process by layering more wool on top of the existing shape and continue poking with the needle.
- Be mindful of the desired shape and use the needle to manipulate the wool accordingly. If you want to create curves or indentations, use the needle to push the fibers in the desired direction.
- Take your time and work slowly, paying attention to the details as you sculpt the wool. Remember that felting is a gradual process, so don’t rush it.
- Once you are satisfied with the shape and firmness of your creation, gently remove any loose fibers by rolling the finished piece in your hands or using a soft brush.
- You can now use your needle felted creation for various crafts, such as embellishing clothing, creating decorative objects, or even making jewelry.
- The most important thing is to have fun!
- There are endless blog posts and needle felting books and even needle felting kits available online. These are great for getting started with your first projects.
- Needles come in a variety of guages and textures: coarse felting needles, special needles, thin needles, thick needles and a regular needle are all things you’ll want to have ready when you get started.
Remember, needle felting requires practice and patience, so don’t be discouraged if your first attempts don’t turn out exactly as planned. With time and experience, you’ll become more adept at shaping and sculpting wool to bring your creative ideas to life. Follow the above steps and you’ll be making little decorations left and right!
What are some advanced needle felting techniques?
Needle felting is a wonderful craft that allows you to create beautiful and intricate designs using just a few basic tools. Once you’ve mastered the basics, you may be interested in exploring some advanced techniques to take your needle felting skills to the next level. Here are a few advanced needle felting techniques that you can try:

- Layering: Layering is a technique that involves adding multiple layers of wool fibers to create depth and dimension in your felting projects. By adding layers of different colors and textures, you can achieve a realistic and three-dimensional effect. Experiment with different colors and thicknesses of wool to create stunning visual effects in your designs.
- Blending: Blending is the process of combining different colors of wool fibers to create unique shades and gradients. This technique allows you to add depth and complexity to your needle felted creations. You can blend different colors together by mixing the fibers before felting or by layering different colors on top of each other and felting them together.
- Sculpting: Sculpting is a technique that involves shaping and forming wool fibers into three-dimensional objects. This technique is great for creating intricate details, such as animal faces, flowers, or miniature objects. Use your felting needle to carefully shape the fibers and bring your creations to life.
- Embellishments: Adding embellishments to your needle felting projects can take them to a whole new level. Consider incorporating beads, sequins, embroidery threads, or other decorative elements to enhance the visual appeal of your designs. Just make sure to securely attach them to your felted piece using a felting needle.
- Surface Detailing: Surface detailing involves adding fine details and textures to your needle felting projects. You can achieve this by using different felting needles, such as ones with barbed or twisted tips, to create specific textures and patterns on the surface of your felted piece. This technique is great for adding fur, feathers, or intricate patterns to your designs.
Remember, advanced needle felting techniques require practice and patience. Take your time to master each technique and don’t be afraid to experiment and let your creativity shine. With dedication and practice, you’ll be able to create stunning needle-felted creations that showcase your expertise and artistic flair. Happy felting!
How do I add details and texture to my needle felting projects?
Adding details and texture to your needle felting projects is a great way to bring them to life. Here are a few techniques you can try:
- Layering: To add depth and dimension to your needle felting, consider layering different colors of wool. Start with a base layer and then add finer details on top. This will create a more realistic and textured appearance.
- Needle Felting Tools: Using different types of needles can help you achieve a variety of effects. Fine gauge needles are great for adding intricate details, while coarse needles can create texture. Experiment with different needle sizes to find the one that works best for your project.
- Adding Embellishments: Incorporating other materials can enhance the texture of your needle felting projects. For example, you can stitch on beads, sequins, or fabric scraps to create interesting surface textures. Just make sure to secure them properly with additional needle felting. Last year I added star shapes all over my sweater. You can also make your needle felting shapes into an elbow patch. Easy and functional!
- Wire Armatures: For sculptures or three-dimensional objects, wire armatures can provide structure and allow you to shape and pose your felting more easily. Wrap the wire with wool before felting to ensure it bonds securely.
- Texture Techniques: You can create different textures by varying the density and length of the wool fibers. For a smooth texture, use shorter fibers and densely felt them. To achieve a fluffy texture, leave the fibers longer and lightly needle felt. Mixing different types of fibers, such as mohair or silk, can also add interesting textures.
- Fine Detailing: To add fine details like facial features or intricate patterns, you can use a single felting needle or even a set of special fine needles. Take your time and work slowly, making small, controlled movements to ensure precision.
Remember, practice makes perfect when it comes to needle felting. Experiment with these techniques and don’t be afraid to push your creative boundaries. Happy felting!
What are some tips for needle felting with multiple colors?
When needle felting with multiple colors, here are some useful tips to achieve beautiful and vibrant designs:
- Prepare your materials: Gather your colored wool roving or batting in the desired hues. Make sure to have a foam pad or felting surface to work on, as well as felting needles of different sizes.
- Plan your design: Before diving in, it’s helpful to sketch or visualize your design. Consider how the colors will interact and where they will be placed in your project.
- Layer the colors: Start by layering small amounts of the base color onto your felting surface, shaping it into the desired form. Use your felting needle to gently poke and secure the fibers into place.
- Add accent colors: Once your base layer is secure, it’s time to introduce the accent colors. Pull small bits of the desired color and place them strategically on top of the base layer. Use your felting needle to gently poke and blend the colors together.
- Blending colors: To create smooth color transitions, use a technique called “spot felting.” Position small pieces of the accent color next to the base color and gently stab the fibers with your needle. This helps the two colors blend seamlessly together.
- Create texture: Experiment with different needle felting techniques to add texture and depth to your design. For example, you can create a fluffy effect by loosely felting the fibers or create a raised texture by felting the fibers more densely.
- Secure the fibers: As you work with multiple colors, periodically check the backside of your project to ensure the fibers are fully felted together. This will prevent any loose or uneven areas.
- Take breaks: Needle felting can be a time-consuming process, so remember to take breaks to rest your hands and eyes. It’s important to maintain focus and precision when working with multiple colors.
By following these tips, you’ll be able to needle felt with multiple colors and create stunning creations full of vibrant hues and intricate designs. Enjoy the process and let your creativity shine!
How do I finish and display my needle felting creations?
Finishing and displaying your needle felting creations is an exciting part of the process. Once you have meticulously crafted your creation, it’s time to give it the attention it deserves. Here are some easy steps to help you finish and display your needle felted masterpiece:

- Finishing Touches: Start by carefully inspecting your creation for any loose fibers or rough edges. Gently trim any excess fibers with a pair of small scissors to give your piece a polished look. Be mindful not to cut too close to the felted surface, as you want to preserve the overall shape and structure. For flat creation, I like to mist some water and then iron my patches to make them flat and more compact. This is optional and be careful when using fabrics such as merino wool or other highly delicate materials.
- Blocking: If your creation needs reshaping or straightening, blocking is the way to go. Take a clean towel or foam pad and place it on a flat surface. Gently position your needle felted piece on top of it, shaping it as desired. Use your fingers to gently manipulate the fibers into the desired shape. Allow it to air dry completely before moving on to the next step.
- Mounting: Now it’s time to choose how you want to display your needle felted creation. There are several options based on personal preference and the nature of your piece:
- Lighting and Background: Consider the lighting and background for your display. Place your needle felted creation in a well-lit area, either with natural light or appropriate artificial lighting to showcase its intricate details.

