
Realistic Polymer Clay Miniature Apples Tutorial
Realistic Polymer Clay Miniature Apples Tutorial
Did you know there's a whole world of polymer clay miniature food items out there? My students love making delicious looking polymer clay fruits, vegetables, and even desserts! Like the novelty of tiny toys, there's just something fun about miniature food. We make them for enjoyment in my art class, but these could totally be used as a dollhouse miniature item. They would be perfect for doll food in a dollhouse kitchen
In this blog post, I'm sharing how to make realistic tiny miniature garden apples using polymer clay.
What's the best clay to use for polymer clay miniature food items?
My absolute favorite clay to use for polymer clay miniature food items is Sculpey polymer clay. Sculpey clay is a breeze to work with. It's super pliable, so you can shape it just right, and it bakes up strong, ensuring your realistic mini food will last through countless hours of use. Plus, the range of colors means you can easily adapt this tutorial to fit any mini fruits or any miniature vegetable.
What you'll need to make a polymer clay miniature apple
Affiliate disclaimer: Although I stand by all of the products I use, I can receive a small commission from any products purchased via my affiliate links.
White polymer clay (I prefer Sculpey)
Clay tool or toothpicks
Clay slicer
Clay tile work surface
Chalk pastels (Red, yellow, green, and brown)
Paint brush
Aluminum foil or wax paper
Oven thermometer (optional, but getting the temp right is super important)
*I love ordering craft supplies on Amazon because there are tons of selection results, free shipping (typically ships within a few business days) and it’s never final sale so if you change your mind, you can send the supplies back. Check out my favorite items on my Amazon storefront. You’ll find a full page of all of my favorite things!
How to make tiny miniature garden apples
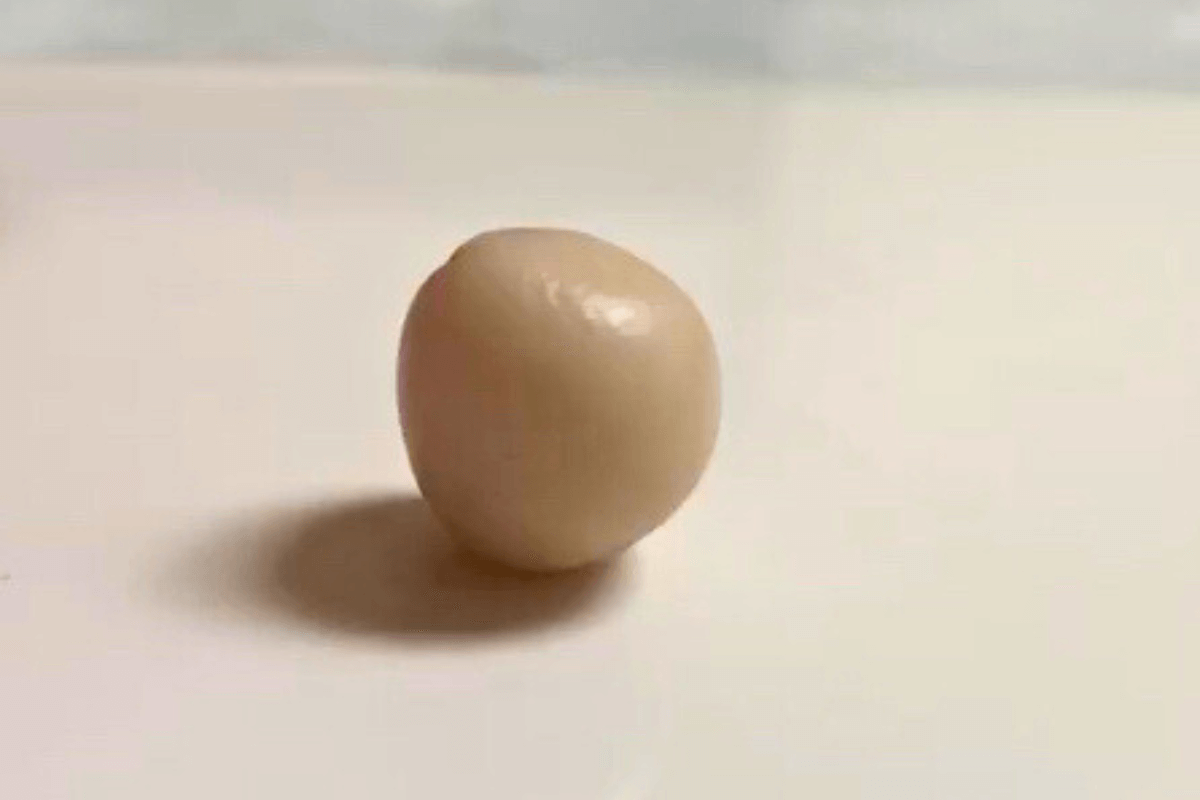
1. Take your white or cream colored clay and roll into one blueberry sized ball.
2. Using one of your dotting tools or a toothpick, make an indentation at the top of the apple.

3. Gently pinch the top so that the shape is not perfectly round.
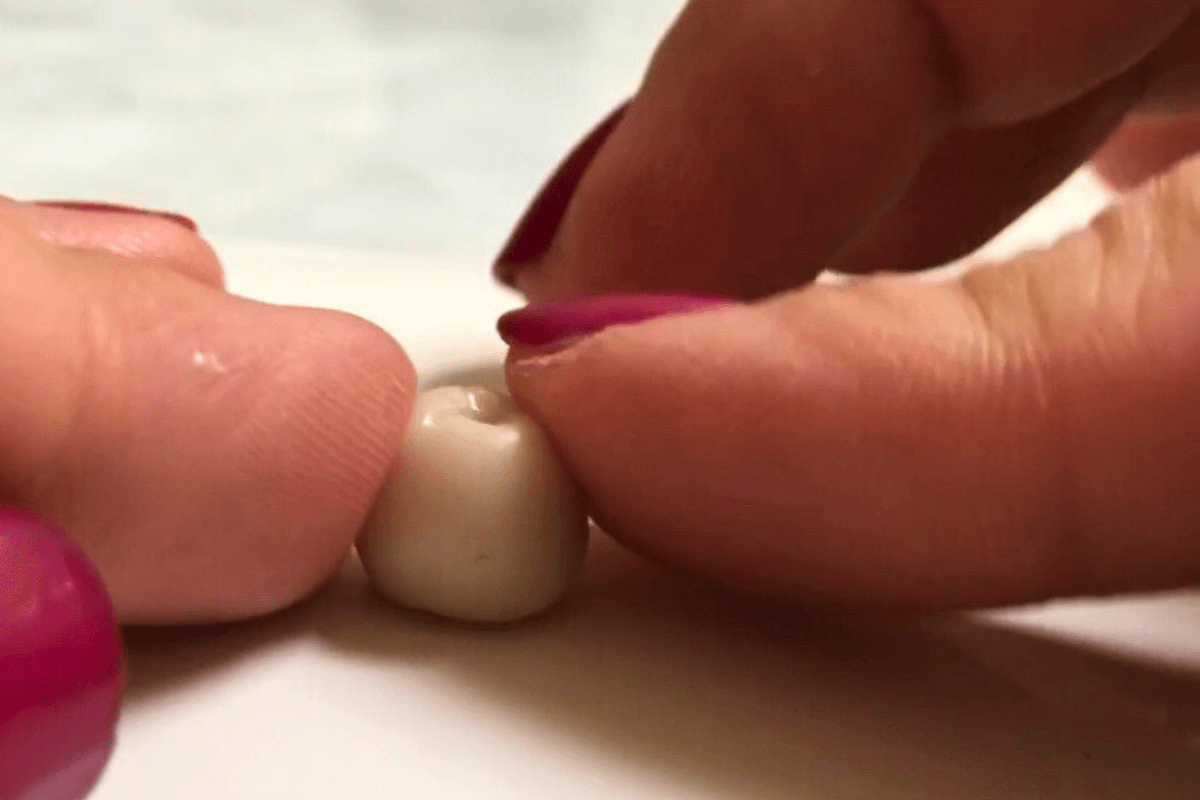
4. Using your dotted tool or a toothpick, add a few dimples to make the apple look less perfect.

5. Using your clay slicer, gently shave a pinch of chalk dust from the side of the yellow chalk pastel.

6. Do the same with the red, green, and brown (apples have more than just red on them).
7. Using your paint brush, add the chalk dust until you are happy with how your apples look.

You can mix and layer colors to get a realistic apple color. You can even make different types of apples like red delicious, granny smith, or golden crisp.
10. Line a baking sheet with aluminum foil or parchment paper. Place the apples onto the baking sheet.
9. For the best baking results, bake at 225 degrees for 30-40 minutes and let cool completely.
**Baking times vary per oven, but be sure not to raise the temperature - burnt clay has an awful smell! Use an oven thermometer to be sure the temp is right.**

How realistic are these tiny apples?! They look like you could just cut right into them to make some tiny apple slices for a doll house. You could even make them their own special fruit bowl out of clay. Don't just stop at apples - polymer clay can be used to make all sorts of realistic mini food. Try out your favorite mini fruits or even a miniature vegetable.
FAQs about tiny miniature garden apples
Can I use air dry clay to make miniature garden apples?
Absolutely, you can give air dry clay a try for your realistic mini food. It's a fun alternative to polymer clay and doesn't require baking. Just keep in mind that air dry clay tends to be a bit more delicate than polymer clay once it dries, so handle your miniature food items with care.
Can I use polymer clay paste to make
I don't recommend using polymer clay paste for this project. You can't shape liquid Sculpey into a firm, solid shape like you can with regular Sculpey. Polymer clay paste is better suited for adhering clay pieces to glass, metal, or wood.
What's the best way to seal and protect my delicious looking polymer clay apples?
After baking, you can use a clear sealant or varnish to protect your clay mini fruits from wear and tear. This step also gives it a lovely glossy finish. Simply follow the instructions on your chosen sealant product for the best results.
Tips & tricks for working with Sculpey polymer clay
You can clean up sculpey using a baby wipe or any household cleaners.
Sculpey does not dry out.
Store extra clay in aluminum foil or a Ziploc bag. Do not store in an acrylic container.
Want to do another delicious looking polymer clay food project or need to make more dollhouse foods? Check out this post on a mini layer cake!