
Octopus Yarn Craft – How to Make a DIY Doll for Kids

Octopus Yarn Craft – How to Make a DIY Doll for Kids
Lately I’ve been thinking about how important it is to get kids away from their screens and into something creative. A great way to do this is to have them make handmade toys using pieces of yarn.
This octopus craft is a hit every single time — and for good reason…it is easy to make, doesn’t involve a single crochet hook or pattern.
If you’ve ever looked at crochet octopus patterns, you will know that they’re not easy for kids. That’s why when I saw this little guy at my friend’s house, I immediately took notice. I asked her about it and she said…I made this as a kid with just some fabric glue, googly eyes and yarn. This DIY yarn octopus is sure to wow!
Yarn octopus or octopi? I am not sure, but all I know is that I have been teaching these for a few years now and they’re always a hit. Plus they take around 2-3 hours so it is a great project to do over time or in one long sitting.
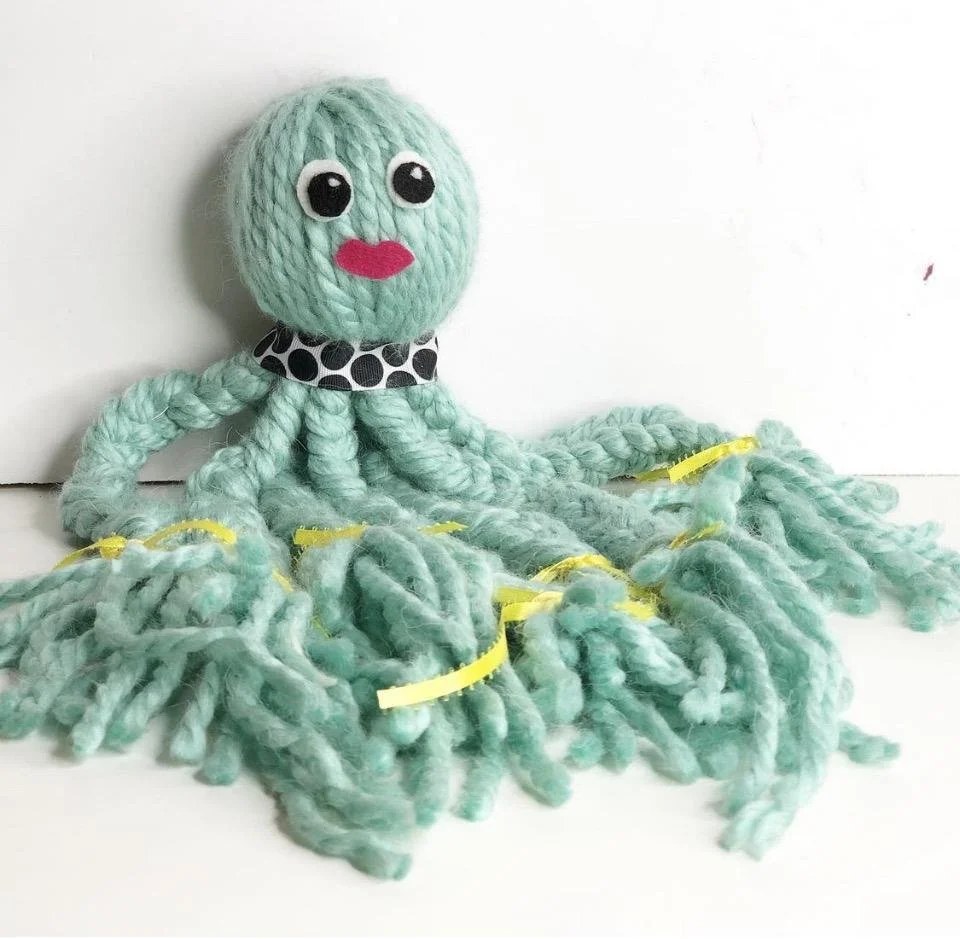
Finished yarn octopus
Yarn Octopus Craft
Subscribe to Art Beat Box!
Get DIYs, crafts, and more from Art Beat Box straight to your inbox.
SUBSCRIBE
I consent to receiving emails and personalized ads.
Here’s what you’ll need to make a giant octopus ocean creature
Affiliate disclaimer: Full disclosure: Although I stand by all of the products I use, I can receive a small commission from any products purchased via my affiliate links.
YARN (you want to stick with soft yarn but not bulky blanket yarn – too hard to work with)
TENNIS BALL or STYROFOAM BALL
EMBELLISHMENTS (GOOGLY EYES, YARN, FELT, TRIM, RIBBON)
CRAFT GLUE (Fabri-tac works great)
SCISSORS
PIECE OF CARDBOARD OR FOAM CORE
Check out my full tutorial on how to make a yarn octopus here.
Step by step instructions for making this ocean animal
Grab a skein of yarn or a ball of yarn at your local craft supplies store. Make sure it is your favorite color of yarn because you’ll be working with the strands of yarn for a while! Choose soft yarns if you think you’ll want to use it as a toy.
You’ll need several lengths of string, so be sure you have enough. You’ll want to wrap the yarn around 100 times around the piece of foam core. This will be enough yarn for both the octopus’ head and the 8 tentacles.
Wrapping it around the cardboard or foam core insures that you have equal lengths of yarn. Some people use the back of a chair, but I prefer using the foam core. The continuous rounds of yarn will end up being the best toy!

WRAP YARN AROUND A LARGE PIECE OF CARDBOARD AROUND 100 TIMES
2. Tie a secure knot on one side of the foam core. This step is very important – it almost creates a magic ring of yarn and insures that the yarn stays together.
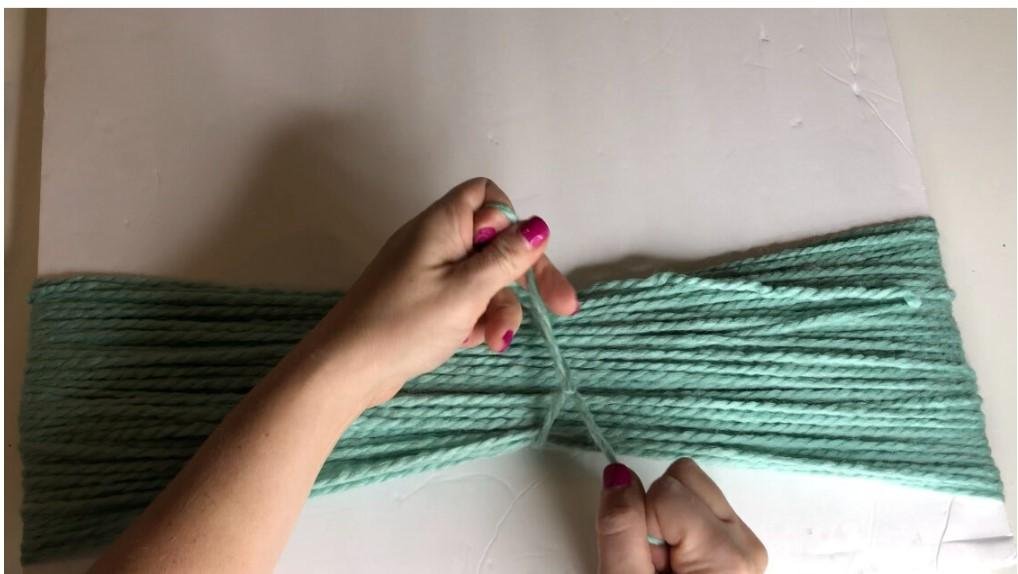
TIE A KNOT
3. Once you’ve wrapped the yarn around 100 times, carefully remove the yarn from the foam core.
CAREFULLY REMOVE FROM CARDBOARD
4. Once your knot is secure, you can cut the bottom of the yarn. The best way to do this is to pull the yarn tight to get an even cut.

CUT OPPOSITE END OF KNOT
5. Drape the yarn onto a table and make sure your tied piece of yarn is at the very top of the table.
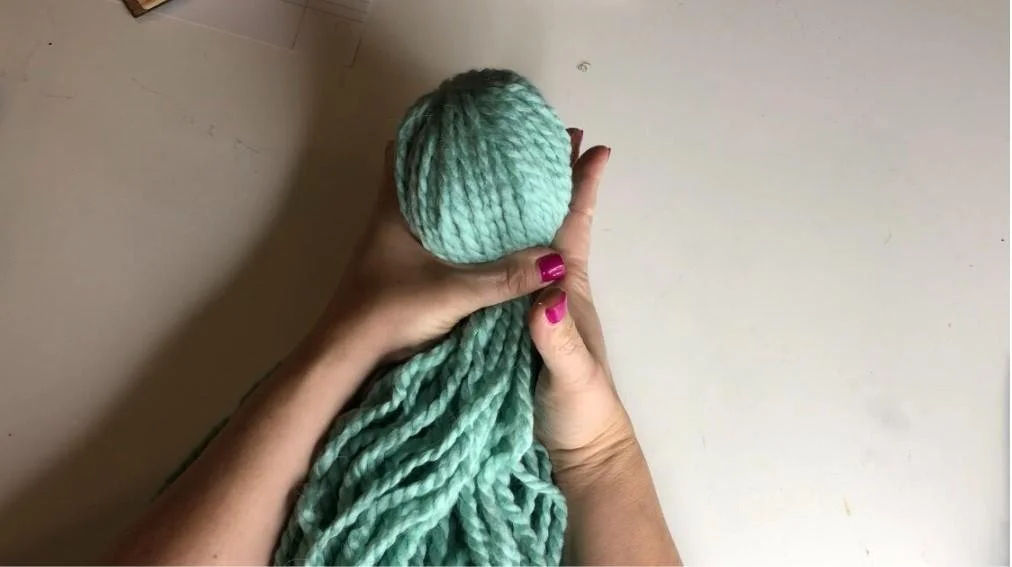
6. Insert either a Styrofoam ball or a tennis ball directly under the knot.

PUT TENNIS BALL BETWEEN THE YARN NEAR THE KNOT
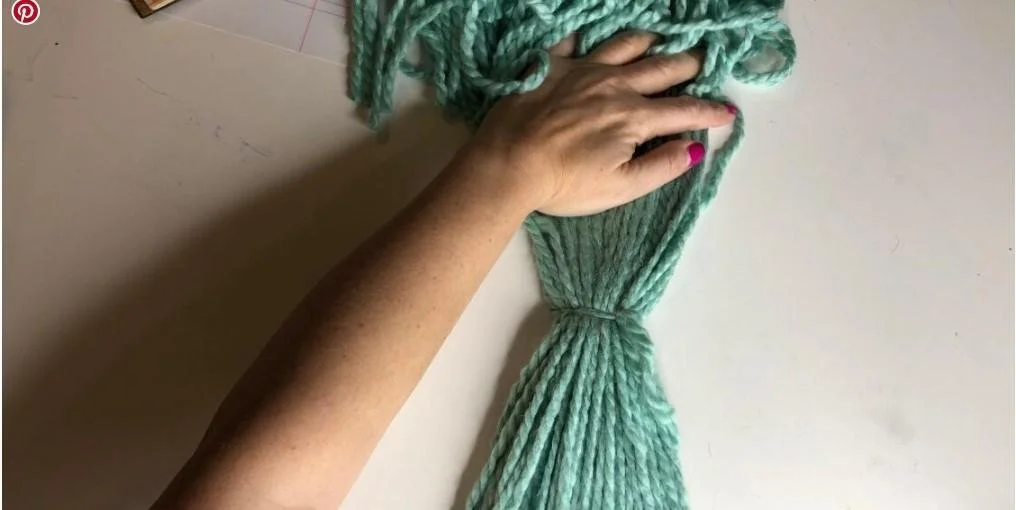
7. Use your hands to drape the yarn until it has totally covered the ball. Cinch the yarn directly underneath the ball and tie a length of yarn (about 12″ piece) where you have cinched the yarn.
Make sure to do a double knot or it might even be a great idea to do a triple knot! A great alternative is to secure the head using a rubber band. This is how I have the kids in my classes do this step.
TIE A RUBBER BAND OR TIE A DOUBLE KNOT
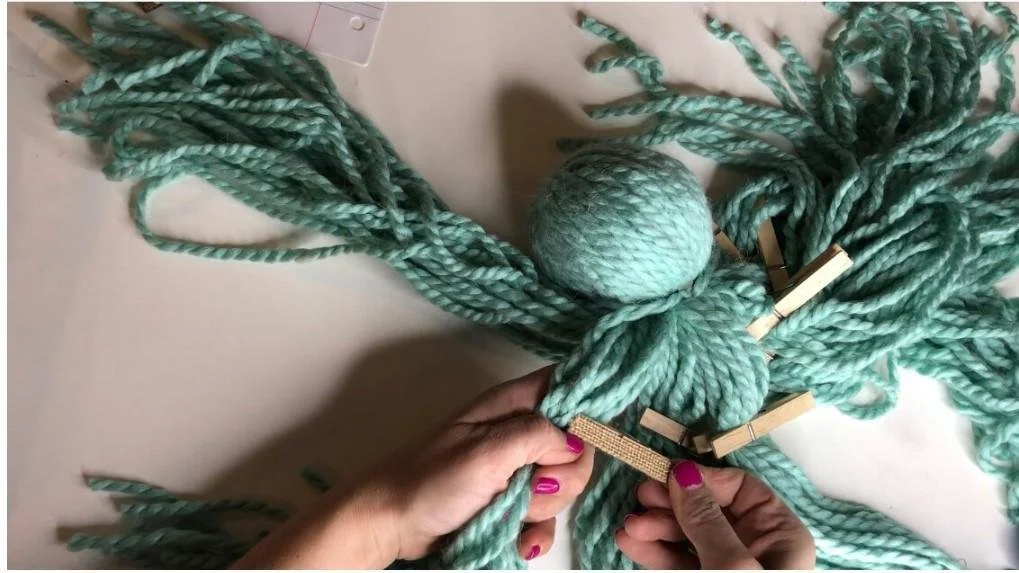
8. Divide the yarn into 8 equal parts. I prefer to eyeball this. You can count them out but I think it is too time consuming to take the extra step. Just estimate.
DIVIDE YARN INTO 8 EQUAL SECTIONS. EITHER USE A RUBBER BAND OR A CLOTHESPIN TO SEPARATE
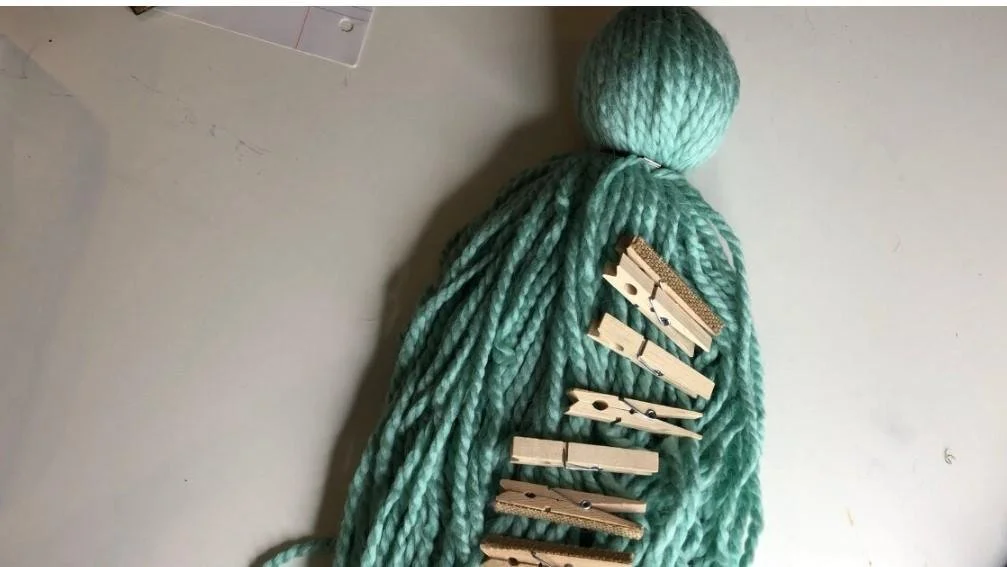
9, Secure each of the divided yarn pieces using clothespins. Personally I think this is the easiest way to keep everything organized.
10. Begin braiding each segment. This step definitely takes time! Since this is a kids craft, I like to have alternative techniques to make this with young children.
Alternatively, you can use lots of rubber bands evenly spaced instead of braiding. The braided yarn definitely looks best, but not ever child knows how to braid and I do like easy crafts to lower the frustration in the class.
If you’re doing this with just one kid, you can probably help them with this step!
ONE AT A TIME, REMOVE CLOTHESPINS AND BRAID
11. Once all eight tentacles are braided, it’s time for the best part! Use wiggly eyes, small amount of scrap yarns and/or felt to embellish this octopus! I had one child in my class make her octopus look like a hippy from the 1960’s. Kids are SO creative!
Add glasses and create a clever octopus. Add a baseball hat to the top of the head and call it a sporty octopus. Use some black yarn and make a smile! The world is your oyster! You can use craft glue to adhere any of your embellishments.
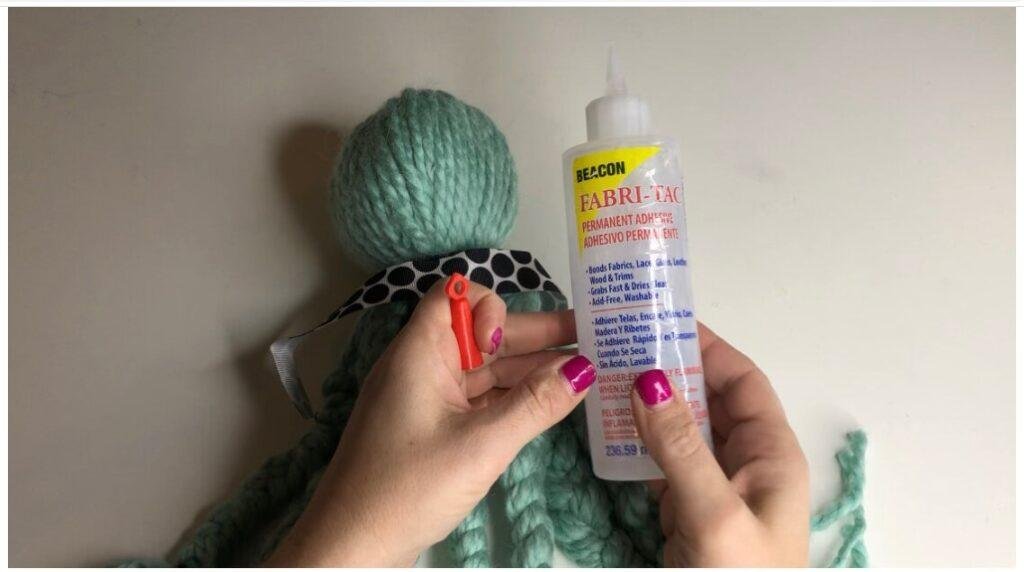
USE GLUE AND ADD DECORATIONS AND EMBELLISHMENT.
More Octopus Ideas
Once your yarn octopus is complete, have fun experimenting with other fun yarn crafts. If you love this tutorial, you will likely want to try out my pom pom tutorial.
Perhaps you can combine the two and make your own pompoms to add to the bottom of the tentacles. The reason this is such a great project is because the possibilities are absolutely endless!
You can also take the leftover yarn (if you still have any) and make a tiny scrap yarn octopus. You can use a ping pong ball or a smaller sphere.
These make great handheld toys although I would definitely not leave them with infants or premature babies. Either way, using the leftover yarn scraps will prevent waste and increase creativity!
Another reason I love this project so much is because it doesn’t use too much yarn, you don’t need stitch markers or free crochet pattern to get started. However, if you happen to love to crochet or knit, you can make some simple stitches using a tapestry needle to create facial details. I haven’t personally done this, but I also don’t love sewing!
Recently, I posted this in a Facebook group for art teachers and one teacher decided to make something similar and seasonal — she made yarn ghosts and just skipped the braiding step. How clever!
Another great idea is the add a large loop of yarn and tie it to the top of the octopus – this way you can easily hang your new toy! Once she mentioned the ghost project, I knew this could be a perfect Halloween craft, too – I can totally see myself making mini ones and creating some kind of a ghost garland.
My brain is flooded with wayyyyy too many ideas! Can anyone relate?!
I know you are always looking for an excellent scrap yarn project and this one takes the cake. You can totally use scrap yarn and make a multi colored octopus. Although I haven’t tried this, I probably will next time I am faced with a stockpile of yarn!
Looking for more fun summer crafts? Check out these funny painted rocks!