
DIY Colorful Polymer Clay Bead Ideas to Make at Home

I'm always on the hunt for fun crafts that are fun, practical, and make thoughtful gifts. Handmade polymer clay beaded keychains are the perfect craft for teens just learning to drive, tweens getting their first house key, or anyone that prefers colorful clay over generic plastic beads. Another perfect place for tweens to use these are on their school backpack. Lately, I've seen everyone with a polymer clay heishi beaded keychain. I love to give trends their own twist, so I decided to make larger beads instead.
In this blog post, I'm sharing three methods to make this easy clay craft.
What's the best clay to use for DIY a polymer clay keychain?
My absolute favorite clay to use for DIY polymer clay beaded keychains is Sculpey polymer clay. Sculpey clay is a breeze to work with. It's super pliable, so you can shape it just right, and it bakes up strong, ensuring your keychains will last through countless uses. Plus, because it comes in various colors, you can easily adapt your DIY keychain to any style.
I have an entire beginner’s guide on how to use Sculpey! It's a great tool for crafters of all skill levels. Check it out here.
What you'll need to make DIY a beaded polymer clay keychain
Affiliate disclaimer: Although I stand by all of the products I use, I can receive a small commission from any products purchased via my affiliate links.
White polymer clay (I prefer Sculpey)
Different colors of polymer clay (I'm using purple, orange, blue, yellow, and red)
Skewer
Keychain ring or jump ring
Clay Slicer
Elastic
Oven
Aluminum foil or parchment paper
Oven thermometer (optional, but getting the temp right is super important)
*I love ordering craft supplies on Amazon because there are tons of selection results, free shipping (typically ships within a few business days) and it’s never final sale so if you change your mind, you can send the supplies back. Check out my favorite items on my Amazon storefront. You’ll find a full page of all of my favorite things!
Step-by-step tutorial for how to make these simple polymer clay projects
1. Pick your colors
Each colorful beaded keychain will have about 6-7 beads. Start by selecting the clay colors you wish to use for your keychain. Take a 1⁄4 of each colored clay and set the rest aside.

Choose the colors for your keychain
2. Start with the white clay
Take the white clay and make seven balls about the size of a blueberry. The white clay ball will be used as the foundation color of the bead and you will create a variety of designs in the next step that you can apply to the white clay balls, which will become your beads for your keychain.

Roll the white clay into small balls and set aside
3. Design your beads
Begin designing your own beads for your keychain using a few different polymer clay techniques. (See below)
The Spiral
Take at least 3 colors and roll each color into one blueberry sized ball
Using your thumb, press each clay ball until it is the thickness of a quarter
Layer one piece of clay on top of another

Stack the pieces of clay on top of each other
Gently push down using the palm of your hand
Using your hands, roll the clay like a jelly roll
Using the blue plastic clay slicer, very thinly slice the clay jelly roll and apply the slices onto a white ball by lightly pressing

Cut pieces from the roll and apply to the bead
Gently roll the clay ball until the design is smooth and the bead is round

Gently roll the clay until the design is smooth
Carefully use a skewer to make a bead hole through the middle
The Bullseye
Take at least 3 colors and make the first one the size and shape of a tic-tac
Make the second color the shape of a tic-tac but slightly larger than the first color
Make the third clay color an even larger tic-tac and make sure it is the same tic-tac shape
Using your pencil, roll each clay ball until it is the thickness of a quarter
Select one of the flattened clay colors and place the smallest size tic-tac on top. Place it at the very end of the flattened clay and roll it up in the clay to form a cane

Place the smallest size tic-tac on one flattened color. Roll it up
Take the cane and place it on the end of the third flattened clay color and roll it up

Take the cane you just created and roll it up in the third color
Take your completed cane and use your hands to roll it to the thickness of a pencil
Use the blue plastic clay slicer and make small very thin slices from the cane and apply the slices onto a white ball by lightly pressing
Cut thin slices from the cane and lightly press onto the white ball
Gently roll the clay until the design is smooth and the bead is round

Gently roll the ball until smooth
Carefully use a skewer to make a bead hole through the middle
The Marbled Bead
Use any scraps of clay and push them together with the white clay
Begin twisting the clay until the marbling design forms

Twist colors together to form a marble design
Roll clay into a ball
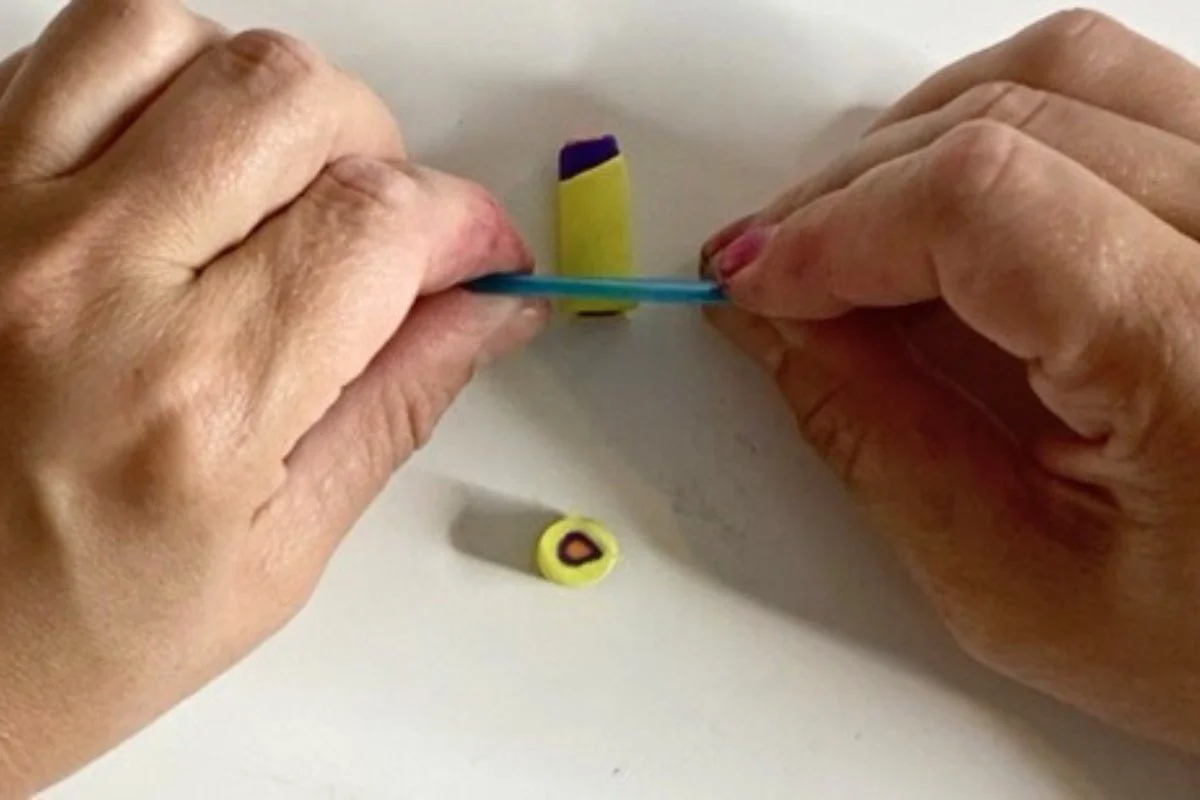
Carefully make a hole using the skewer
4. Bake the beads
For the best end result, bake at 225 degrees for 30-40 minutes. Be sure not to raise the temperature - burnt clay has an awful smell! Using an oven thermometer is a great way to be sure the temp is right.

Use a skewer to make a bead hole before baking
5. Create the key ring
Using the elastic, tie one end to the key ring. String the beads onto the elastic. Tie the opposite end of the elastic onto the key ring.

Finished beaded polymer clay keychain
Enjoy your custom polymer clay keychain—it makes a great gift!
FAQs about polymer clay ideas
Can I use air dry clay for this fun project?
Absolutely, you can give air dry clay a try for your beaded keychain project instead of using an oven-bake clay like Sculpey. It's a fun alternative to polymer clay and doesn't require baking. Just keep in mind that air dry clay tends to be a bit more delicate than polymer clay once it dries, so handle your keychains with care.
Can I make clay charms for this polymer clay craft?
Yes! Sculpey clay is super versatile. Once you've created your clay keychain you can use the scraps to create clay charms. Get creative and see what kind of clever design you can make. You may need something like an iron ring to attach the clay charms.
What's the best way to seal and protect these polymer clay beads?
After baking, you can use a clear sealant or varnish to protect your keychain from wear and tear. This step also gives your beads a lovely glossy finish. If you use all white beads, it might even give it a faux pearl effect. Simply follow the instructions on your chosen sealant product for the best results.
Tips & tricks for working with Sculpey polymer clay for your next project
Don't throw away extra clay! Use it to make extra beads or try a different method.
You can clean up Sculpey using a baby wipe or any household
cleaners.Sculpey does not dry out.
Store extra clay in aluminum foil or a Ziploc bag. Do not store in an
acrylic container.