
Easy Ikonart Stencil Project - Art Lover Custom Tote Bag

Easy Ikonart Stencil Project - Art Lover Custom Tote Bag
If you love screen printing but hate to mess with all of the chemicals to make your own stencils, this easy Ikonart stencil project is for you!
The Ikonart custom stencil kit has revolutionized screen printing by allowing you to make custom stencils without the hassle of the traditional method. Using the included stencil films, exposure light, and a custom printed design, you can make reusable stencils in just a few minutes.
This revolutionary kit makes DIY screen printing shirts, tea towels, wood signs, home decor, holiday decor, pillow covers, tote bags, and other project ideas easier than ever before. In today's post, we're sharing how to make a custom "Art Lover" tote bag using Ikonart stencils.
What is the Ikonart Stencil Kit?
The Ikonart Custom Stencil Kit is a system that allows you to make reusable silkscreen stencils with custom designs.
The kit typically features a light exposure stand, stencil films, and a special printer film that you can use to print your designs before exposing them to light to develop the stencil.
When you combine printed designs with the silkscreen stencil film and exposure light, you can make custom stencils to use for screen printing various flat surfaces such as fabric, wood, metal, and glass.
I've been making screen printed craft projects for years, and the Ikonart custom stencil maker is hands down the easiest way to create reusable stencils at home! This revolutionary kit is the perfect choice for beginners just getting started with screen printing to seasoned crafters that want to make intricate designs.
How do you use the Ikonart Stencil Kit?
If this is your first time using the revolutionary Ikonart custom stencil making kit, you'll want to check out my beginners' guide on how to set up and use an Ikonart kit. You'll learn all about the Ikonart stencil glaze, printer settings, and exposure times needed to make a good stencil.
You can also join an Ikonart Crafters Facebook group or visit their YouTube channel to get help with printer setting recommendations and watch demo videos.
One important thing to note is that the kit comes with purple stencils and blue stencils for different purposes. We're using the new purple film in this tutorial.
What's the difference between the new purple stencil film and blue stencil film?
The Ikonart Custom Stencil Making Kit recently introduced a new purple stencil film, which differs from the original blue stencil film in several key aspects.
The purple stencil film, often referred to as the Ikonart Textile Film, is designed specifically for use on textiles. It features a more aggressive adhesive, which is excellent for creating stickier stencils that adhere better to fabric surfaces. This allows for finer details in designs and reduces the likelihood of paint bleeding under the stencil, making it ideal for projects involving intricate patterns and textile add-on bundles.
On the other hand, the original Ikonart Stencil Film, typically blue, is more versatile and can be used on a variety of surfaces, not just textiles. It does not have as aggressive an adhesive as the purple film, making it better suited for general crafts or less detailed images.
What you'll need to make an "Art Lover" tote bag using Ikonart stencils
Affiliate disclaimer: Although I stand by all of the products I use, I can receive a small commission from any products purchased via my affiliate links.
- Purple "Art Lover" Screen Stencil (Click here to learn how to make a stencil)
- Squeegee
- Different Colors of Acrylic Paints
- Sticky Mat
- Tote Bag
- Popsicle Sticks
- Paper Towels or Wipes
- Table Covering
- Sink/Water
Not sure which paint to use? Check out this post on the best acrylic paints for artists!
I love ordering supplies on Amazon because there are tons of selection results, free shipping (typically ships within a few business days) and it’s never final sale, so if you change your mind, you can send the supplies back.
Check out my favorite items on my Amazon storefront. You’ll find a full page of all of my favorite things!
How to make an "Art Lover" tote bag using Ikonart stencils
1. Take your sticky mat and remove the clear film. Place the sticky mat inside your tote bag.

Place the sticky mat inside your tote bag to keep it still
2. Using your hands, smooth out your tote bag. Be sure the fabric is very smooth and pulled tightly before adding your screen stencil.
3. Remove the clear backing from your purple screen stencil. Be sure to put the clear backing in a safe spot if you want to use the stencil again.
4. Place the screen stencil onto the tote bag. Use your hands to push the stencil down. Make sure that it lays completely flat.
5. Shake your paint for 30 seconds. Using a popsicle stick, add paint above and below the words. If you would like an ombre look, you can add more than one paint color (as pictured).
Do not exceed more than three colors.
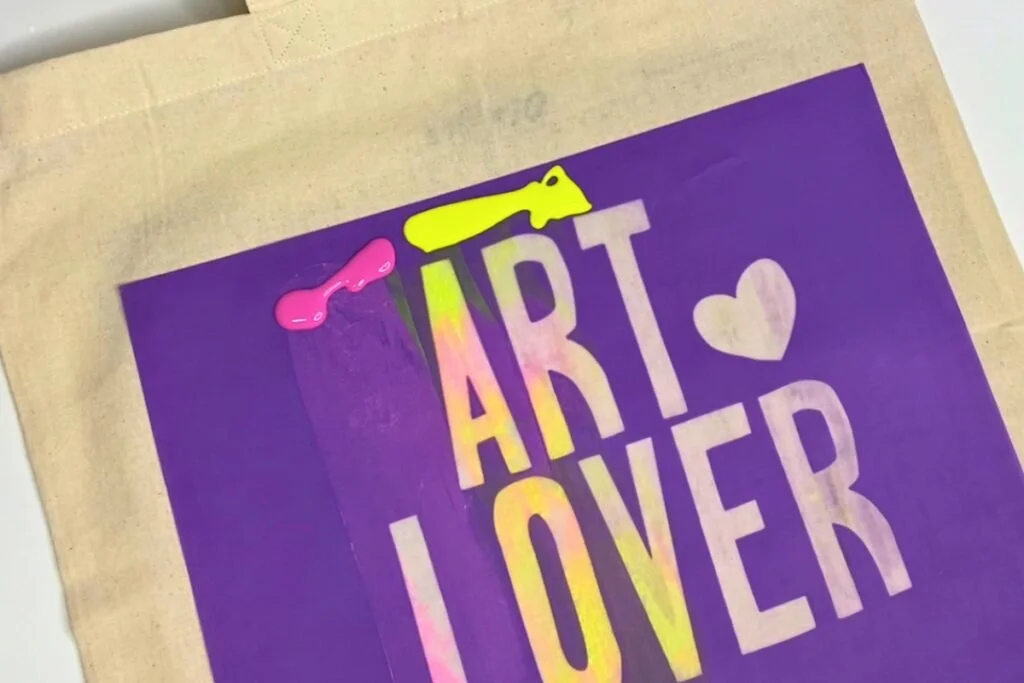
Add paint above the words
6. Using your squeegee, apply pressure and drag the paint straight down and up.

Drag the paint straight down with the squeegee
7. Wipe off your squeegee using a wipe or paper towel (if you are only using one color, you can put the paint back inside the paint jar using a popsicle stick).
8. If you are doing an ombre effect, move on to your next color with your freshly cleaned squeegee. Repeat this process until you have dragged the paint across all of the words.

Clean your squeegee in between paint colors for an ombre effect
9. Use the “peel and peek” technique by lifting a corner of your screen stencil. If there is enough paint and you are happy with how your tote bag looks, you can remove the stencil.
If you think it might need more paint, add more and repeat the screen printing process. Be gentle and try not to move your stencil around too much while checking on your design.

Carefully peek at your design to see if it’s finished
10. Once you are happy with your tote bag and the stencil is removed, please wash your stencil immediately using warm (not hot) water. The stencil can be re-used several times if you wash it gently and thoroughly.

Remove the stencil to reveal the finished design
11. Place the clear backing back onto your screen stencil so that the stencil remains sticky and clean. Once your paint is dry, you can use an iron to set the paint. Iron on medium heat for 30 seconds.
How to customize this easy Ikonart stencil project
There are so many different ways you can customize this Ikonart stencil project. Ikonart smart screen stencils work on various types of smooth surfaces. Here are a few other project ideas you can make with this "Art Lover" design:
- Custom backpack for an art student
- Custom mugs as a Mother's Day gift
- Metal sign for an art teacher
- Decorative throw pillows
FAQs about the Ikonart Custom Stencil Kit
How do I start my first Ikonart project?
It's super easy! Follow these simple steps: print your design using either an inkjet printer film or laser printer film, expose it for 2-3 minutes, and you're ready to create. Whether it's for school projects or unique gifts, you'll love seeing your good artwork come to life!
Can I use the Ikonart kit for fabric projects?
Absolutely! Just use our ikonart textile film and follow the ink selection guide to ensure you're using the right materials. The self-adhesive stencils stick well and are perfect for customizing everything from t-shirts to tote bags.
Can I use the Ikonart kit for glass etching?
Yes! The ikonart works with glass etching gel. Etchall etching crème works best. Be sure to rinse your stencil film immediately after use. Take note that the etching cream seems to break down the emulsion faster on the reusable silk screen stencils.
Where can I find inspiration for my designs?
Check out the Ikonart Design Shop for a variety of ways to get inspired. Whether you're looking to create a favorite quote on a cutting board or glitter paint decorations, there's something for everyone.