
20 Colorful DIY Resin Coaster Ideas For Beginners To Make

20 Colorful DIY Resin Coaster Ideas For Beginners To Make
If you've been wanting to add a splash of color to your coffee table or kitchen, these 20 unique DIY resin coaster ideas are the perfect place to start!
Whether you’re sprucing up your coffee table or searching for that perfect handmade gift, creating your own resin coasters is a fun and creative way to express yourself.
Plus, with a variety of techniques and decorations, from glitter resin coasters to geode coasters, there’s something here for everyone. Here's what you need to know about resin fundamentals before you get started.
What are resin crafts?
Resin crafts are a cool way of making all sorts of shiny and sturdy items with something called epoxy resin. Epoxy resin is a clear material that, when you mix it with a hardener, hardens up to a glossy finish that’s really tough.
You can make a variety of DIY projects with it, like sparkly coasters with glitter or those awesome geode coasters you might’ve seen.
You can also make jewelry, keychains, magnets, and more out of resin. Throw in things like gold flakes or swirls of alcohol inks to make each piece pop with color.
It’s become a huge hit, especially on TikTok, where everyone’s showing off their resin projects, from artsy jewelry to eye-catching home decor. Seriously, grab some resin, pick out a mold, and try it yourself—you can create some pretty amazing things that are as practical as they are pretty!
What's the easiest resin for beginners?
When you’re just diving into the world of resin crafts, you'll want something user-friendly to kick things off. The easiest resin for beginners is typically a clear epoxy resin that's specifically labeled as "easy-mix" or "1-to-1 ratio."
This type of resin has equal parts resin and hardener, which simplifies the mixing process—a huge plus when you’re just getting started. Plus, it’s great for smaller projects like DIY resin coasters or jewelry, so you can see quick, beautiful results without too much hassle.
Just mix it up, pour, and you’re on your way to creating some awesome resin art. Look for brands that offer extended working times too, which give you a bit more leeway to work out those tricky air bubbles or adjust your designs before the resin starts to set.
What do you need to make DIY epoxy resin coasters?
The exact supplies you'll need will depend on the type of coaster you make. Here's a general list of resin craft supplies:
Silicone mold
Clear epoxy resin
Resin hardener
Different colors of alcohol inks, Micah powder, or other colorants
Glitter, gold flakes, or decorative elements for different effects
Heat gun or butane torch to remove air bubbles
Stir stick for mixing resin
Disposable gloves to protect your hands
Wax paper or parchment paper to protect your work surface
Painter's tape for creating clean edges
Small cups or containers for mixing resin
Disposable craft sticks for stirring
Optional: Acrylic paint for sides of the coasters
Sealant or resin topcoat for finishing and sealing the coasters
How to Make DIY Epoxy Resin Coasters
Making your own resin coasters is easier than you might think. With a few simple supplies you'll be making your first resin project in no time.
Prepare Your Work Area: Lay down wax paper or parchment paper to protect your work surface and gather all your materials.
Mix the Resin: Following package instructions, mix equal parts of resin and hardener in a plastic cup. Stir with a craft stick until fully blended.
Add Color and Effects: Mix resin with your choice of mica powder, alcohol inks, or other colorants. Stir in small amounts to achieve the different effects.
Pour Into Molds: Carefully pour the resin mixture into silicone coaster molds. Use a heat gun or butane torch to gently pass over the surface to pop any tiny bubbles in the center of the mold.
Add Decorations: Place any additional items like flowers or glitter into the wet resin. Use a toothpick to adjust the placement.
Cure: Allow the coasters to cure in a dry place for 24-48 hours. Make sure the area is well-ventilated and as dust-free as possible
What Should You Put in DIY Resin Coasters?
The beauty of DIY resin coasters is how customizable they are. You can embed a wide range of materials to create truly unique designs:
Alcohol inks: Add vibrant swirls of color.
Mica powder or resin dye: Introduce shimmering effects or rich hues.
Gold flakes: For a touch of luxury.
Flowers or leaves: Preserved in clear resin for a natural touch.
Photos or artwork: Sealed under clear epoxy for a personal twist.
Glitter: Because a little sparkle never hurt!
Tiny shells or beach sand: Perfect for a summer theme.
How Long Should You Let DIY Resin Coasters Cure?
Curing time for resin coasters typically ranges from 24 to 48 hours. However, this can vary based on the brand of epoxy resin you use and the environmental conditions like temperature and humidity.
Always check the resin’s package instructions for the recommended curing times. It’s crucial to let your coasters cure fully to ensure they’re durable and water-resistant.
Are DIY Resin Coasters Profitable?
Absolutely! Resin coasters are a great way to tap into the home decor market. They're relatively low-cost to make but can be sold at a good markup, especially if they feature unique designs or personalized elements.
Selling these on platforms like Etsy, at craft fairs, or on TikTok can turn your hobby into a profitable business. Remember to factor in the cost of materials and your time to find the right price point.
How Do You Seal a Coaster with Resin?
There are a few different ways to seal resin crafts, but the best way to seal epoxy resin coasters is to actually apply another coat of the resin called a seal coat. It's pretty straightforward:
Prepare the Coaster: If you’re adding a final top coat to a previously decorated coaster, make sure the surface is clean and dry.
Mix a Fresh Batch of Resin: As before, mix a small amount of resin according to the manufacturer’s directions. Use equal amounts of resin and hardener
Apply the Resin: Pour or brush a thin layer of clear resin over the coaster. Use a heat gun to remove bubbles and ensure a smooth finish.
Cure Again: Allow the resin to cure for another 24-48 hours to form a hard, protective layer.
20 Colorful DIY Resin Coaster Ideas for Beginners to Make
Whether you're looking for inspiration for your first DIY resin coaster project or you're a seasoned pro, you'll find something you love on this list!
Click on the name of each coaster to see the full tutorial.

1. Galaxy Resin Coasters by Resin Crafts Blog
These galaxy resin coasters from Resin Crafts Blog are the perfect gift for anyone who likes star-gazing.
2. Citrus Resin Coasters by Resin Crafts Blog
These citrus resin coasters from Resin Crafts Blog make a great addition to your coffee table in the summer!
3. Bottlecap Resin Coasters by Resin Obsession
Preserve memories of your favorite brews with these unique Bottlecap Resin Coasters. Such a great gift for dads on Father's Day!
4. Faux Agate Resin Coasters by Resin Crafts Blog
Mimic the natural elegance of agate with these faux agate resin coasters.

5. Beach Resin Coasters by Resin Crafts Blog
Bring the seaside to your living room with these serene Beach Resin Coasters.
6. Poured Rainbow Resin Coasters by Resin Crafts Blog
Add a splash of color to your décor with these vibrant Poured Rainbow Resin Coasters.
7. Northern Lights Resin Coasters by Resin Crafts Blog
Experience the awe of the aurora borealis with these Northern Lights Resin Coasters.
8. Rainbow Alcohol Ink Resin Coasters by Resin Crafts Blog
Swirls of color bring these Rainbow Alcohol Ink Resin Coasters to life.
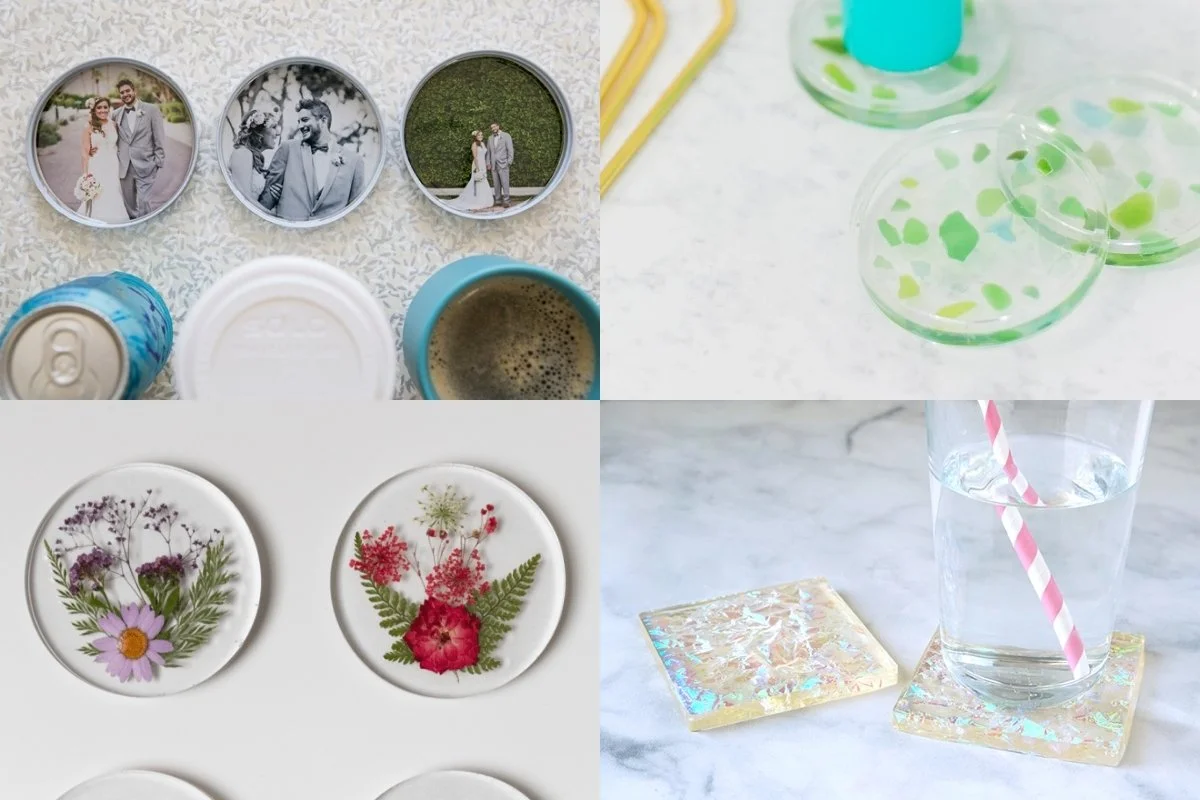
9. Mason Jar Lid Resin Coasters by Something Turquoise
Recycle and create with these clever Mason Jar Lid Resin Coasters.
10. Sea Glass Resin Coasters by Lovely Indeed
Capture ocean vibes with these beautifully understated Sea Glass Resin Coasters.
11. Floral Resin Coasters by Handmade Weekly
Preserve the beauty of your garden with these Floral Resin Coasters.
12. Iridescent Resin Coasters by Resin Crafts Blog
Shimmer and shine meet in these dazzling Iridescent Resin Coasters.
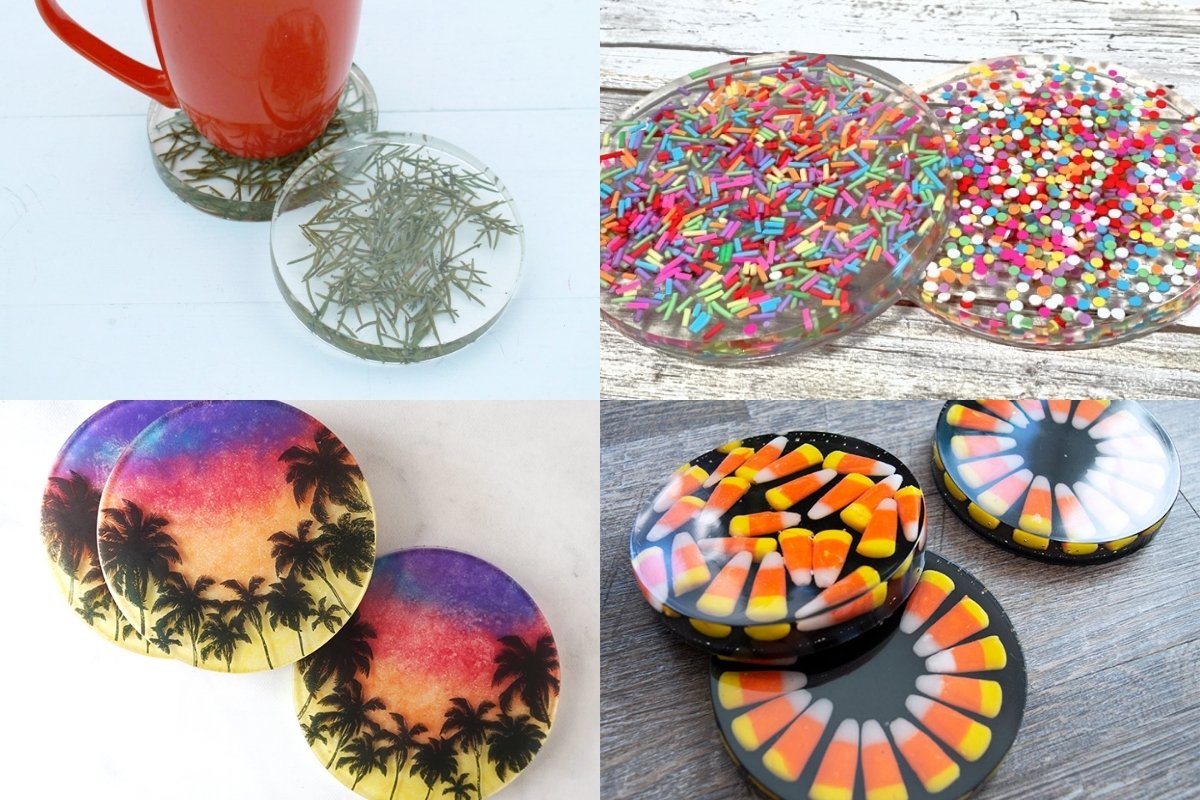
13. Christmas Tree Pine Needle Resin Coasters by Resin Crafts Blog
Keep the holiday spirit alive year-round with these Christmas Tree Pine Needle Resin Coasters.
14. Sprinkles Resin Coasters by Resin Crafts Blog
Celebrate every day with these fun and festive Sprinkles Resin Coasters.
15. Sunset Resin Coasters by Artsy Fartsy Mama
End each day on a high note with these stunning Sunset Resin Coasters.
16. Candy Corn Resin Coasters by Resin Crafts Blog
Perfect for Halloween or any candy lover, these Candy Corn Resin Coasters are a treat.

17. Dyed Sea Shell Resin Coasters by Resin Crafts Blog
Ocean treasures and colors combine in these Dyed Sea Shell Resin Coasters.
18. Gold Leaf Resin Coasters by Sarah Hears
Elegance meets functionality in these chic Gold Leaf Resin Coasters.
19. "Petri Dish" Resin Coasters by Artsy Fartsy Mama
Science meets art in these uniquely captivating "Petri Dish" Resin Coasters.
20. Resin Teacher Coasters by Ms. Campbell Teach
Show appreciation for educators with these thoughtful Resin Teacher Coasters.
Making resin coasters is not just a great way to unleash your creativity, but it's also a fantastic stepping stone into the world of resin art.
Whether you're making a set for yourself or starting a side hustle, the possibilities are endless.
So, grab your resin kit, pick your favorite colors and additives, and start pouring! The end result? Beautiful coasters that are as functional as they are artistic.
If you love making coasters, check out this post on how to make DIY clay marble coasters!