
Hand Stamp A Pillowcase Using DIY Stamps With Foam Stickers

Hand Stamp A Pillowcase Using DIY Stamps With Foam Stickers
If you've ever wanted to make custom stamps but thought the process was too difficult, you're in the right place! We're sharing how to easily make your own DIY stamps with foam stickers.
Learn how to make your own stamps for DIY projects in just a matter of minutes with supplies you can find at craft stores like the Dollar Store, like craft foam. Making homemade stamps is one of those fun and easy creative projects for both younger kids and older kids.
Today we'll show you how to hand stamp a pillowcase using your own DIY stamps with foam stickers, but you can use your own stamps on anything. You won't believe the final results came from DIY stamps!
Why should you make DIY stamps with foam stickers?
Making your own rubber stamps is difficult, but making DIY stamps using foam stickers is easy! It's not only a fun way to spend an afternoon but also a fantastic opportunity to customize with your own unique style.
Plus, it's a great craft for young kids because they can make intricate designs without drawing or painting.
What type of foam stickers do you need to make your own stamps?
For the best results in making your own stamps, look for thick foam stickers that can easily absorb and apply ink. You can find these at craft stores or the Dollar Tree.
Foam craft sheets are also a great choice if you want to cut out your own design, offering more versatility and a personal touch to your stamped design.
What can you use DIY foam stamps on?
DIY foam stamps are incredibly versatile and can be used on a variety of surfaces. They work beautifully on paper for custom cards or wrapping paper, and with fabric paint, you can transform fabric into custom pieces.
Whether you're making homemade stamps for scrapbooking or adding a unique touch to a pillowcase like this tutorial, the possibilities are endless!
What you'll need to make a hand stamped pillowcase using DIY foam stamps
Affiliate disclaimer: Although I stand by all of the products I use, I can receive a small commission from any products purchased via my affiliate links.
Practice notebook or paper
Adhesive Foam Shapes or Foam Images
Adhesive Foam Craft Sheets
Foam Brushes
Fabric Paint
Pillow Case
Sticky Mat
Wooden Blocks
Table Covering
Water
Paper Towel
*I love ordering supplies on Amazon because there are tons of selection results, free shipping (typically ships within a few business days) and it’s never final sale so if you change your mind, you can send the supplies back.
Check out my favorite items on my Amazon storefront. You’ll find a full page of all of my favorite things!
How to make a hand stamped pillowcase using DIY foam stamps
1. The first thing you'll need is a wooden block to use as a stamp base. Choose a side to make a stamp on.
2. Peel off the backing from the foam stickers and stick to the wood blocks. To make the stamp thicker, each shape will need two layers of the same shape(s), one on top of another.

Place the stickers on the wooden block
For example, if you want to make a design using three stars, you will need to put three foam stars and then place another three identical foam stickers right on top.
3. Take your time and make stamps on all sides of your wooden block. You can use adhesive foam sheets to make custom shapes. The adhesive rectangular sheet is thicker, so you will only need to make your shapes one layer thick.
If you have extra shapes left over, why not make a second stamp?

Make custom shapes with foam craft sheets
4. Once you are happy with your design, use a foam brush to add a thin layer of paint to the foam stickers. For best results, try not to add too much.

Add a small amount of paint to the stickers
5. It's a great idea to practice your stamp first inside your practice notebook. If you are happy with the way your own design looks, you can move on to the pillowcase. You can also use the notebook to remove any extra paint on your stamp.
6. To prepare the pillowcase, peel the clear layer off of the sticky mat. Place the sticky mat inside the pillowcase and smooth out the fabric.

Use a sticky mat to prepare the pillowcase
7. Once the fabric is smooth, you can begin stamping your design. You can change colors by waiting for the stamp to dry and using another color. Be creative and always practice your designs inside your notebook first.

Start stamping your design and get creative!
8. Once your stamped design is completed, you will need to iron the pillowcase to set the paint. You can add a pillow insert and use your new decorative pillow!
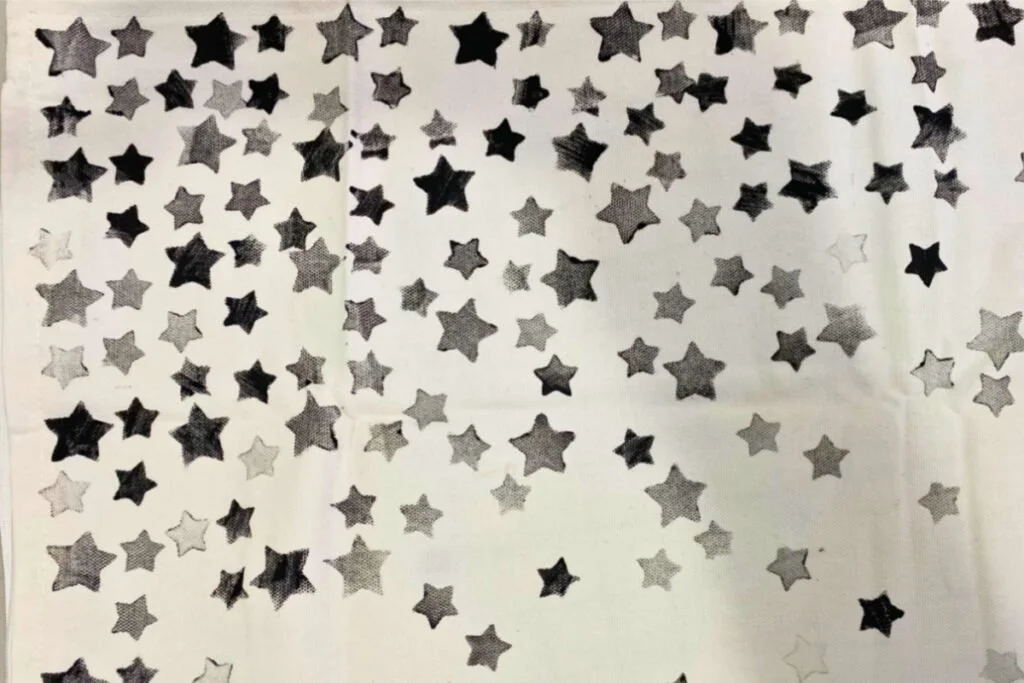
Finished hand-stamped pillowcase
FAQs about DIY Stamps With Foam Stickers
Can I use a stamp pad with DIY foam stamps?
While we prefer to use paint, you can use a stamp pad with DIY foam stamps. For the best results, gently press your foam stamp onto the stamp pad, ensuring an even coating of ink. This technique is ideal for adding detailed stamped designs to paper projects.
How do I make sure my foam stamp details are visible?
To ensure that small details in your foam stamps come out clearly, use high-quality foam sheets or foam craft sheets for creating your stamps. Cut the designs carefully with an x-acto knife or small scissors, paying close attention to small details.
Press the stamp onto your material with less pressure initially, then increase as needed to transfer the design effectively.
Where can I find materials for making my own DIY Stamps with foam stickers?
You can find all the necessary materials for making your own foam stamps at local craft stores or dollar stores. Look for foam stickers, craft foam, wooden blocks, and stamp pads. These stores often offer a variety of craft supplies that are suitable for both younger kids and adults involved in DIY projects.
We hope you had so much fun using your new stamps to create a decorative throw pillow!
Interested in another DIY pillow project? Try making this easy bandana pillow!