
Easy Step By Step Guide To Mandala Rock Painting

Easy Step By Step Guide To Mandala Rock Painting
I've been spending much of the summer painting rocks and after dozens of ‘kindness rocks’ and fun picture painting, I'm officially hooked on using rocks as a canvas. Like always, once I get into something, I want to explore all of it. And so I recently started painting mandala patterns onto rocks and this might be the most meditative art project I’ve ever done.
I've learned a ton and I am excited to share it with you. Without further adieu...here are my step-by-step instructions to help you get started on this easy tutorial:
What You’ll Need for Mandala Rock Painting:

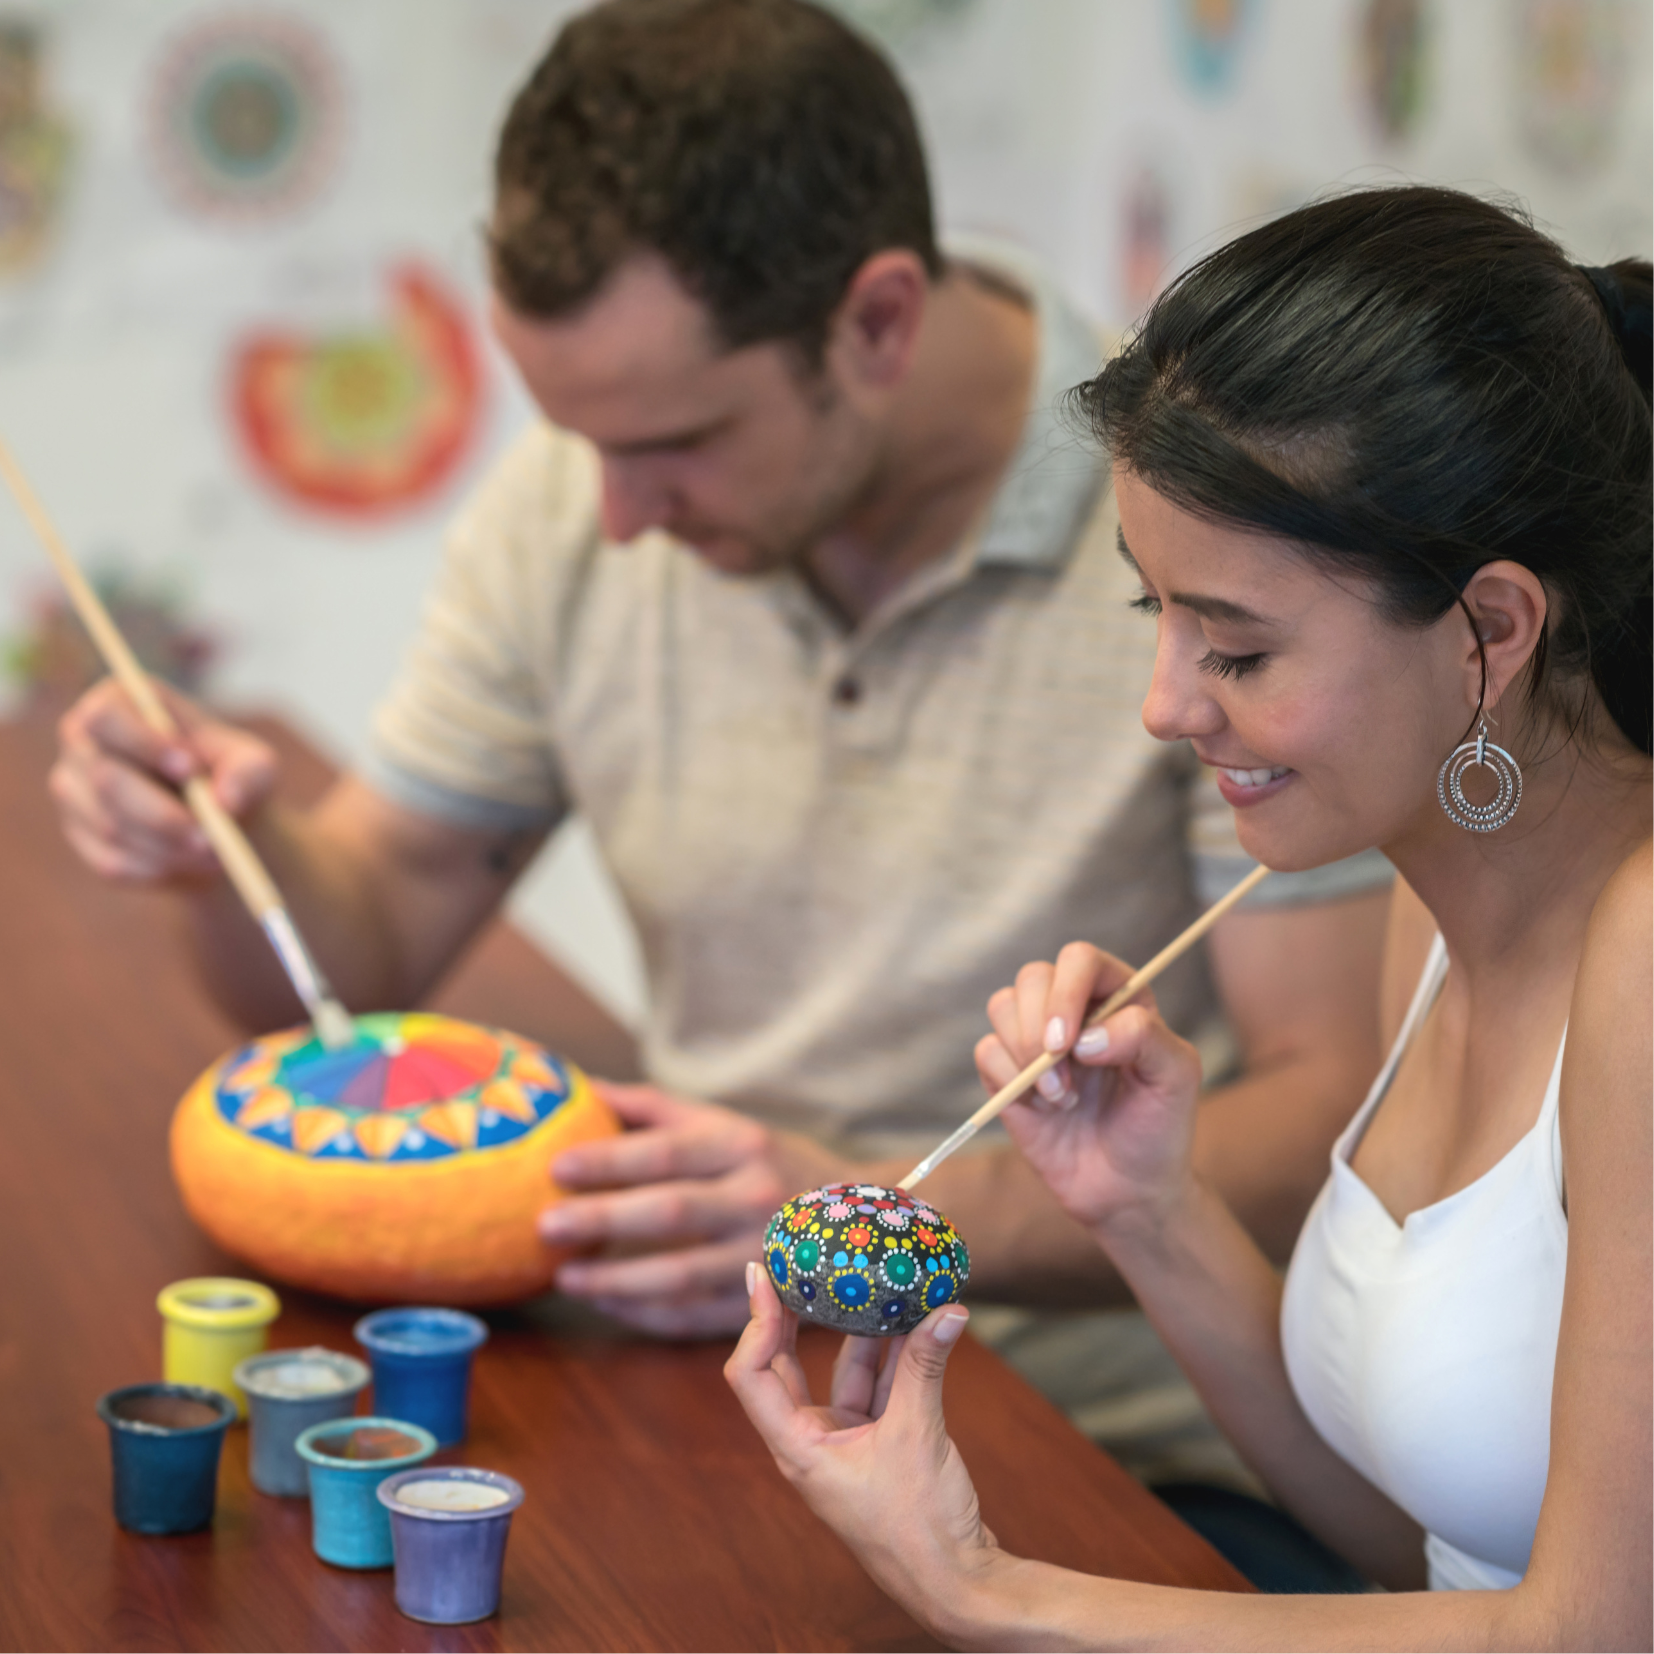
You just need a few simple supplies to paint mandala rocks
- Smooth, clean rock or stone: You can find these by a stony beach, or lakes or you can also purchase them at your local home improvement stores as well as your local craft store.
-Acrylic Paints (various colors): You can also use paint pens however, in my experience they do not work as well with painting mandalas because it is challenging to get the dots to form perfect circles. When purchasing paint, there are many choices and it can be overwhelming. I have created this guide to acrylic paints to help you figure out which paint to purchase. In general, though, you should begin with a slightly thick paint so that the paint doesn't run too much. Thicker paint also works best when adding small details like smaller dots or for signing your name (it is my opinion that every artist should sign their names)! You do not need a ton of paint, just a small amount of each shade.
I pick up a multi pack of these so that I can make a larger dot, bigger dots, and small dots. These were originally created to be used with nail polish during a manicure, but they work wonderfully when making mandala rocks.

Dotting tools are usually used for nail art
- Pencil and eraser
- Mandala rock stencils: If you want to create your own designs, check out these stencils. If you want to use ready-made patterns, these are a better way to go.
- Circle stencil or ruler or compass (optional, for creating precise circles): I personally prefer to use a circle stencil so that I can just trace the spots where I will be adding dots. The circular form is hard to free draw, so I definitely recommend using a template.
If you're all over the place like I was when I first got started, this kit totally saved me! I love the templates and the tools and felt that this was a great "first" experience creating mandalas on rocks.
- Palette or paper plate for mixing colors
- Water cup and paper towels (for cleaning brushes)
Step-by-step Instructions for Creating Mandala Rocks
1. Prepare Your Rock:
Choose a smooth rock or stone of your preferred size and shape. Personally, a larger, flat, round rock works best for this very specific painting process. You can use rocks that come in darker colors like black and grey or you can go lighter. You are the artist!
Wash the rock thoroughly with water and let it dry completely.
Optionally, you can apply a base coat of white or a light color to create a smooth painting surface. Thick white acrylic paint or gesso work best for this step.
You will want to use thicker paint so that you do not need to do multiple layers of paint. With the higher quality paints, just a bit of white should be enough to cover the entire surface of your rock.
If you have sensory issues like some of my students, go ahead and add a layer of matte Mod Podge all over your rock and let dry. This will give you a smooth, not chalk-like, less porous surface to work on. Totally optional, though.
2. Plan your mandala design using a stencil or a template:
Learn to paint mandala rocks using a stencil or template
Using a mandala stencil on a rock can streamline the process of creating intricate designs while allowing for artistic expression and creativity. Enjoy the process and have fun creating your mandala-painted rock!
You'll want to begin by positioning your stencil so that it lies completely flat on the rock. This is why it is important to have a flat rock. Once you have the stencil in the desired position, use painter's tape to keep it in place. You can just secure the corners or you can tape around the entire perimeter.
Start with a central point on the rock and go ahead and pencil in your center dot. This is always where you should begin so that if the stencil moves, you can see immediately where to position it. Think of the center dot as your North Star.
Use a pencil to lightly trace the design of the mandala stencil onto the rock. Do not worry if you get pencil elsewhere on the rock - you can always use a pencil eraser to remove it or just paint over it using a bit of white paint.
You can use a ruler or compass to create even circles if needed, or draw them freehand for a more organic look.
You can follow the stencil's guidelines or modify the design as you go.
Carefully lift the mandala stencil from the rock once you've sketched out all the desired sections.
Add small amounts of paint to your palette. Using your dotting tool, begin by adding a dot of paint to the center of your rock right on top of the sketched out pencil guideline.
Wipe off your dotting tool and grab a dotting tool in another color. Personally, I like to use fresh colored dots on each row so that it is colorful. It will also help you not to get confused by the dots of the previous row. You can do contrasting colors, monochromatic, a gradient effect or anything. You are the artist and the world is your oyster!
Continue adding to your third row. If you did white dots, this time you can switch to a dark color or vice versa. If you added a big dot, maybe you might need some small dots to fill in little gaps.
Sometimes you won't see that until the very end and then once the paint is dry you can go back in and add more dots in more paint colors. Large dot, small dot, it doesn't matter - as long as you keep on going until you can step back and admire the dots of your last row. Head onto a new row and mix it up each time.
Inspect the painted mandala and touch up any areas where the paint might have bled or where more detail is needed. If you have any smudges, try to get them off with a wipe or a Q-tip as quickly as possible so that the rock still looks and feels smooth.
Add extra details or accents to enhance the overall design, such as adding dots, lines, or highlights.
Allow the acrylic paint to dry completely according to the manufacturer's instructions.
Optionally, apply a coat of acrylic sealer or varnish to protect the painted mandala design. This step helps preserve the colors and enhances durability, especially if the rock will be displayed outdoors.
Once the paint and varnish (if applied) are fully dry, find a suitable place to display your mandala-painted rock. It can be a decorative piece indoors or a unique addition to your garden or outdoor space.
Tips:

Beautiful mandala rock painting
Ensure the stencil is clean and free of any residual paint before using it on the rock to avoid unintended smudges or marks.
Experiment with different color combinations to create visually appealing mandala designs.
Take your time with painting and allow each layer to dry completely before adding additional details or colors.
In warm weather, working outside is great because the paint will dry quickly and this reduces the chance for smudging.
Have a cup of soap water on hand in case the dotting tools get dirty with buildup.
Only use acrylic paint. If you use a different kind of paint it either will wash off or will take forever to dry.
If you love making these beautiful designs (let's face it, painting mandalas is a form of meditation), try out some other rock art ideas.
If you want your dots to be more 3d, use tulip slick paint.
If you do not have a dotting tool, the Tulip Slick Paints have a small nozzle and you can squeeze directly from the bottle. However, it might look a bit messier than using a dotting tool with your rock mandalas.
However you decide to approach the task of painting mandala rocks, I recommend you print out a bunch of creative designs, gather your supplies, and then just experiment. In my experience, my most wonderful rocks were created just after big failures.
Go, try, be creative, and go easy on yourself - this is supposed to be fun!
Want more painted rock ideas? Check out this post!