
How to Transfer a Photo Using Liquitex Gel Medium

How to Transfer a Photo Using Liquitex Gel Medium
I recently discovered a new technique and it feels like magic! If you’ve ever wondered how to do an image transfer using an acrylic medium, you’re in the right place.

Using photo transfer to make a mixed media collage
I’ll be breaking down how to use the Liquitex gel medium to make gel medium transfers onto paper, art journals or canvas. I’ll also be testing this technique on wood.
Whichever transfer method you use, it is imperative that you have the right materials and a healthy dose of patience.
Here’s what you’ll need to make your Liquitex medium transfer
Chip brush or foam brush or paint brush
Laser print of your image (inkjet printer images do not work)
Heat gun (optional)
Regular low weight Printer paper
Watercolor paper (heavy weight works best)
Damp sponge or wet rag (optional)
This project can get messy. Click here for the scoop on my must-have cleaner for artists and crafters. (It seriously works miracles!)
How to Transfer the photo using your Liquitex Medium – Step By Step
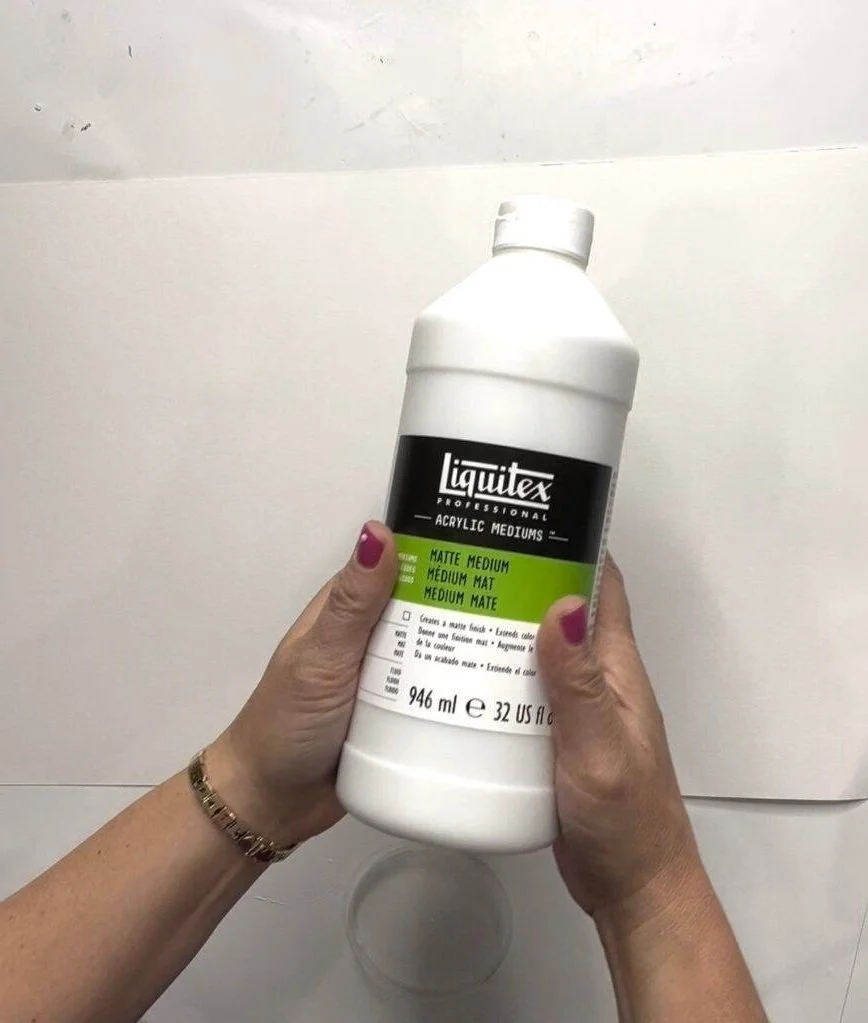
Liquitex matte gel medium for photo transfers
1. Find a photo that you want to transfer. Be sure you have permission to use the photo if you are planning on selling your artwork.
Print it on the cheapest paper possible (I looked for paper at the office supply store that had the lightest weight). You do not need special photo paper.
2. Print out your image and cut out the parts that you want to transfer.
3. Squirt a healthy amount of the Liquitex Medium (I used matte medium for this project but you can use whichever medium makes you happy – all personal preference).

Add a generous amount of Liquitex Matte Medium Directly to your canvas or watercolor paper
4. Using a chip brush or foam brush, spread the medium around the white background watercolor paper or art journal pages. You do not want it to be too thin but you also do not want it to be too thick.
Once you get the hang of the process, feel free to experiment. On my first try I didn’t use enough and the image didn’t fully transfer. If you add enough, you should not need a second coat.

Closeup of the brush strokes from the Liquitex Medium
5. Place the laser prints transfer images face down onto the wet Liquitex medium. Use your hands to eliminate air bubbles. You can also use a squeegee or a credit card to get rid of the air bubbles.

Place your laser printed image face down onto the watercolor paper
6. Allow the paper to dry for around 2-4 hours. You can speed this up using a hair dryer or a heat gun. Be sure to give this ample drying time for it to be successful.
7. For the transfer process, you will want to separate the dry toner from the printout from the standard printer paper. For best results, you will want to spray or mist water onto the photo transfer paper (meaning the paper with the photo on it).
The easiest way is to let the water sit on the printed image for a few minutes. The you will be starting at the center of the image and work to the edges. The end result is pretty exciting. Do not use nail polish remover, rubbing alcohol or acetone!

Apply water using a spray bottle
8. Once you see the paper fibers begin to soften, you will want to remove the paper backing. The best way to do this is the use your hands and move them in different ways (up and down, small circular motion, etc).
You can start with a small test spot to be sure the small image transfers before moving on to the bigger section. Leave yourself enough time for this step because it requires patience.
Feel free to try a wash cloth or a sponge brush if you do not like rubbing with your hands. I have found that using circular motions with my hands works best. You will see lots of little paper scraps rolling off the image. This is what should happen!
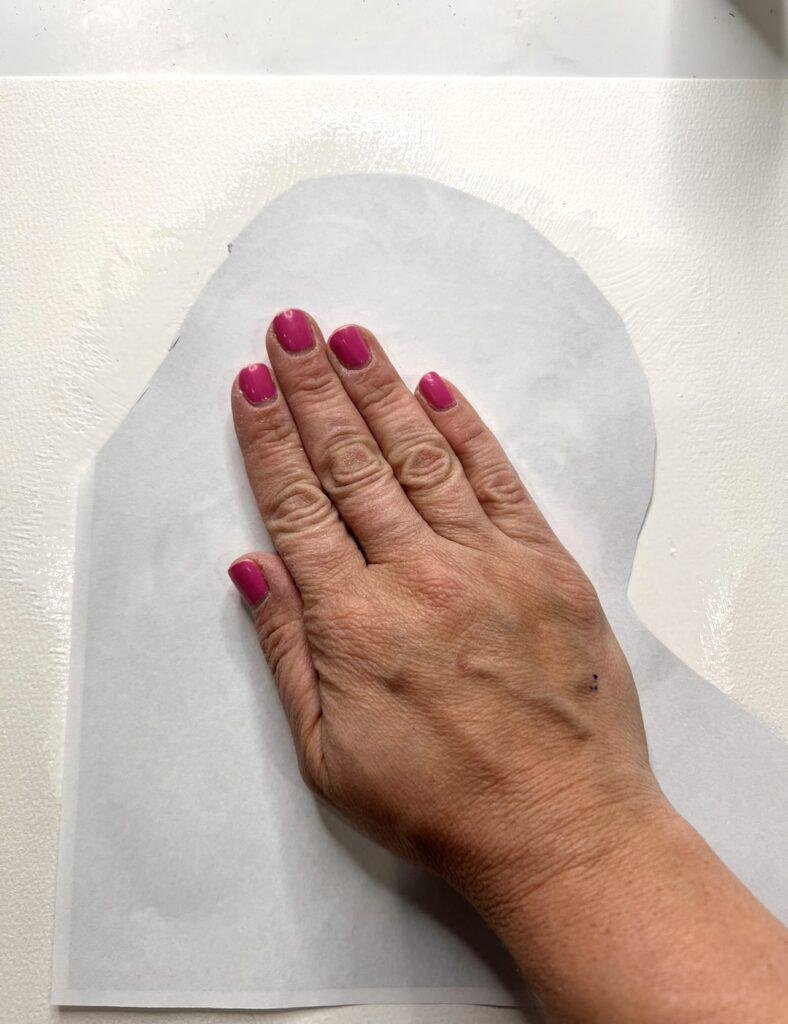
Rub in small circular motions
You will see the paper rub away from the ink. Keep going and add water as needed
9. Keep rubbing the paper until you see the paper film is completely gone revealing the image. You will also see spots where you didn’t add enough and it will have brush strokes.
Personally, I like this because it gives the final product more of a vintage appearance. If your entire image doesn’t transfer, you will know that you either didn’t use enough or you didn’t let it dry long enough.

Keep rubbing – you will know your image has fully transferred when it doesn’t have a foggy look to it
Once your image is totally transferred, you can use other materials to make a mixed media college or any other craft projects you have in mind. If you only have a little time, perhaps you just want to use your favorite photo and leave it that way.

Once you finish transferring your photo, make a collage.
FAQ’s about photo transfers
Can you use Mod Podge to do a photo transfer?
Yes! I recently tried Mod Podge (just regular – you can use glossy or matte) and it dried fast and totally worked. I didn’t see a huge difference between the matte medium and the mod podge.
I didn’t try Mod Podge photo transfer medium but I will assume that it would work since the regular Mod Podge worked great!
Does PVA glue work to do a photo transfer?
Yes! PVA glue also works to do a photo transfer. Just make sure not to use ink jet prints. And of course just use regular printer paper.
Does acrylic paint work for photo transfers?
Yes! Acrylic paint also works – but only if you purchase heavy body acrylics. They seem to have a better result. An acrylic transfer is especially nice if you plan to have a bit of color behind your image.
Does acrylic gesso work for photo transfers?
I haven’t tested that out but if I do, I will update it here.
How do you transfer a magazine photo?
This is a popular technique but also a simple technique. It is done in the same way using acrylic gel and/or gel medium.
Can you transfer photos to different surfaces?
Definitely try different surfaces. Try wax paper, a piece of fabric, the edges of the canvas, make a metal print and a wood surface.
If you do end up tryingto make a transferred image onto canvas, be sure to put a heavy book behind the canvas to give it stability and to make sure the back of the fabric/canvas is tight. You can still use regular copy paper.
Can you make a photo transfer using a color laser printer?
Yes, but I would recommend starting with black ink only and then experimenting.
Can you make a photo transfer using a gel plate?
Yes, you can make a photo transfer on a gel plate. You can skip the wet paper and circular motion and simply peel the paper. You will want to be sure to use the right ink to make the transfer. You can check out this tutorial for more information.
Liquitex gel matte medium vs Mod Podge
The big difference I have noticed is that Liquitex doesn’t smell as strong as Mod Podge, but Mod Podge dries faster. You can add a top layer of either the modge podge or the Liquitex to the back of the image, the front of the image or whatever.
Can I make multiple copies of inkjet images on a copy machine?
Unfortunately the transfer doesn’t work well with non-laser printed images.
After you’ve completed your transfer, you can easily add collage elements, gloss finish, acrylic skins or mod podge Get creative!
Add your first coat, throw some fun stuff on there and head to the local craft store to find more things to add to the top of the paper.
Happy Crafting! If you like this tutorial, you will love making these!