
Shaving Cream Marbling Tutorial: Easy DIY Trinket Dishes
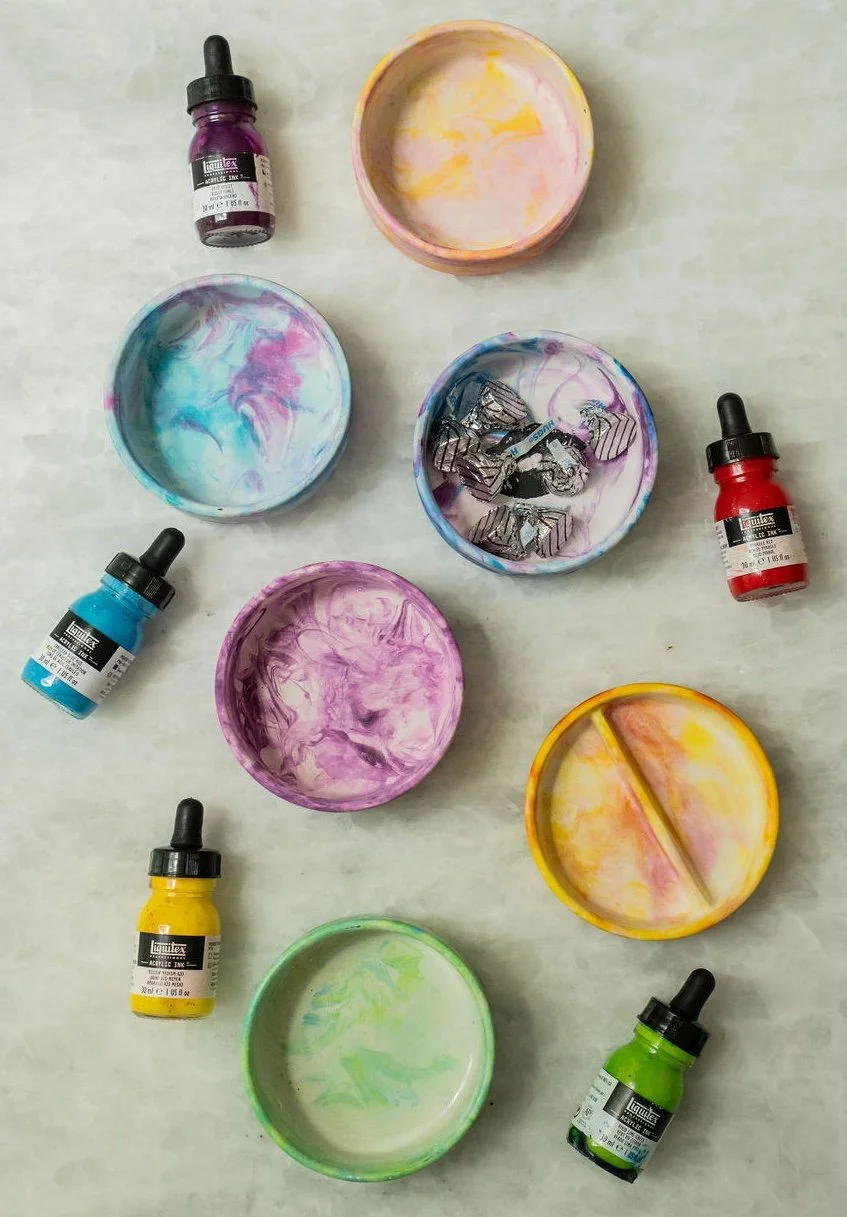
Beautiful marbled trinket dishes
No doubt, the easiest, cheapest, and best homemade marbled crafts are done with shaving cream marbling. This marbling method is one of my all-time favorite art activities. You’ll never get tired of it and you’ll keep returning to it repeatedly over the years because everyone can do it…and I mean EVERYONE! It's one of those craft projects everyone loves because there is no wrong way to do it. I’ve tried out shaving cream marbling using unglazed ceramics, cardstock and fabric. So it's time to get ready for some messy fun!
You’ll need to decide which object you want to marble. Personally, I think cardstock is the best place to start. Practice making several prints so that you can see which colors work best together. It is best to practice on a piece of paper first so that you can get a feel for the material. Once you’ve decided on what you like best, move on to something like an unglazed* ceramic piece or fabric.
*glazed ceramic pieces do NOT work. The shaving cream needs a porous material in order for the ink to really sink in.
What is Shaving Cream Marbling?
Shaving cream marbling is a beginner-friendly technique where you swirl ink into a layer of shaving cream, then press paper, fabric, or ceramics into the foam to transfer the fun marbled patterns. Shaving cream marbling uses supplies you already have at home, which makes it perfect for kids, classrooms, and your budget.
The foam acts as a temporary canvas where colors float on the surface without fully mixing. When you press your object into the shaving cream, the ink transfers onto your material while the foam rinses away clean. The result? Gorgeous one-of-a-kind swirled designs that look WAY more impressive than the effort required.
Best of all, there's truly no wrong way to do it, which is why this technique works for everyone from preschoolers to adults!
Supplies Required to Marble Paint with Shaving Cream:
Affiliate disclaimer: Although I stand by all of the products I use, I can receive a small commission from any products purchased via my affiliate links.
Materials
Gloves - you will definitely not want to skip this step! I personally LOVE nitrile gloves
Shaving cream (make sure it says shaving foam or cream instead of “gel”)
Shallow baking dish, such as a styrofoam tray or aluminum tray.
Liquitex acrylic inks (other paints and inks do not work as well)
Items to marble (cardstock paper, unglazed ceramics and natural fibers)
Scraper such as a square piece of cardboard, thick popsicle stick or a spatula
Smock (yes, this is definitely a little bit messy)
Before starting, be sure to put on gloves and a smock. Cover your table or surface - liquitex inks stain!
Instructions
1. Create a layer of shaving cream
First, grab some shaving cream and spray a layer to cover the bottom of your baking dish, cookie sheet, foam tray, or plate. It doesn’t have to be perfect. Perfection is the enemy of creativity! Level it out as much as you can using either a popsicle stick, spoon or spatula.
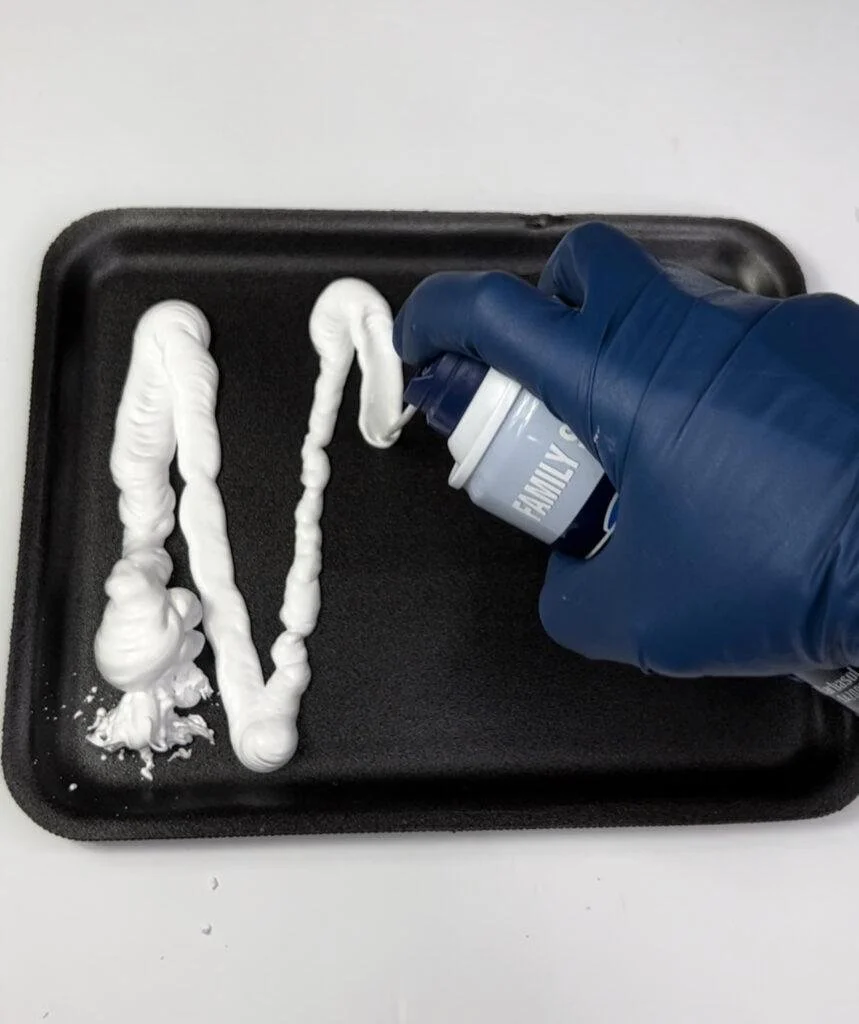
Add shaving cream to a shallow tray; styrofoam tray, plastic tray, or baking sheet.
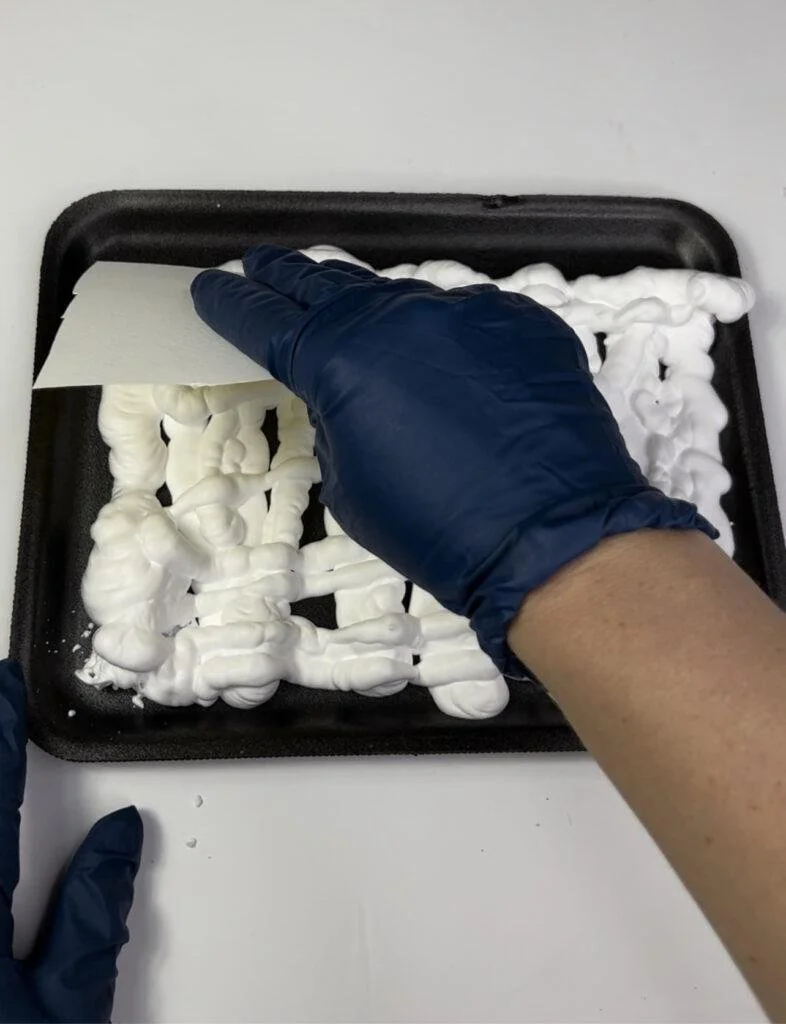
Level it out using either a piece of cardboard or a popsicle stick
2. Add color
Add several drops of liquitex acrylic inks to the surface of the shaving cream. (I have tried other paints like liquid watercolor and acrylic paint, but the inks definitely work best with the shaving cream because the color remains vibrant and saturated) Feel free to add several colors of paint - but don’t overdo it! I typically drop 2-3 different kinds of liquitex acrylic ink onto the shaving cream (for an 8x11” tray I used about 5-6 drops of each color.
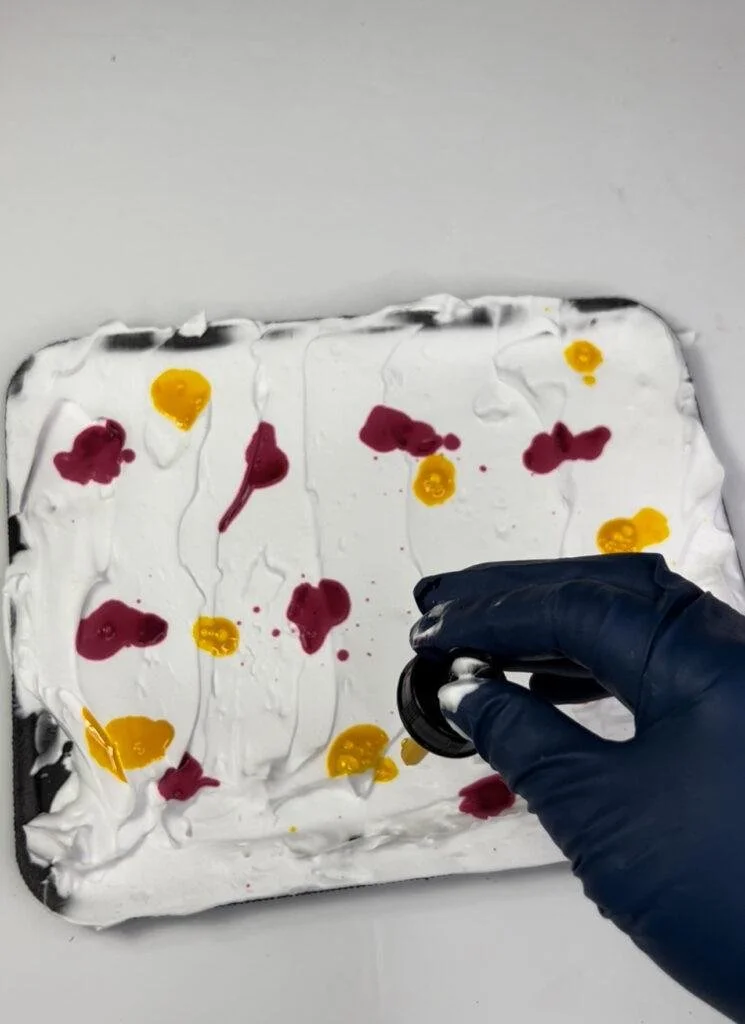
Add several drops of each color
3. Swirl the paint
The next step is the fun part. Grab a skewer like the kind you use for shish kebabs to swirl the paint around to create a marbled look. (You can also use the end of a paintbrush, craft stick, or chopstick).
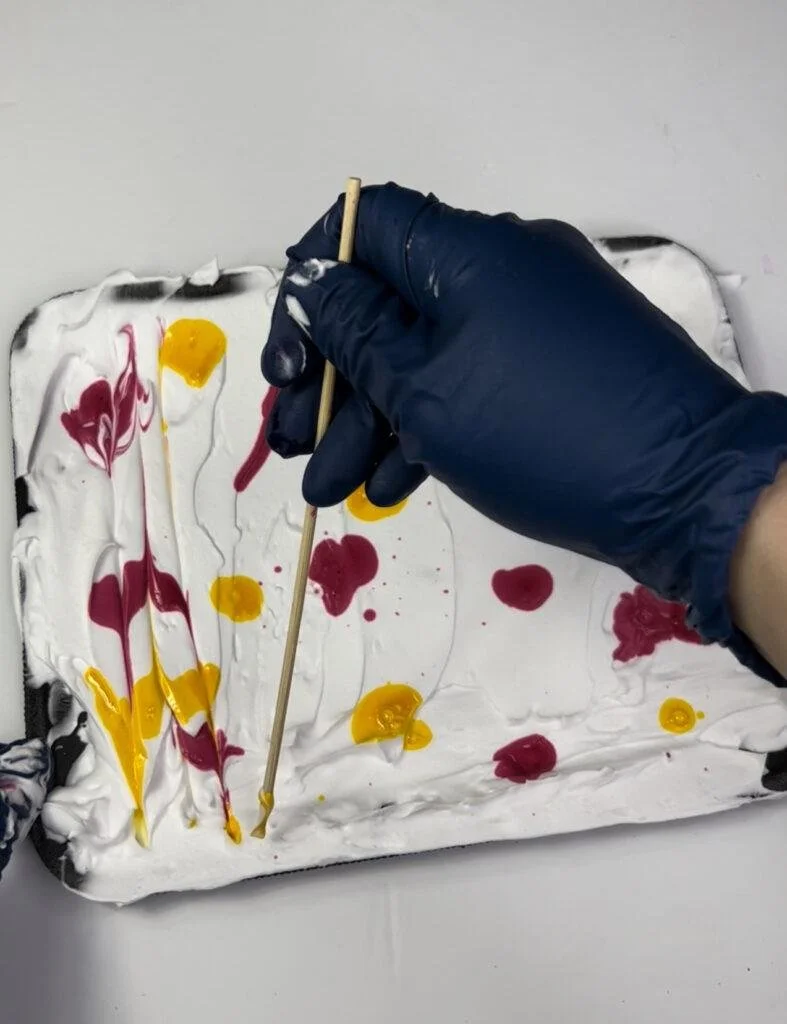
You can make your swirl designs in an organized fashion or you can just move in a circular direction to get the marbled effect.
4. Press the object into the shaving cream
Carefully roll the unglazed ceramics into the paint-covered shaving cream and let the shaving cream mixture sit for about 5 minutes. For flat objects, you can simply push the object into the foam. For bowls, you can scoop up your shaving cream and push it directly onto the unglazed ceramic piece.
*glazed ceramic pieces do NOT work. The shaving cream needs a porous material in order for the ink to really sink in.
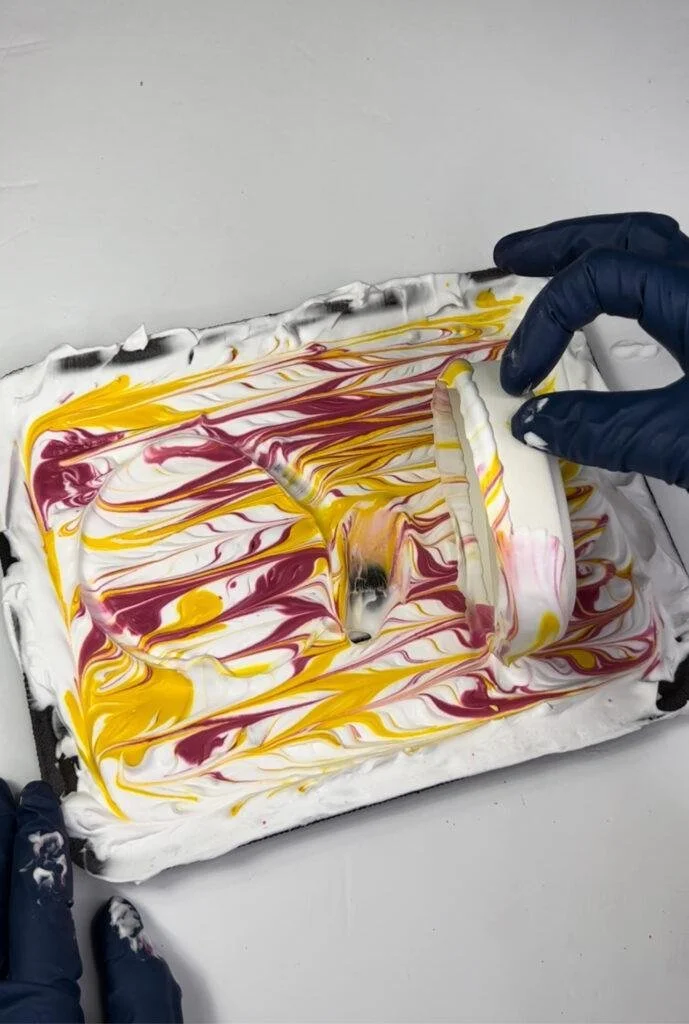
Place your object into the shaving cream and press
5. Rinse off
Take your masterpiece to the sink and wash off all of the excess shaving cream. Wash off your ceramics to reveal the beautiful art you’ve just created.
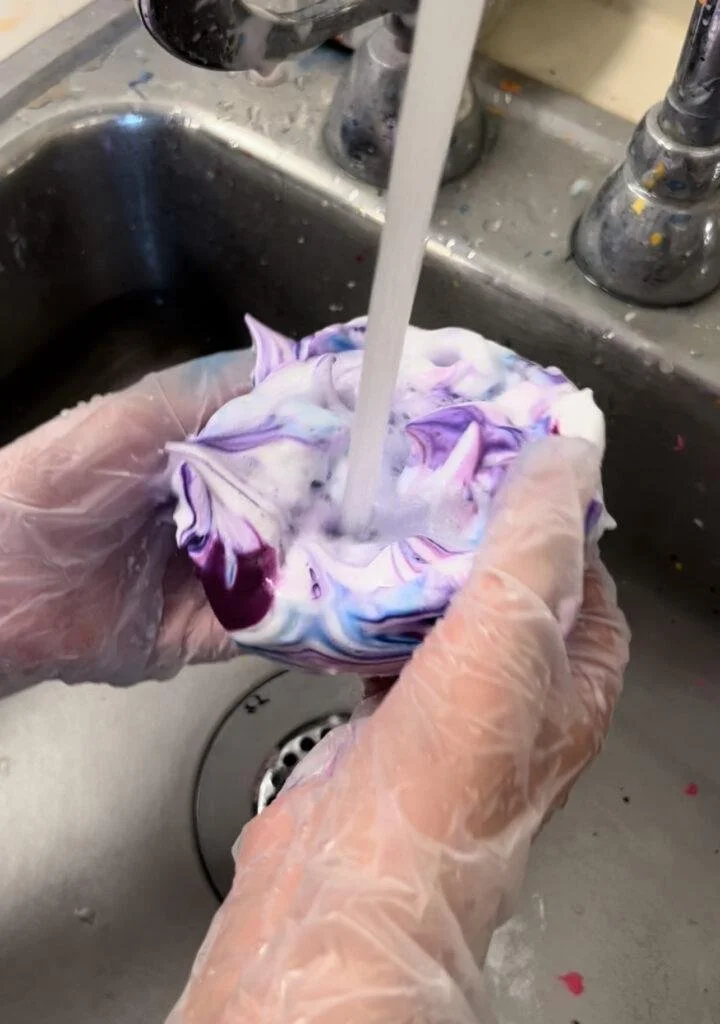
Rinse off all of the shaving cream to see your amazing results.
6. Repeat!
You can marble several pieces - this works with ceramics, natural fabrics, watercolor paper, and more. I encourage you to experiment with your marbling projects! Keep adding different colors and see how they pop.
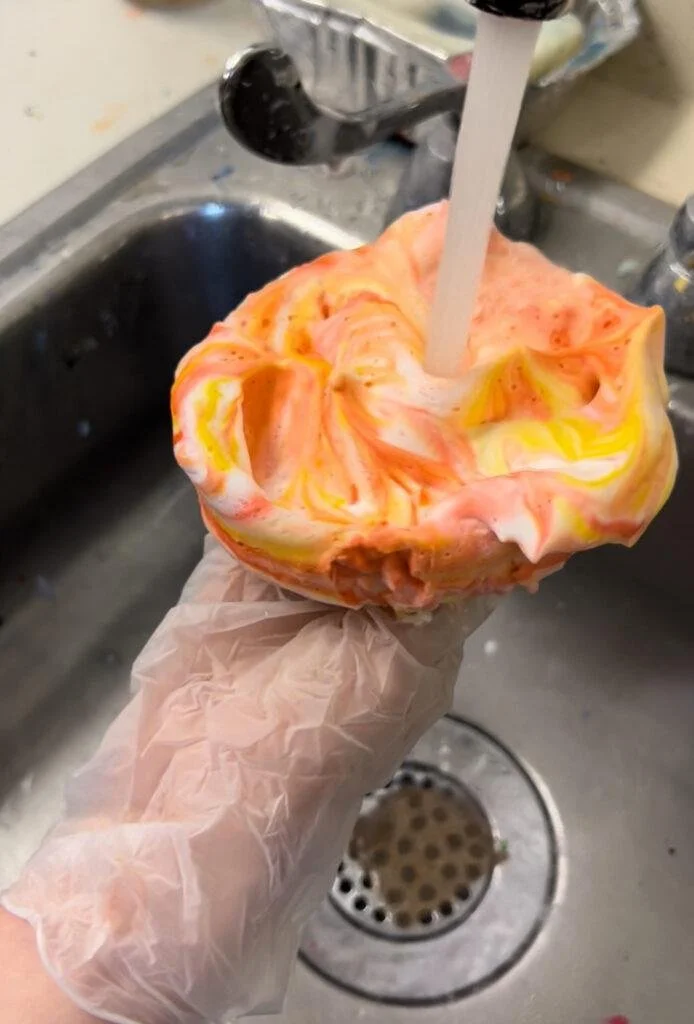
Rinse off all of the shaving cream
7. Seal
If you don’t love the way unglazed ceramics feel (sensory issues are real), I recommend sealing your piece with Mod Podge and a foam brush. I personally love the glossy Mod Podge, but it is personal preference as to what you like best! Let dry on wax paper or plastic tablecloth for 24 hours.
Common Shaving Cream Marbling Problems (and Fixes)
-
The problem: You're over-swirling! When you mix too much, the colors blend together completely instead of creating those beautiful marbled streaks.
The fix: Use gentle, deliberate swirls. Think 5-8 passes with your skewer, not 50. You want to create ribbons of color, not a smoothie. If you've already over-mixed, scrape off that layer and start fresh—it only takes a minute to add new shaving cream.
Pro tip: Stick to 2-3 colors max. More than that increases your chances of ending up with brown, especially if you're using complementary colors (like red + green or blue + orange).
-
The problem: You're not giving the ink enough time to absorb into the material, or you're using the wrong type of surface.
The fix: After pressing your object into the shaving cream, let it sit for 20-30 seconds before lifting it out. This gives the ink time to really soak in. For ceramics, make sure you're using unglazed pieces. Glazed ceramics are non-porous, so the ink just slides right off when you rinse.
Pro tip: If you're working with fabric, let the shaving cream sit on the material for a full minute, then rinse with cold water. Heat-set with an iron afterward to make it permanent.
-
Description text goThe problem: Your shaving cream has been sitting out too long and is starting to deflate, or you're using watered-down paint instead of ink.
The fix: Use Liquitex acrylic inks (not regular acrylic paint or liquid watercolors). The inks are thin enough to float on the surface but concentrated enough to create vibrant color. If your shaving cream has been sitting for more than 10 minutes, it starts to lose its structure—scrape it off and add a fresh layer.es here
Still having trouble? Drop a comment below and I'll help you troubleshoot! I've probably made every shaving cream marbling mistake in the book—and figured out how to fix them.
Marbled Trinket Dishes: The Perfect Gift
These shaving cream marbled trinket dishes hit that sweet spot of "looks impressive but didn't take forever to make."
They're perfect for:
Teacher appreciation gifts
Mother's Day or birthday presents
Bridesmaids gifts (a set in wedding colors would be so beautiful!)
Holiday gifts for anyone on your list!
The best part? You can make a whole batch in one afternoon, and each one turns out completely unique. No two are ever the same, which makes them feel even more special.
On a handmade gift kick this holiday season? Here are some of my other favorite budget-friendly projects:
You’ll find lots of great giftable ideas in this list of Hanukkah crafts
These DIY personalized luggage tags make the perfect gift for your favorite jet setters!
Everybody loves a great t-shirt! These free SVG files will help you personalize a gift for anyone on your list.