
The Beginners Guide To Bedazzling With Rhinestones
So you've decided to get started with rhinestone-ing (is this even a verb)? Be warned, once you get started with rhinestones, there's no turning back! It is incredibly satisfying and addicting. When I first got started with bedazzling, I had so many questions and couldn't find all of the answers I needed. Through research, trial and error, and testing, I've mastered the art of bedazzling with rhinestones and I can't wait to get started!

Are you ready to bling it on?
Bring your designs to life and let your creativity truly sparkle with our comprehensive rhinestone course.
Are you a beginner looking to learn how to work with rhinestones? This beginner's guide will walk you through the steps for applying rhinestones to various surfaces. From t-shirts to phone cases, when you finish reading, you'll be ready to bedazzling with rhinestones anything and everything!
What are rhinestones?
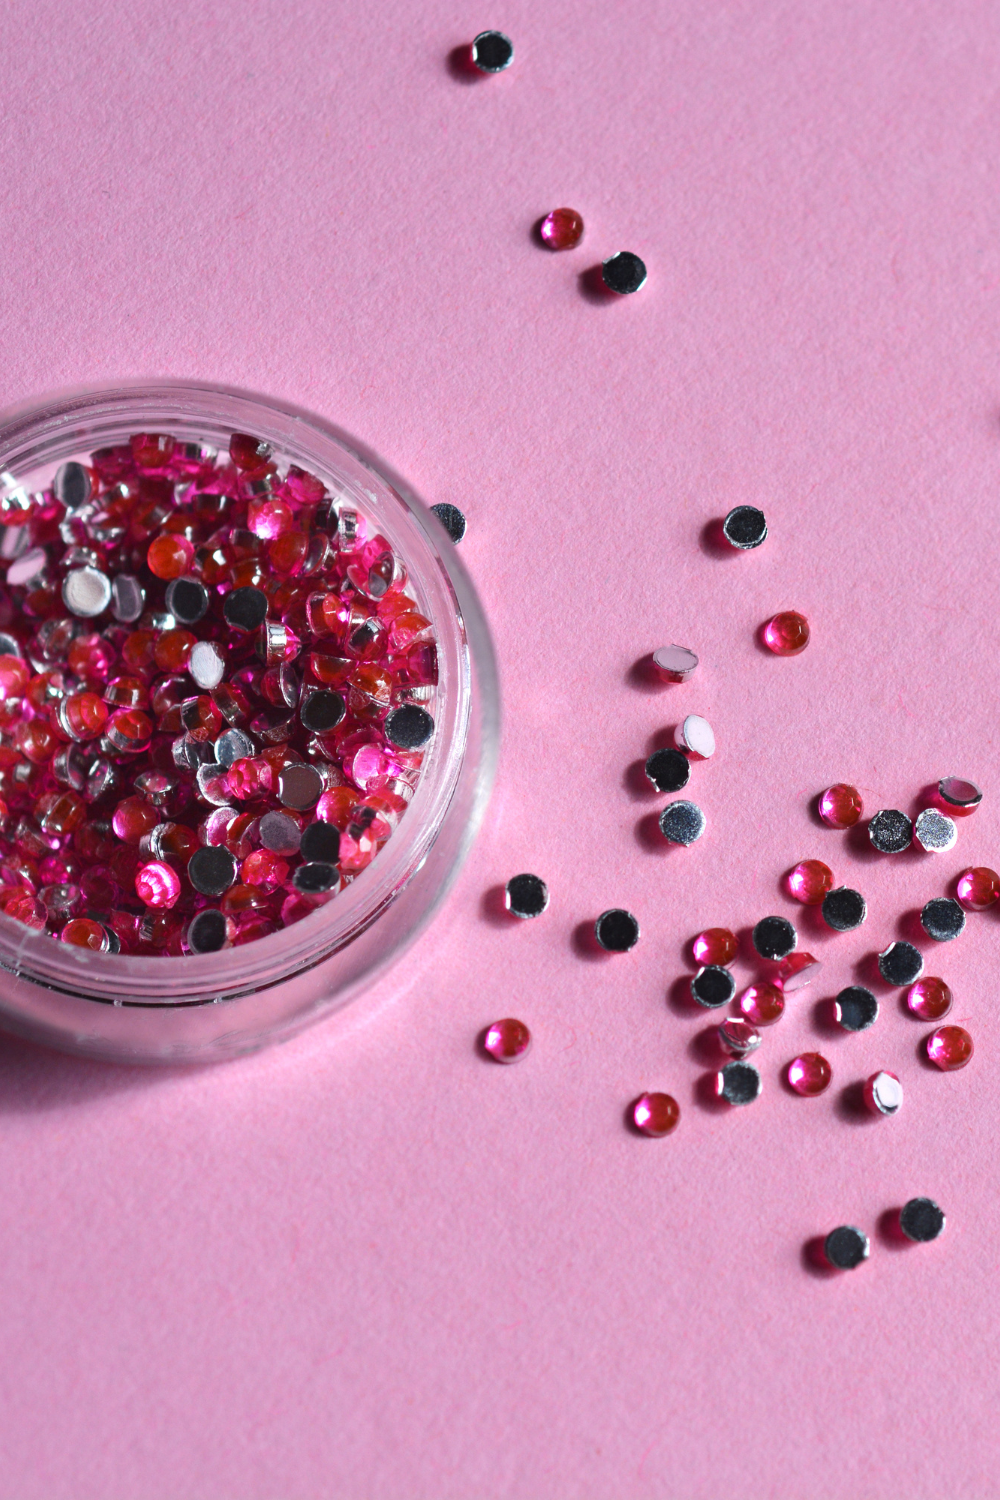
Rhinestones have been around for almost 300 years and have been used for clothing, crafts and so much more! Rhinestones are small, sparkly gems that are often used to add a touch of bling to any surface. They come in a wide range of colors, shapes, and sizes, and are typically made from glass, crystal or resin. Rhinestones are commonly used in jewelry-making, but they can also be used to embellish clothing, shoes, phone cases, and even home decor items.
The term “rhinestone” actually originated from the name of a river in Czechoslovakia called the Rhine. In the 18th century, a jeweler named George Friedrich Strass developed a method for creating high-quality imitation diamonds using leaded glass. These glass gems became known as "strass stones," and eventually the term “rhinestone” became more commonly used.
Today, rhinestones are widely available and are a popular choice for adding a touch of glamour to any project. Whether you're a beginner or an experienced crafter, working with rhinestones can be a fun and rewarding DIY activity.
Are there different types of rhinestones?
Yes, there are different types of rhinestones. Rhinestones come in various shapes, sizes, and materials, with their own unique characteristics and uses. In this beginner's guide, we will explore the different types of rhinestones and help you understand which ones are best suited for your projects.
Flatback Rhinestones: These are the most common type of rhinestones used for crafting. They have a flat back and are often made of glass or acrylic. Flatback rhinestones can be easily applied to various surfaces, such as fabric, paper, and plastic. They are available in different sizes and colors, making them versatile for different design options.
Hotfix Rhinestones: Unlike flatback rhinestones, hotfix rhinestones have a heat-activated adhesive on the back. This adhesive allows them to be easily applied to fabric using a heat press or iron. Hotfix rhinestones are popular for creating rhinestone t-shirts, dance costumes, and other fabric-based projects. They come in a wide range of colors and sizes.
Sew-on Rhinestones: Sew-on rhinestones have holes on either side, allowing them to be stitched onto fabric or other materials. These rhinestones are commonly used in jewelry making and embellishing garments. Sew-on rhinestones can add a touch of elegance and sparkle to any project.
Resin Rhinestones: Resin rhinestones are made from a resin material and have a slightly different look and feel compared to glass or crystal rhinestones. They are lightweight and often come in unique shapes and designs. Resin rhinestones are typically used in jewelry making and can be glued or sewn onto various surfaces.
Hotfix vs. Non-Hotfix Rhinestones: As mentioned earlier, hotfix rhinestones have a heat-activated adhesive on the back, while non-hotfix rhinestones do not. Hotfix rhinestones are ideal for fabric-based projects, as they can be easily applied using a heat press or iron. Non-hotfix rhinestones, on the other hand, require an adhesive such as glue or epoxy to be applied to surfaces.

What techniques can I use to attach rhinestones?
If you're looking to add some bling to your DIY projects or crafts, attaching rhinestones is a great way to do it. Rhinestones are small, sparkling gems that can be applied to various surfaces to create eye-catching designs. In this beginner's guide, I'll walk you through some techniques you can use to attach rhinestones and create stunning projects.
Flatback Rhinestones: One of the most common types of rhinestones. These rhinestones have a flat side that can easily be glued onto surfaces. To attach flatback rhinestones, you'll need a few tools and materials. First, start by gathering your rhinestones, a gem picker or tweezers, and a strong adhesive suitable for rhinestones.
Rhinestone Templates: If you have a specific design in mind, using rhinestone templates can help you achieve the best results. Rhinestone templates are pre-made designs or patterns that you can follow to create your own custom design. You can find a wide variety of rhinestone templates online or create your own using cutting machines like Cricut. Once you have your template, simply apply the rhinestones according to the design and secure them with adhesive.
Heat Press: If you're working with fabrics like t-shirts or dance costumes, using a heat press is an excellent method for applying rhinestones. A heat press allows you to easily adhere hotfix rhinestones to the fabric using heat and pressure. Simply place your rhinestones on the desired area of the fabric, cover them with a pressing cloth or Teflon sheet, and press down with the heat press for the recommended amount of time. This method ensures a secure bond between the rhinestones and the fabric, creating a long-lasting design.
Sewing: For sew-on rhinestones, the best way to attach them is by sewing. These rhinestones have holes on either side, making it easy to thread a needle and sew them onto the fabric or material. Choose a thread color that matches the rhinestones or the fabric, and carefully sew each rhinestone into place. Be sure to secure the thread with knots to prevent the rhinestones from falling off. Sewing allows for a secure and durable attachment, especially for jewelry or garments that will undergo regular movement.
Gluing: If you're working with non-hotfix rhinestones or want to attach rhinestones to non-fabric surfaces like plastic or metal, using a strong adhesive is the way to go. There are many adhesives specifically designed for rhinestones available in the market. Make sure to choose one that is suitable for the material you're working with and provides a strong bond. Apply a small amount of adhesive to the back of each rhinestone and carefully press it onto the surface. Be sure to let the adhesive dry completely before handling the project.
What are some tips for working with Bedazzling With Rhinestones?
Working with rhinestones can be a fun and rewarding crafting experience. Here are some tips to help you get the best results with your rhinestone projects:
Choose the right rhinestones: Consider the size, color, and style of rhinestones that will best suit your project. Experiment with different combinations to find the look you're going for.
Prepare your surface: Before applying rhinestones, make sure the surface is clean and dry. Remove any dust, dirt, or oils that could affect the adhesive.
Use the right tools: Invest in quality tools like gem pickers, tweezers, and weeding tools to make the application process easier and more precise. The main tool you'll need is a wax pencil - these make rhinestone placements so much easier!
Plan your design: If you're creating a custom design, plan it out beforehand. Use templates or draw out your design on paper to visualize how it will look.
Start small: If you're a beginner, start with smaller projects before tackling larger ones. This will help you get a feel for working with rhinestones and build your skills.
Practice proper placement: Take your time when placing rhinestones. Use a pencil or marker to lightly mark the placement before applying adhesive.
Work in sections: If you're working on a large project, it's best to work in sections. This will help you stay organized and ensure that the adhesive doesn't dry before you have a chance to place the rhinestones.
Experiment with different placement techniques: There are many different ways to place rhinestones, so don't be afraid to try out different techniques. You can create patterns, fill in shapes, or even create your own designs. Have fun and get creative!
Use transfer tape for intricate designs: If you're working with a design that has small dots or intricate details, using transfer tape can make the process much easier. Simply apply the transfer tape over the design, press down firmly, and peel it off. The rhinestones will stick to the tape, making it easier to transfer them onto your project.
Seal your rhinestones: To ensure that your rhinestones stay in place and maintain their sparkle, consider sealing them. There are many sealants available specifically for rhinestones that will protect them from wear and tear. Simply apply a thin coat over the rhinestones and let it dry completely.
What are some rhinestone glue tips?
1. Precision tip bottles need to be filled all the way up.
2. Store the bottles with the cap on and a wet paper towel wrapped around it to avoid the glue drying out.
3. If the glue cap gets sealed shut, soak in alcohol to release the cap.
4. You can put use a pin or thumbtack to apply glue as an alternative to toothpicks
5. Less is more when applying glue. If you are going to take a break make sure you don’t have any excess glue around your last row or your following row won’t nestle in nicely.
Are rhinestones suitable for all fabrics?
Rhinestones can be a great way to add some bling and sparkle to any fabric, but it's important to consider the type of fabric you're working with before applying them. While rhinestones can be used on a variety of fabrics, they may not adhere as well or have the same effect on certain materials.
Fabrics that are smooth and non-porous, like satin or silk, tend to work best with rhinestones. The smooth surface provides a good base for the adhesive to stick to, ensuring that the rhinestones stay in place. These types of fabrics also tend to reflect light well, enhancing the sparkle and shine of the rhinestones.
On the other hand, fabrics that are rough or have a lot of texture, like denim or burlap, may not be as suitable for rhinestones. The adhesive may not adhere as well to these types of fabrics and the rhinestones may not lay flat, resulting in a less polished look.
When working with delicate fabrics like chiffon or lace, it's important to be cautious. The adhesive used to attach the rhinestones can sometimes damage or discolor these types of fabrics. It's always a good idea to do a test patch on a small, inconspicuous area of the fabric before applying rhinestones to the entire garment.
If you're unsure about whether a fabric is suitable for rhinestones, it's always a good idea to consult the fabric care instructions or reach out to the manufacturer for guidance.
How can I create my own rhinestone designs? Creating your own rhinestone designs is a fun and creative way to personalize your projects.

What is the best way to store rhinestones?
When it comes to storing rhinestones, it's important to keep them organized and protected so that they stay in the best condition possible. As someone who loves working with rhinestones and bedazzling, I've discovered a few tips and tricks for storing these sparkly gems. So, if you're looking for the best way to store your rhinestones, here are some suggestions:
1. Rhinestone Storage Boxes: One of the easiest and most convenient ways to store rhinestones is by using small, compartmentalized storage boxes. These boxes usually have individual sections or slots where you can place each rhinestone. This helps to keep them separate and prevents them from getting mixed up. Plus, these boxes are often transparent, so you can easily see the rhinestones inside without having to open every box.
2. Craft Organizers: Another option is to use craft organizers that are specifically designed for storing small items like beads or rhinestones. These organizers usually have multiple compartments or drawers that you can use to categorize and store your rhinestones based on size, color, or shape. Craft organizers are a great option if you have a large collection of rhinestones and want to keep them all in one place.
3. Rhinestone Storage Bags: If you prefer a more compact and portable storage solution, rhinestone storage bags might be the way to go. These bags are made of clear plastic and have multiple compartments or pockets where you can store your rhinestones. They are lightweight and easy to carry, making them perfect for crafting on the go. Plus, the clear plastic allows you to see the rhinestones inside without having to open the bag.
4. Bead Trays: If you have a lot of rhinestones and want a larger storage option, bead trays can be a great choice. These trays have multiple compartments and are often stackable, making them easy to store. You can use each compartment to store different sizes or colors of rhinestones, keeping them organized and easily accessible.
5. Magnetic Sheets: If you're worried about your rhinestones getting mixed up or spilling out of their containers, magnetic sheets can be a great solution. Simply attach the rhinestones to the magnetic sheet and place it in a container or storage box. The magnets will hold the rhinestones in place, preventing them from moving around or falling out.
No matter what storage option you choose, it's important to keep your rhinestones in a cool, dry place to prevent them from losing their sparkle or becoming damaged. Avoid storing them in direct sunlight or in a humid environment, as this can cause the adhesive to weaken or the rhinestones to discolor.
Remember, the key to storing rhinestones is to keep them organized and protected. By following these tips and finding a storage solution that works for you, you can ensure that your rhinestones are always in the best condition and ready to use for your next bedazzling project.
What is the best way to apply rhinestones?
Applying rhinestones to your projects can be a fun and creative process. Whether you're bedazzling a t-shirt, customizing a phone case, or decorating a dance costume, there are a few steps you can follow to achieve the best results.
1. Prepare your surface: Start by making sure that the surface you'll be applying the rhinestones to is clean and free of any dirt or debris. This will help the adhesive stick better and ensure that your rhinestones stay in place.
2. Choose the right rhinestones: There are many different types of rhinestones available, such as flatback rhinestones, hotfix rhinestones, and sew-on rhinestones. For beginners, flatback rhinestones are usually the easiest to work with. They have a flat surface on the back that can be easily glued onto your project. Choose rhinestones in different sizes and colors to create a unique and eye-catching design.
3. Apply the adhesive: There are several ways to apply adhesive to your rhinestones. You can use a small dot of glue for each rhinestone, or you can use a heat press if you have one. A heat press is a great tool for applying rhinestones, as it ensures even and secure adhesion. If you're using a heat press, follow the manufacturer's instructions for the best results. If you're using glue, apply a small amount to the back of each rhinestone using a toothpick or a small brush.
What supplies do I need to get started with rhinestones?
Affiliate disclaimer: Although I stand by all of the products I use, I can receive a small commission from any products purchased via my affiliate links.
First things first, you'll need a few supplies to get started. The most important tool you'll need is a rhinestone applicator or wax pencil/pen. This is a handheld tool that has a wax tip on the end where you can pick up your rhinestones. You can find rhinestone wax pencils at most craft stores or online. You can see more info about how to use the wax picker tool here.
Next, you'll need some rhinestones. There are a few different types of rhinestones to choose from, but for beginners, I recommend starting with flat back rhinestones. These are rhinestones that have a flat surface on the back, which makes them easier to apply. Flat back rhinestones come in different sizes and colors, so choose the ones that best fit your project.
If you decide to use hotfix rhinestones, you'll also need some transfer tape or transfer paper. This is a sticky, transparent sheet that will help you transfer your rhinestones from the applicator to your chosen surface. You can find transfer tape at most craft stores or online. It's important to use transfer tape specifically made for rhinestones, as regular tape may not be sticky enough.
Lastly, you'll need a flat surface to work on. This could be a t-shirt, a phone case, a piece of fabric, or any other item you want to bedazzle. Make sure the surface is clean and dry before you start.
I'll break everything down further in this article, but these are the basic supplies to purchase when you are just starting out.
Rhinestones (My favorite rhinestones are either from Amazon or from Be Createful. In my experience, Be Createful has the best rhinestone quality. Use this link & the code ArtBeat for 20% off your first order!)
Rubbing Alcohol
Sand paper or sanding sponge
Rhinestone trays
Hot fix heat tool (use this only if you are working with hotfix rhinestones, see FAQs below!)

Shop All My Faves
I love ordering supplies on Amazon because there are tons of selection results, free shipping (typically ships within a few business days) and it’s never final sale so if you change your mind, you can send the supplies back.
FAQs about Bedazzling with rhinestones
Since there's endless information out there; I thought I would start by answering the most frequently asked questions about working with rhinestones. These are the questions I am asked most often.
-
Glass rhinestones and Swarovski crystals sparkle a lot more than resin.
-
As for Swarovski crystals vs glass rhinestones? Back in the day when it was hard to find sparkly rhinestones, I would have said to go ahead and splurge on the Swarovski, but these days I cannot tell the difference between high quality glass rhinestones and Swarovski.
-
Glass rhinestones. I love these on Amazon and these on Be Createful. Use code ArtBeat on Be Createful for a discount.
-
I cover all of this in my course and also have this DIY tutorial with all of the details.
-
Honeycomb
Scatter
Linear
If you want to learn step by step how to do each of these, you'll love my rhinestones basics course!
-
The adhesives conversation is a long one and ever evolving as I discover new products. I have broken down my favorite glues based on testing, using and washing the rhinestones. Check that out here.
-
There are a few reasons why your rhinestones end up cloudy. The first is that you've used the wrong adhesive. Some adhesives result in cloudy stones which I've experienced first hand. Definitely test everything out on a scrap piece of metal before adhering to a tumbler. The second reason is that you've covered your rhinestones with adhesive. If you get glue on your rhinestones, be sure to clean them off immediately or remove them. The third reason is that you are using resin rhinestones. They aren't the same quality and some adhesives do not react well with resin.
-
No. Rhinestones do not need to be sealed. If you've used the right adhesive and prepped your surface, your rhinestones will stay. Sealing will take away the rhinestone's sparkle.
-
You can use something with a straight edge and press it against the bottom or top of the tumbler while the rhinestones are still wet (depending on which side you're working from). You can also buy guides that slide onto the tumbler.
-
In short, hotfix rhinestones are used with a heat press or a heat tool. Flat back are used with glue. There are also rhinestones that do not have a flat back, but I never use those kinds of rhinestones.
-
Check out patterns on Etsy. There are people who sell patterns which act as a paint by number - just keep a count and change the color according to the instructions on the template. Here is an example of a rhinestone pattern.
-
This is a whole topic in of itself but here are the basics. You can make your own designs using Inkscape and then import them into Cricut design space. The templates are reusable. The flock is on the pricey side, but you can use them again and again and again.
Learn the step by step process for making your own rhinestone templates using a Cricut in myBling it On digital rhinestone course!
-
There are several ways to keep your line straight. You can purchase levelers that wrap around a tumbler or you can do it by hand. To do it by hand, you'll need a marking pencil or marker. I prefer a pencil. Using a pencil, turn your tumbler around with the pencil touching the tumbler until you have a straight line across the bottom. Do this on a few other spots on your tumbler to ensure the lines remain neat and tight. You can use a piece of painter's tape or a rhinestone belt to achieve a straight line.
I personally love this tumbler holder - it comes with the belts, too. The most important thing when working with the honeycomb method is to get the first few lines straight. I also like to mark off lines periodically throughout the tumbler as a guideline while working. If the first line isn't straight, it is very challenging to be successful after that. Take a little bit more time on this first step to ensure that the entire design looks good!
-
Amazon, The rhinestone world, Transfer express
-
In my experience, Inkjoy pens work great when making pens. You do not need stainless steel pens - they're expensive and not necessary. Simply sand off the grip coating on the ink joy and start adding rhinestones.
-
If you spend a lot of time working with rhinestones, eventually you are going to have an achy neck. I find using an adjustable desk or chair works well. Leaning over and looking down for hours will cause neck pain. Try to work at eye level or close by. I like these tumbler mounts on Amazon. As for eye strain, use magnifying glasses and a good light. I like these jewelers glasses - I used them during my jewelry making days and they are amazing. I use three lights when rhinestoning. I have the regular ceiling lights, a bright lamp and direct light. The only downside? Sometimes it gets hot!
-
Yes! It is very easy to make a template on a Cricut Machine or any vinyl cutting machine. Check out my class;Bling it on, for more details!
-
Soak your cloudy rhinestones in acetone or rubbing alcohol for several hours to remove glue. Use a gentle cloth on the top of the rhinestone. This isn't foolproof but usually works really well!
-
AB stands for Aurora Borealis. They are named after the Northern Lights. Clear rhinestones are transparent but still faceted. Crystal are silver with silver coating. Anything AB adds an iridescent finish. This is all personal preference.
-
Foiled rhinestones have foil on the bottom and unfoiled do not.
-
I wrote an entire glue guide here, but below are the questions I get most.
-
E6000 works well on many surfaces. Leather or a surface with oils are sometime hard to use with E6000. Also, E6000 is pretty toxic, so be mindful of that.
-
E6000 or Liquid Fusion worked best for me. However, this depends on the fabric. Leather, for example, is harder to apply rhinestones or a rhinestone appliqué to because it has a treated surface.
-
These are two adhesives that look pretty similar. The main difference is that B7000 is more flexible. For flat, non porous surfaces, B6000 will perform better. Just be sure to work in a well ventilated space.
-
The adhesives conversation is a long one and ever evolving as I discover new products. I have broken down my favorite glues based on testing, using and washing the rhinestones. Check that out here.
-
In my experience, using Elmer's glue for rhinestones is best when working with kids. It doesn't last forever. If you do not want to use E6000 or Liquid Fusion, Aileene's would work better than Elmer's. However, neither Elmer's or Aileene's will have the same permanence as the Liquid Fusion.
-
You only need a UV light if you are using UV resin to adhere rhinestones. This is commonly used in nail salons. Just know that if you are using UV resin or adhesive, you will need a well ventilated space. UV fumes are not good to breathe in.
-
No. Do not do this. It will make your rhinestones cloudy.
-
No. Do not do this. It will make your rhinestones cloudy.
-
You do not need a protective coating. With the right prep and right adhesive, you won't need anything else.
-
No. Do not do this. It will make your rhinestones cloudy.
-
Yes. But do not put in wash machine or dishwasher. Dish soap like dawn is fine for cleaning tumblers.
-
You don't. Glue is more than enough.
-
Yes, it takes about a week for E6000 and Liquid Fusion to fully cure.
-
No. But do not put in wash machine or dishwasher. Dish soap like dawn is fine for cleaning tumblers.
-
Either you didn't prep the surface, used the wrong adhesive or didn't push down hard enough. Other than that, you should never put rhinestones in the dishwasher or wash machine. Even under the best circumstances, rhinestones occasionally do fall off so keep extras on hand.
-
Yes. Use dawn dish soap and a soft brush. Hand wash only and do not put in the dishwasher.
-
By hand. And hang dry.
-
Yes. In my experience, when you use the right glue, they can stay on but you will eventually lose a few - do not put into the wash or the dryer.
-
I have not seen rhinestones tarnish. If you use pronged rhinestones, tarnish is possible.
-
Yes. Hand wash only to maximize the strength of the adhesive.
-
Most glues dry quickly but do not full cure for at least a few days to a week.
-
Stone count may vary depending on the complexity of your design. For a 24 ounce Starbucks Cup (acrylic clear), you will need approximately 3000-3100 SS10 Rhinestones.
-
A very long time!
-
No, they lose their sparkle.