
How To Make Sequin Art Using Beads, Sequins And Pins

How To Make Sequin Art Using Beads, Sequins And Pins
A few months ago I took a trip to New Orleans, Louisiana. As per usual, when I travel, I love to check out the local art scene. I noticed that dozens of galleries along Royal Street carried art made with sequins and beads.
Upon further inquiry, I learned that these were called "Voodoo Flags" or "Haitian Flags" and carried price tags in the thousands.
Voodoo flags are intricately created using hundreds of sequins and beads to cover a piece of fabric. Each sequin and bead is sewn to the fabric and the process can take several weeks for an artist to create.
Since I've always been drawn to things that sparkle, I was intrigued! Because I am not great at sewing and I decided to explore other options for making a vibrant picture out of sequins and pins. I found little information on the internet so I began looking for a sequin art kit. I wasn't thrilled with what existed so I created my method.
This decorative craft is not only captivating to look at but incredibly therapeutic to engage in. Whether you are a seasoned crafter or a beginner looking for a relaxing hobby, creating sequin art using beads, sequins, and pins is a deeply therapeutic craft since it involves hours of relaxation resulting in a stunning picture.
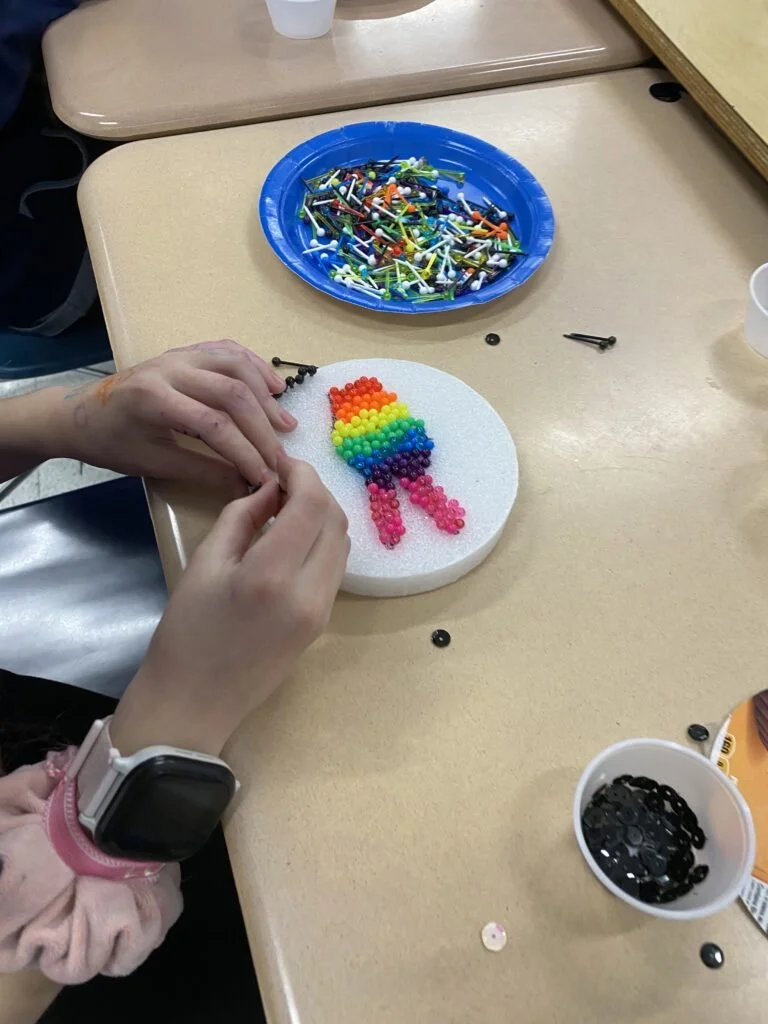
Craft supplies needed to create sequin art using pins and beads
Affiliate disclaimer: Although I stand by all of the products I use, I can receive a small commission from any products purchased via my affiliate links.
Before you begin, you will need to gather a few materials:
A styrofoam disc or polystyrene shapes
Sequins in various sizes and colors
Seed beads - check before purchasing that the sequin pin can fit through the hole of the bead
Sequin pins or small round-headed pins - be sure the head is larger than the hole of the sequin
Scissors
Thumbtacks - I love using the gold ones
Optional: Cricut
*I love ordering supplies on Amazon because there are tons of selection results, free shipping (typically ships within a few business days) and it’s never final sale so if you change your mind, you can send the supplies back.
Check out my favorite items on my Amazon storefront. You’ll find a full page of all of my favorite things!
Step-by-step instructions to make sequin pin art
Step 1: Preparation
First, prepare your base. If you are using a foam board, cut it to your desired size. I purchase the round styrofoam discs at the dollar tree. I love that they come in a two pack.
Since most pins are longer than the thickness of the disc, I use both discs for this project so that pins do not stick out the back.
Step 2: Choosing a Design

Select a design for your sequin art. This could be anything from abstract patterns to detailed images like flowers or animals. You can find templates online or create your own.
I cut stencils or templates using my Cricut machine. I create a 5" stencil on Cricut Design space. In my experience, it isn't worth spending too much time on coloring in the design.
I typically trace the template using a crayon or a marker and then loosely color each section so that I will know which sequins to use for each section. Keep your design simple if you are a beginner.
Step 3: Pinning the Sequins, Pins and Beads

In my experience, there are several ways to make one of these stunning sequin art designs. I love to use a mixture of sequins, beads, dressmaker pins and colorful pins.
I found these kid-friendly pins called Ornapiks and work beautifully. Unfortunately, they're hard to find in art supply stores. If this is the case, just use pins and sequins. When I do this craft with my classes, I use a mixture of pins, beads, map pins, dressmaker pins, and ornapix.
Take a pin and start by putting a seed bead onto the pin. The bead not only adds an extra decorative element but also helps to keep the sequin flat and secure.
The bead is entirely optional - if you would prefer to just use a sequin and avoid this extra step, you can do so. When working with kids, I skip the bead step.
Start by following your design outline. Push each sequin into the styrofoam until it is flush with the disc. If the pin pushes all the way through, place the second disc under the top disc. Continue following your design outline until it is complete.
It's helpful to work from the center of the design outward. This technique prevents the fabric from puckering and keeps your design aligned.
If necessary, use tweezers to handle the sequins and beads if they are too small to manipulate with fingers. A thimble can be useful to push pins into tough spots without hurting your fingers.
When doing this craft with kids, they can typically handle the sequins and beads without needing tweezers.
Step 4: Filling in Large Areas

For larger areas, you might want to layer sequins to add depth and fullness. If the area is very large, use larger sequins to speed up the process.
You can even overlap sequins slightly to avoid gaps and create a textured, luxurious effect. Additionally, you can layer a small sequin on top of a larger sequin to add more texture and sparkle. Continue to add sequins until your entire design is covered.
Step 5: Final Touches
Once your design is filled in, step back and look at it from a distance. This perspective might reveal gaps or uneven areas that need additional sequins or beads. Make adjustments as necessary until you are satisfied with the overall look.
Remember, the back of the artwork will have protruding pin ends, so it’s best to place an additional styrofoam disc underneath. I typically use Aileene's craft glue at the end to be sure the pins do not fall off.
Once the two discs are glued together, I add a piece of two inch ribbon to the sides. We use a small amount of glue and then gold or silver thumbtacks to secure it further.
You can add a loop of ribbon to the back to make it easy to wall hang or you can mount the finished sequin pin art in a shadow box.
What else can you make using sequins, pins and beads?
Christmas ornaments - check out these sparkly ideas!
Final Thoughts
Creating sequin art is a delightful, relaxing, and deeply rewarding process that yields stunning results. It allows for endless creativity, from the choice of the design to the selection of sequin colors.
Beyond its aesthetic appeal, the process of creating sequin art is meditative and can be a great way to relax and unwind. Whether for personal enjoyment or as a handmade gift, sequin art crafted with beads, sequins, and pins is sure to dazzle and impress.
If you love things that sparkle, check out my rhinestone course, Bling It On!