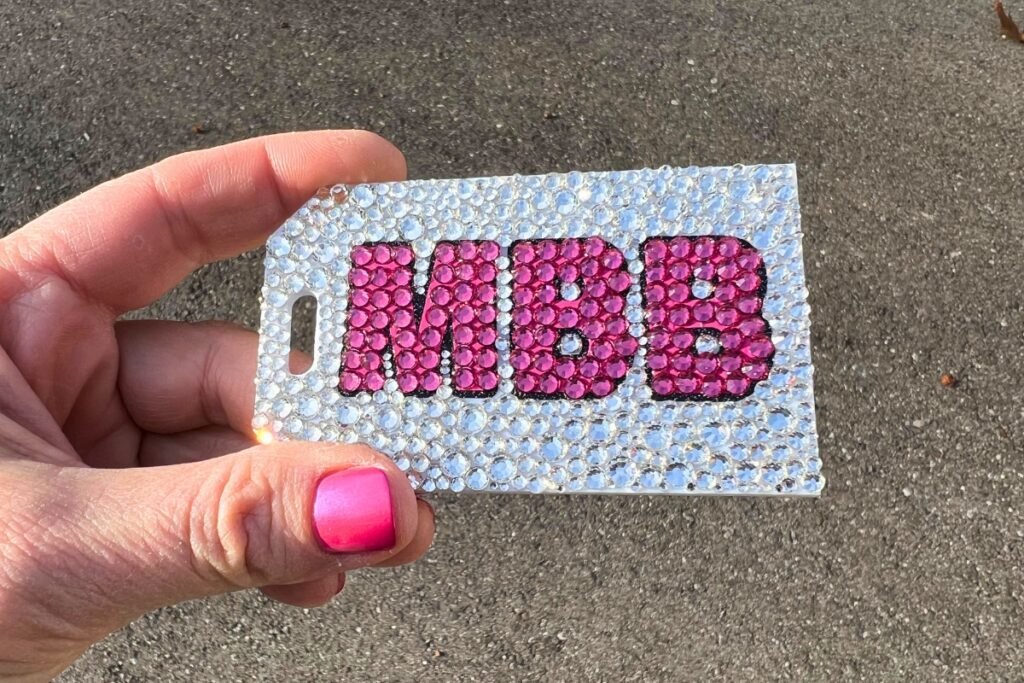
How To Make A Personalized Rhinestone Luggage Tag
How To Make A Personalized Rhinestone Luggage Tag
I’m sure you’ve seen influencers say on TikTok: Make this special thing. Today the best thing I saw was a rhinestone luggage tag and now I can’t stop thinking about making one! It’s sparkly and practical! We’ve all been there; you’re at the airport, and every single bag looks exactly the same.
For your next trip, consider creating your very own personalized rhinestone luggage tag and/or passport holder.
Custom luggage tags also make great gifts and if you’re looking to start a rhinestone business, interested buyers will pretty much purchase anything personalized! Custom is the golden ticket when it comes to small businesses.
If you’re new to rhinestone art or want to learn how to use your Cricut to make rhinestone templates, check out my digital rhinestone course below. You’ll be bedazzling like a pro in no time!
Are you ready to bling it on?
Bring your designs to life and let your creativity truly sparkle with our comprehensive rhinestone course.
A Personalized Rhinestone Luggage Tag
I’m sure you’ve scoured the Etsy app in search of the perfect gift for a world traveler. These days the site is filled with Etsy ads and vintage treasures but handmade gifts are the reason I like to shop there.
With so many views of Etsy, you could totally start your own travel line of handmade pieces. It is a global marketplace so its a great way to get started doing custom. And honestly, there is not a large amount of sellers on etsy making a personalized luggage tag. Trust me!
What you’ll need to make a custom rhinestone luggage tag
Affiliate disclaimer: Although I stand by all of the products I use, I can receive a small commission from any products purchased via my affiliate links.
DIY Rhinestone Luggage Tag
Blank luggage tags with plastic tag holder (these have free shipping on Amazon) *be sure to only use white ones; clear won’t look as good
Toothpicks
*I love ordering supplies on Amazon because there are tons of selection results, free shipping (typically ships within a few business days) and it’s never final sale so if you change your mind, you can send the supplies back.
Check out my favorite items on my Amazon storefront. You’ll find a full page of all of my favorite things!
To make a custom bag tag, you do not need to own a Cricut so I’ll also tell you how to make a luggage tag without purchasing a vinyl cutter. But first, let me show you how to make made-to-order items that can be rhinestoned using your Cricut.
How to make a custom rhinestone luggage tag
1. Head over to the Cricut design space and create a text box. Insert the three letters you’d like to use. This can be an initial or a 3 letter name.
Alternatively, you can truly create any design, but I stuck to names for this one.
2. Make the three letters one inch shorter than the actual luggage tag so that there’s a good amount of negative space surrounding your design. When I made my new luggage tags, I made one with a rhinestone background and one just with the name filled in.
It’s a great idea to keep one side blank to add your name, phone number, shipping addresses and zip code.
3. Weed the vinyl and use transfer tape to move the design onto the luggage tag. I like using the transfer tape with the grid so that its easier to see if everything is lined up and level.
4. Use a scraper such as a credit card or gift card to smooth any bumps.
5. Add the rhinestones you’ll need to a rhinestone tray. For the inside of the letters, I used the linear method. For the outside, I used the honeycomb method. But you do you and make whichever kind you want.
6. Using a toothpick, begin adding adhesive to the first letter.
7. Using a wax pencil, pick up a rhinestone and place it directly onto the adhesive. The wax pencils look simple, but trust me, they’re powerful tools!
I always advise starting from the inside and working your way out. Do any tight spaces as you go.
Add rhinestones to the letters on your luggage tag
8. Keep going until you’ve finished all the letters and then move on to the background and outline.
9. Let dry and cure for 24-36 hours before heading out on your trip.
Finished DIY Rhinestone Luggage Tag
Some variations to the rhinestone luggage tag:
Make your luggage tag in the shape of a little suitcase using either a laser cutter or by hand. By the way, did you know that most public libraries have free laser cutting machines?
This is a great way for creative entrepreneurs to make one of a kind items without purchasing all of the craft supplies and machinery. You might need some digital items to get started like an SVG (cut file) of a luggage tag. Some libraries sell acrylic, while others are BYO.
Do your own research and find out your own information on what you’ll need to bring with you. I love that libraries have an in-person help center for crafters and creatives to make special goods with extraordinary care from library studio Stagg.
I am blown away by my local library’s maker space. I’ve gone there to do on site work and have made more creative goods than I can count!
So…what are you waiting for?? Start getting crafty and make a brand new bag tag! Happy Crafting!
Looking for more rhinestone crafts? Check out these posts!


