
Easy DIY Decorative Thumbtack Craft to Make for Home

Easy DIY Decorative Thumbtack Craft to Make for Home
Next time you decide to purchase new art for your home, consider making it yourself. That’s right, you can totally make super cool art in just a little bit of time with just thumbtacks and a few other items. I promise it will become one of your favorite DIY’s!
I’ve been doing this projects for years. This, along with other dollar store crafts are perfect for teens, tweens and adults.
Why? Because all you need are some gold thumb tacks, a canvas and a piece of paper. It is a perfect project for a rainy day. Thumbtacks aren’t just for your bulletin board anymore!
There are many free tutorials online, but when I went to make them the first time, I couldn’t find any that I really loved. So I decided to write up exactly how I do this project in my classes.
And again, I’ve been doing this for over 20 years and even the most resistant kids love it. It is a great way to explore different textures without breaking the bank.
How to Make Thumbtack Letter Art
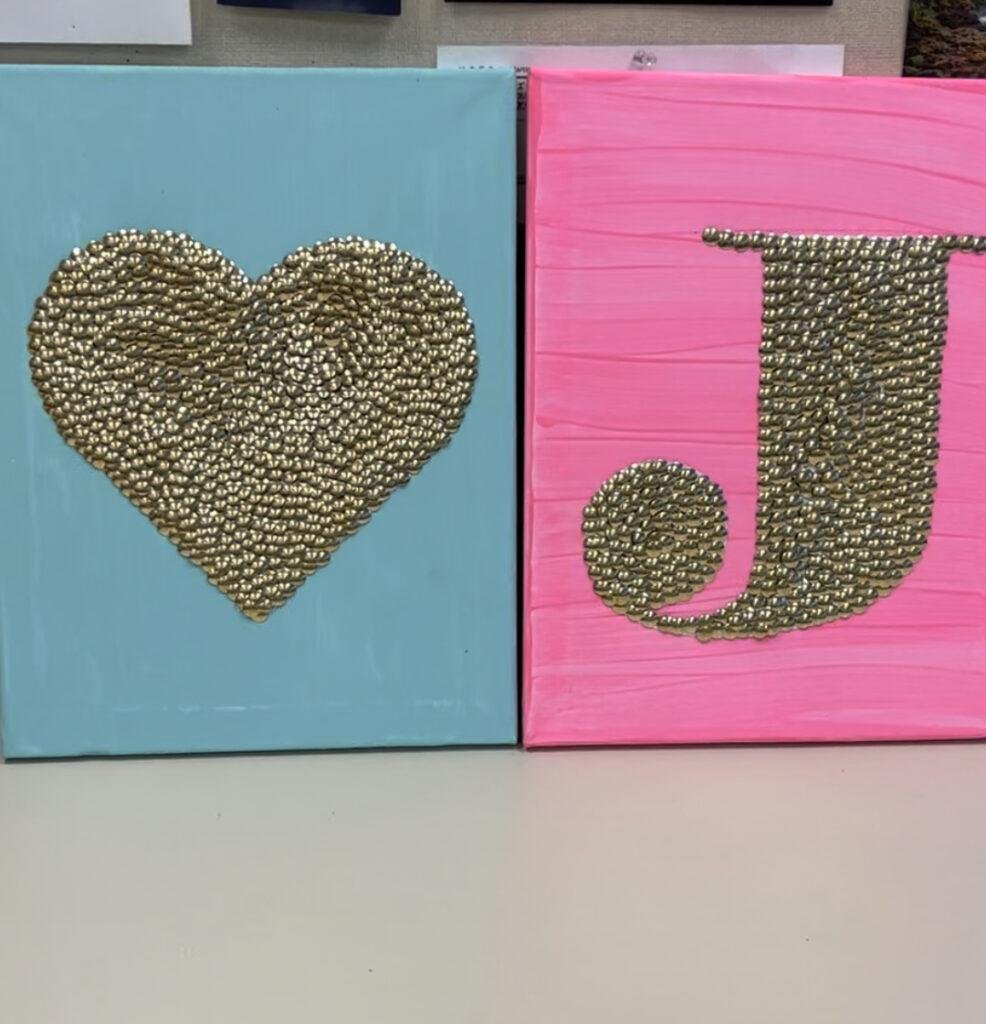
Examples of thumbtack art from my tween class
When gathering your craft supplies, head to the local crafts store or to the Dollar store. Pick up silver thumb tacks, gold thumb tacks or decorative thumb tacks.
You can make these any way you want, but consider experimenting to get a fun texture. I’ve done these with kids starting in 3rd grade and up.
What You Need to Make Thumb Tack Art
Affiliate disclaimer: Although I stand by all of the products I use, I can receive a small commission from any products purchased via my affiliate links.
Paper letters (you can either trace a letter, use a Cricut machine to cut a perfect one or just use your own handwriting)
Hot Glue Gun or Craft Glue
Patience!
Step by Step Instructions for Making Thumbtack Art
Trace or cut a letter onto a piece of paper. You will want your letter to be smaller than the canvas or foam core.
If you do not want a white background, use some spray paint to make it colorful

Place the letter onto the canvas
2. Place your thumbtacks into a glass container or bowl Take a handful of thumbtacks and push them into the letter to hold it into place.
Sometimes the paper letter will buckle – do not worry – all of it will be covered with push pins eventually

Add a few thumbtacks or pushpins to hold the paper down
3. Start on the top of the letter and begin placing thumbtacks along the entire perimeter of the letter (the reason I have my classes do it this way is in case someone runs out of time and cannot finish, at least they can go home with the perimeter completed)

Work around the perimeter
4. Once you’ve made your way around the letter, begin filling in the middle. Start right next to the first row and add a small hole very close to the tacks you’ve already placed.
Keep going until the entire thing is filled in. Do not worry if it doesn’t look perfect – they all seem to look beautiful in the end.

once the perimeter is complete, begin filling in the letter
5. Add hot glue to the back of the canvas so that the tacks do not fall out. You can also use craft glue if you have extra time.
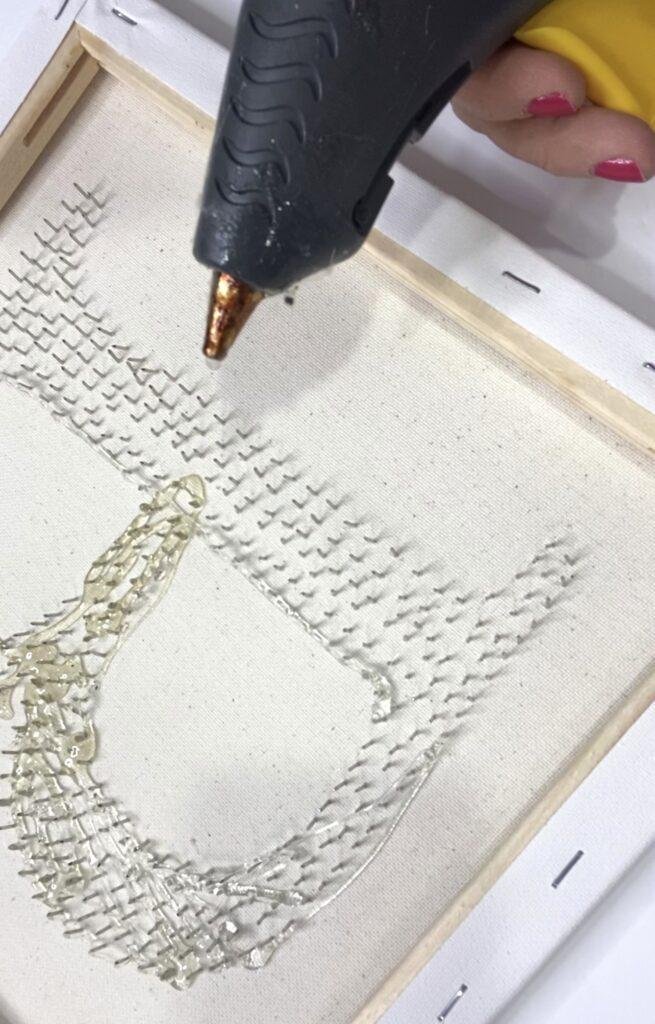
flip the canvas and add hot glue to the back. Safety first!
6. Cut a notch in the decorative paper and glue it on to cover the tacks. The notch is so that you can still easily hang the canvas

Cut a knot into the decorative paper
7. Glue the paper to the back of the canvas. I like taking this extra step because it prevents injury both in the classroom and at home.

The notch is nice so that you can easily hang your new thumbtack art
I also encourage my students to never judge their art in the middle of a project. Hang your masterpiece onto a wall!
What Other Projects Can I Make Using Thumbtacks?

heart canvas
Thumbtack Globe: Grab some styrofoam balls and begin drawing out a world map. For this project, I would recommend using green and blue thumbtacks instead of silver or gold.
Thumbtack Decorative Balls: Make a statement in the middle of your table by covering an entire styrofoam ball in tacks. It’s a fun way to add texture and some shine without breaking the bank.
Thumbtack Pumpkins: This is another successful project because these can be displayed year after year. The dollar store or your local craft store should have faux foam pumpkins starting in September.
Grab one and either make a pattern or cover the entire pumpkin in tacks. I’ve even had kids in my class make a thumbtack jack-o-lantern by using contrasting thumbtack colors.

Thumbtack pumpkin
Valentine’s Day Heart Art: Use a heart instead of a letter – see beautiful they are!
Thumbtack Books: A local store sells these for almost $100! They take coffee table books and add thumbtack designs to the cover.
I will assume that the thumbtacks need to be pushed in with extra force or with a hammer – would not be the easiest for kids.
If you love these beautiful crafts and you would like to try another of my absolute favorite projects, check out this sparkly cactus craft.