How to Customize Your Crocs with Charms & Bling
People love Crocs. They're casual, easy to wear, and come in tons of vibrant colors. You can add custom shoe charms to each pair as a fun way to level up your footwear game and even bedazzle them with rhinestones and other gems and sequins. Sure, you can place an order for custom designs (or custom Croc charms), but the delivery time means it'll take a little while for you to get your pair (and things like a minimum order quantity, the time it takes to make handmade items, and the like can make that turnaround time stretch even longer - make sure you get a tracking number!)
Luckily, you can make next level custom Crocs at home. Whether you're looking for the perfect fit for your little kid or are looking for the best quality bedazzled crocs for your big kid (or, let's face it, yourself!), I'm here to help. This post will walk you through my journey to make custom Crocs and all my best tips for creating your own.
My niece wearing the bedazzled crocs she designed
My niece turned eight and she asked me to design a custom pair of bedazzled Crocs shoes for her to wear all summer long.
At first, the task seemed easy enough - add rhinestones with some glue and then she could add Croc charms (I bought on Amazon with free shipping).
I set out to find the perfect pair of plain Crocs and asked her what her favorite color is. Her answer? Tie dye!
I definitely didn't expect that but since I love color and tie dye and all things bedazzled. I knew I was up for the task. At first I considered making tie dye crocs and quickly realized how ridiculous that was.
After perusing TikTok and the crocs website, I was pleased to know that they actually make tie dye Crocs so I got her a pair in her size. I went to ETSY to get ideas from other custom orders but wasn't really happy with what I found.
I began experimenting...and failing to keep the rhinestones on the shoes. But ultimately I figured out the secret sauce for making sure that the rhinestones stayed secure.
Are you ready to bling it on?
Bring your designs to life and let your creativity truly sparkle with our comprehensive rhinestone course.
What kind of glue works on custom bedazzled rhinestone crocs?
When I had my first failure, I used E6000. I used it because it typically sticks to just about anything. But it didn't stay on the crocs.
With some trial and error, I made my very first pair of bedazzled crocs and I love the way they look!
The ONLY GLUE that worked for me was Loctite Ultra Gel. But...you have to follow a very specific process to get it right!
What You'll Need to Create Custom Crocs:
Affiliate disclaimer: Although I stand by all of the products I use, I can receive a small commission from any products purchased via my affiliate links.
Wax Pen (I like these because they can be sharpened)
Rubbing Alcohol
Glue (Do not use E6000 for this project - only use this glue)
Safety Glasses
I get some of my rhinestones from Amazon (linked above), but I get the bulk of my rhinestones from this incredible rhinestone online store. Use coupon code artbeat for 10% off all purchases!
How to Make Custom Bling Crocs That Fit Your Unique Style
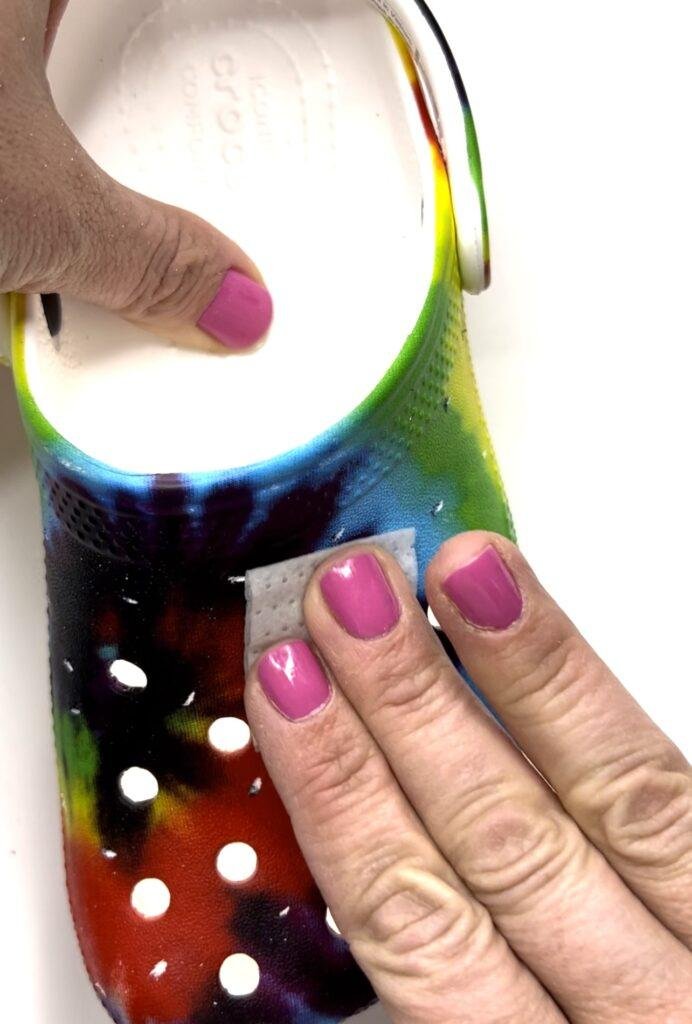
1. Prep your Crocs. The oil from your hands will cause the rhinestones not to stick. I very gently wiped the crocs with rubbing alcohol.
With designs like tie dye, you will want to be careful and not rub too hard. The design will wear off. If you have a jibbitz charm or anything attached to your Crocs, make sure to remove it before you start bedazzling.
Use an alcohol prep pad to clean off any oils or dirt.
2. Using your sharpie marker or any permanent marker, add dots where you want the rhinestones to go. I spaced my rhinestones carefully because I still wanted her to be able to add and trade designer charms with her friends.
Mark where you want the rhinestones to go
3. Grab your Dremel tool (sandpaper tip) and gently make an indentation wherever you have added sharpie dots.
This step is the MOST important because the rhinestones will not stick to the surface of the Croc material. You have to remove the top layer to get them to stick and stay.
Also, be sure to wear safety glasses! You do not want Croc fragments flying into your eyes!
You have to use a Dremel tool otherwise the rhinestones do not stick!
4. Once you have made your indentations, you can begin adhering the rhinestones. Do a few at a time because the glue dot will dry very quickly.
Also, be sure to work in a well ventilated space. Loctite is strong stuff! Working outside with the glue is probably the smartest idea
5. Push down/hold down the rhinestones on your pair of crocs using weight. Some people use clamps but I had way too many rhinestones for that to work so I used painter’s tape and then put some heavy stuff on top for 24 hours.
6. Once the glue was fully cured, I added some designer charms for her and decided that she can also add her own Jibbitz. I love the final result!
In conclusion, making custom rhinestone bedazzled crocs requires two main things: removing the surface with a dremel and using the right adhesive—no shipping address, tracking number, many business days' wait, or shipping services required.
If you want more rhinestone glue advice, check out my other blog post here.
Here’s the finished pair of custom clogs:
Want to learn how to bling out a candy box? Check out this tutorial.


