DIY Shaving Cream Marbling Art for Kids to Make

No doubt, the easiest, cheapest, and best homemade marbled crafts are done with shaving cream marbling. This marbling method is one of my all-time favorite art activities. You’ll never get tired of it and you’ll keep returning to it repeatedly over the years because everyone can do it…and I mean EVERYONE! It’s one of those craft projects everyone loves because there is no wrong way to do it. I’ve tried out shaving cream marbling using unglazed ceramics, cardstock and fabric. So it’s time to get ready for some messy fun!
You’ll need to decide which object you want to marble. Personally, I think cardstock is the best place to start. Practice making several prints so that you can see which colors work best together. It is best to practice on a piece of paper first so that you can get a feel for the material. Once you’ve decided on what you like best, move on to something like an unglazed* ceramic piece or fabric.
*glazed ceramic pieces do NOT work. The shaving cream needs a porous material in order for the ink to really sink in.
What you’ll need:
Affiliate disclaimer: Although I stand by all of the products I use, I can receive a small commission from any products purchased via my affiliate links.
MATERIALS
- Gloves – you will definitely not want to skip this step! I personally LOVE nitrile gloves
- Shaving cream (make sure it says shaving foam or cream instead of “gel”)
- Shallow baking dish, such as a styrofoam tray or aluminum tray.
- Liquitex acrylic inks (other paints and inks do not work as well)
- Skewer
- Items to marble (cardstock paper, unglazed ceramics and natural fibers)
- Scraper such as a square piece of cardboard, thick popsicle stick or a spatula
- Smock (yes, this is definitely a little bit messy)
- Foam Brush
- Mod Podge
Before starting, be sure to put on gloves and a smock. Cover your table or surface – liquitex inks stain!
Instructions
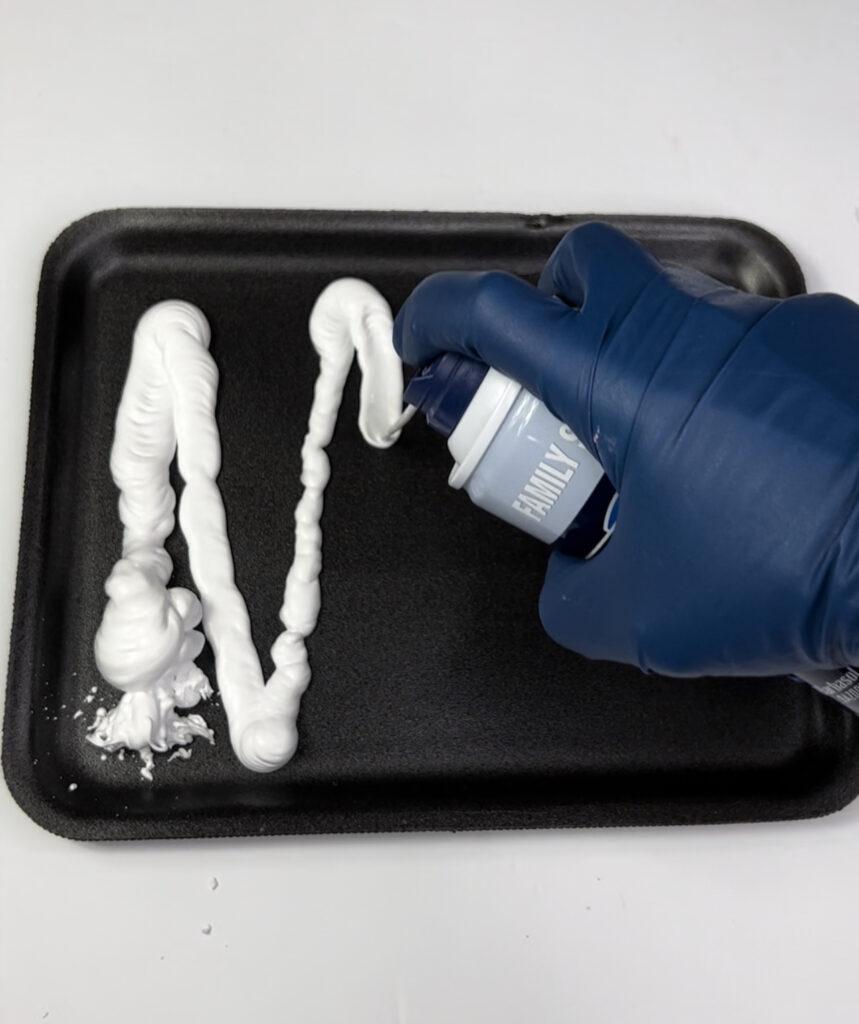
- Create a layer of shaving cream
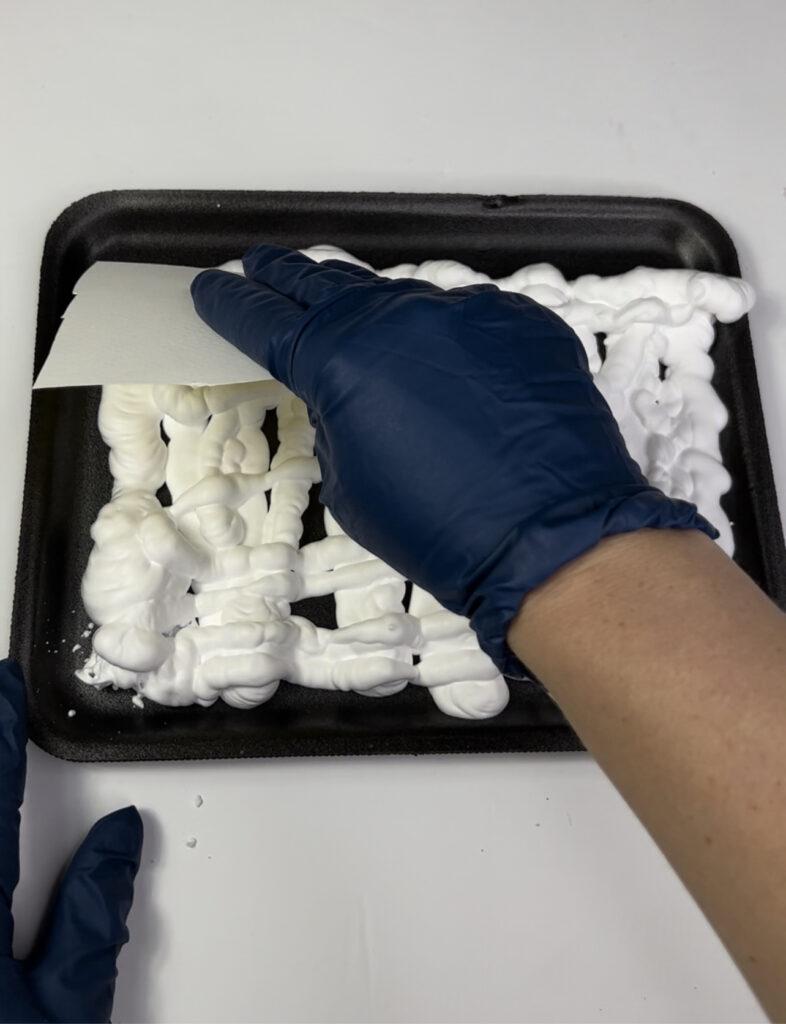
First, grab some shaving cream and spray a layer to cover the bottom of your baking dish, cookie sheet, foam tray, or plate. It doesn’t have to be perfect. Perfection is the enemy of creativity! Level it out as much as you can using either a popsicle stick, spoon or spatula.
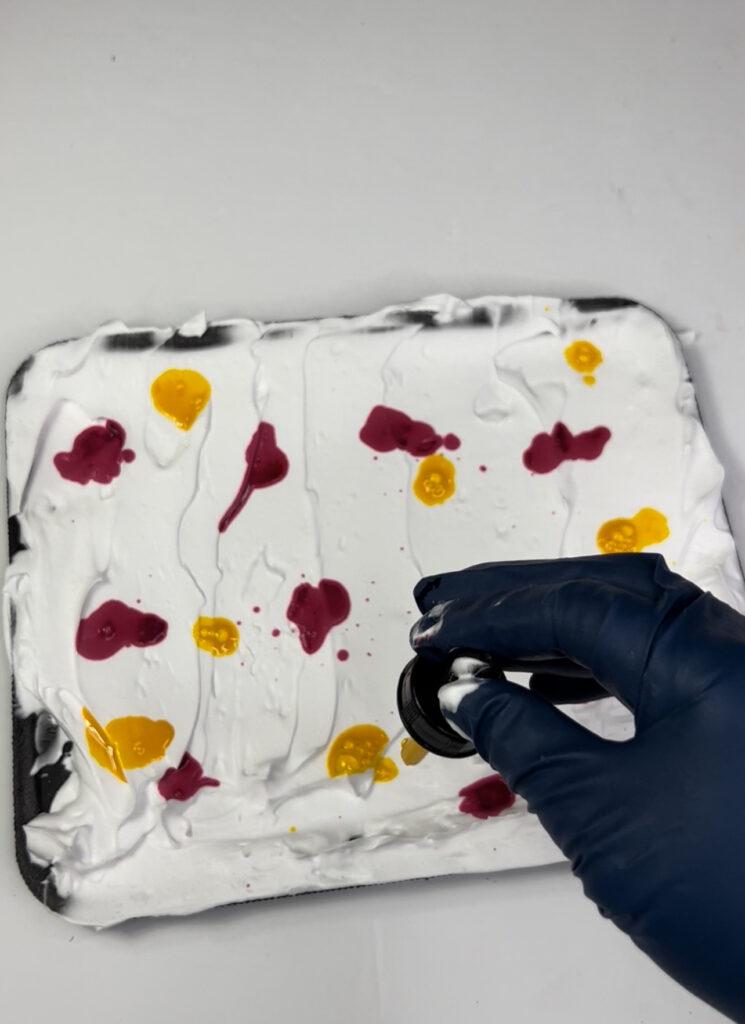
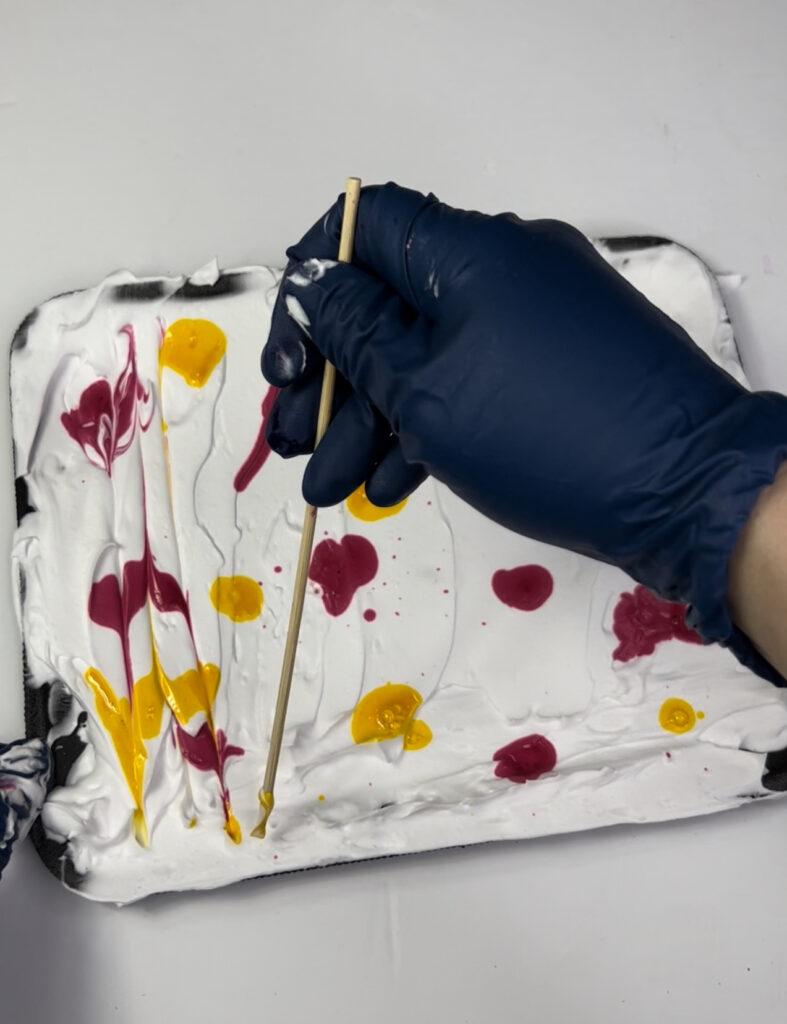
2. Add color
Add several drops of liquitex acrylic inks to the surface of the shaving cream. (I have tried other paints like liquid watercolor and acrylic paint, but the inks definitely work best with the shaving cream because the color remains vibrant and saturated) Feel free to add several colors of paint – but don’t overdo it! I typically drop 2-3 different kinds of liquitex acrylic ink onto the shaving cream (for an 8×11” tray I used about 5-6 drops of each color.
3. Swirl the paint
The next step is the fun part. Grab a skewer like the kind you use for shish kebabs to swirl the paint around to create a marbled look. (You can also use the end of a paintbrush, craft stick, or chopstick).
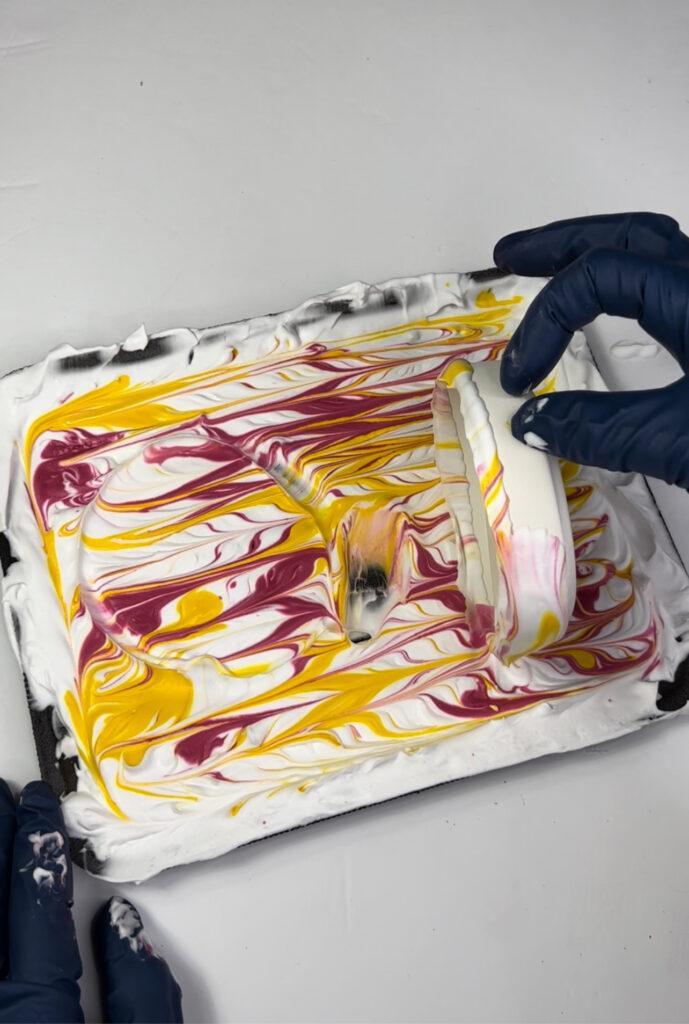
4. Press the object into the shaving cream
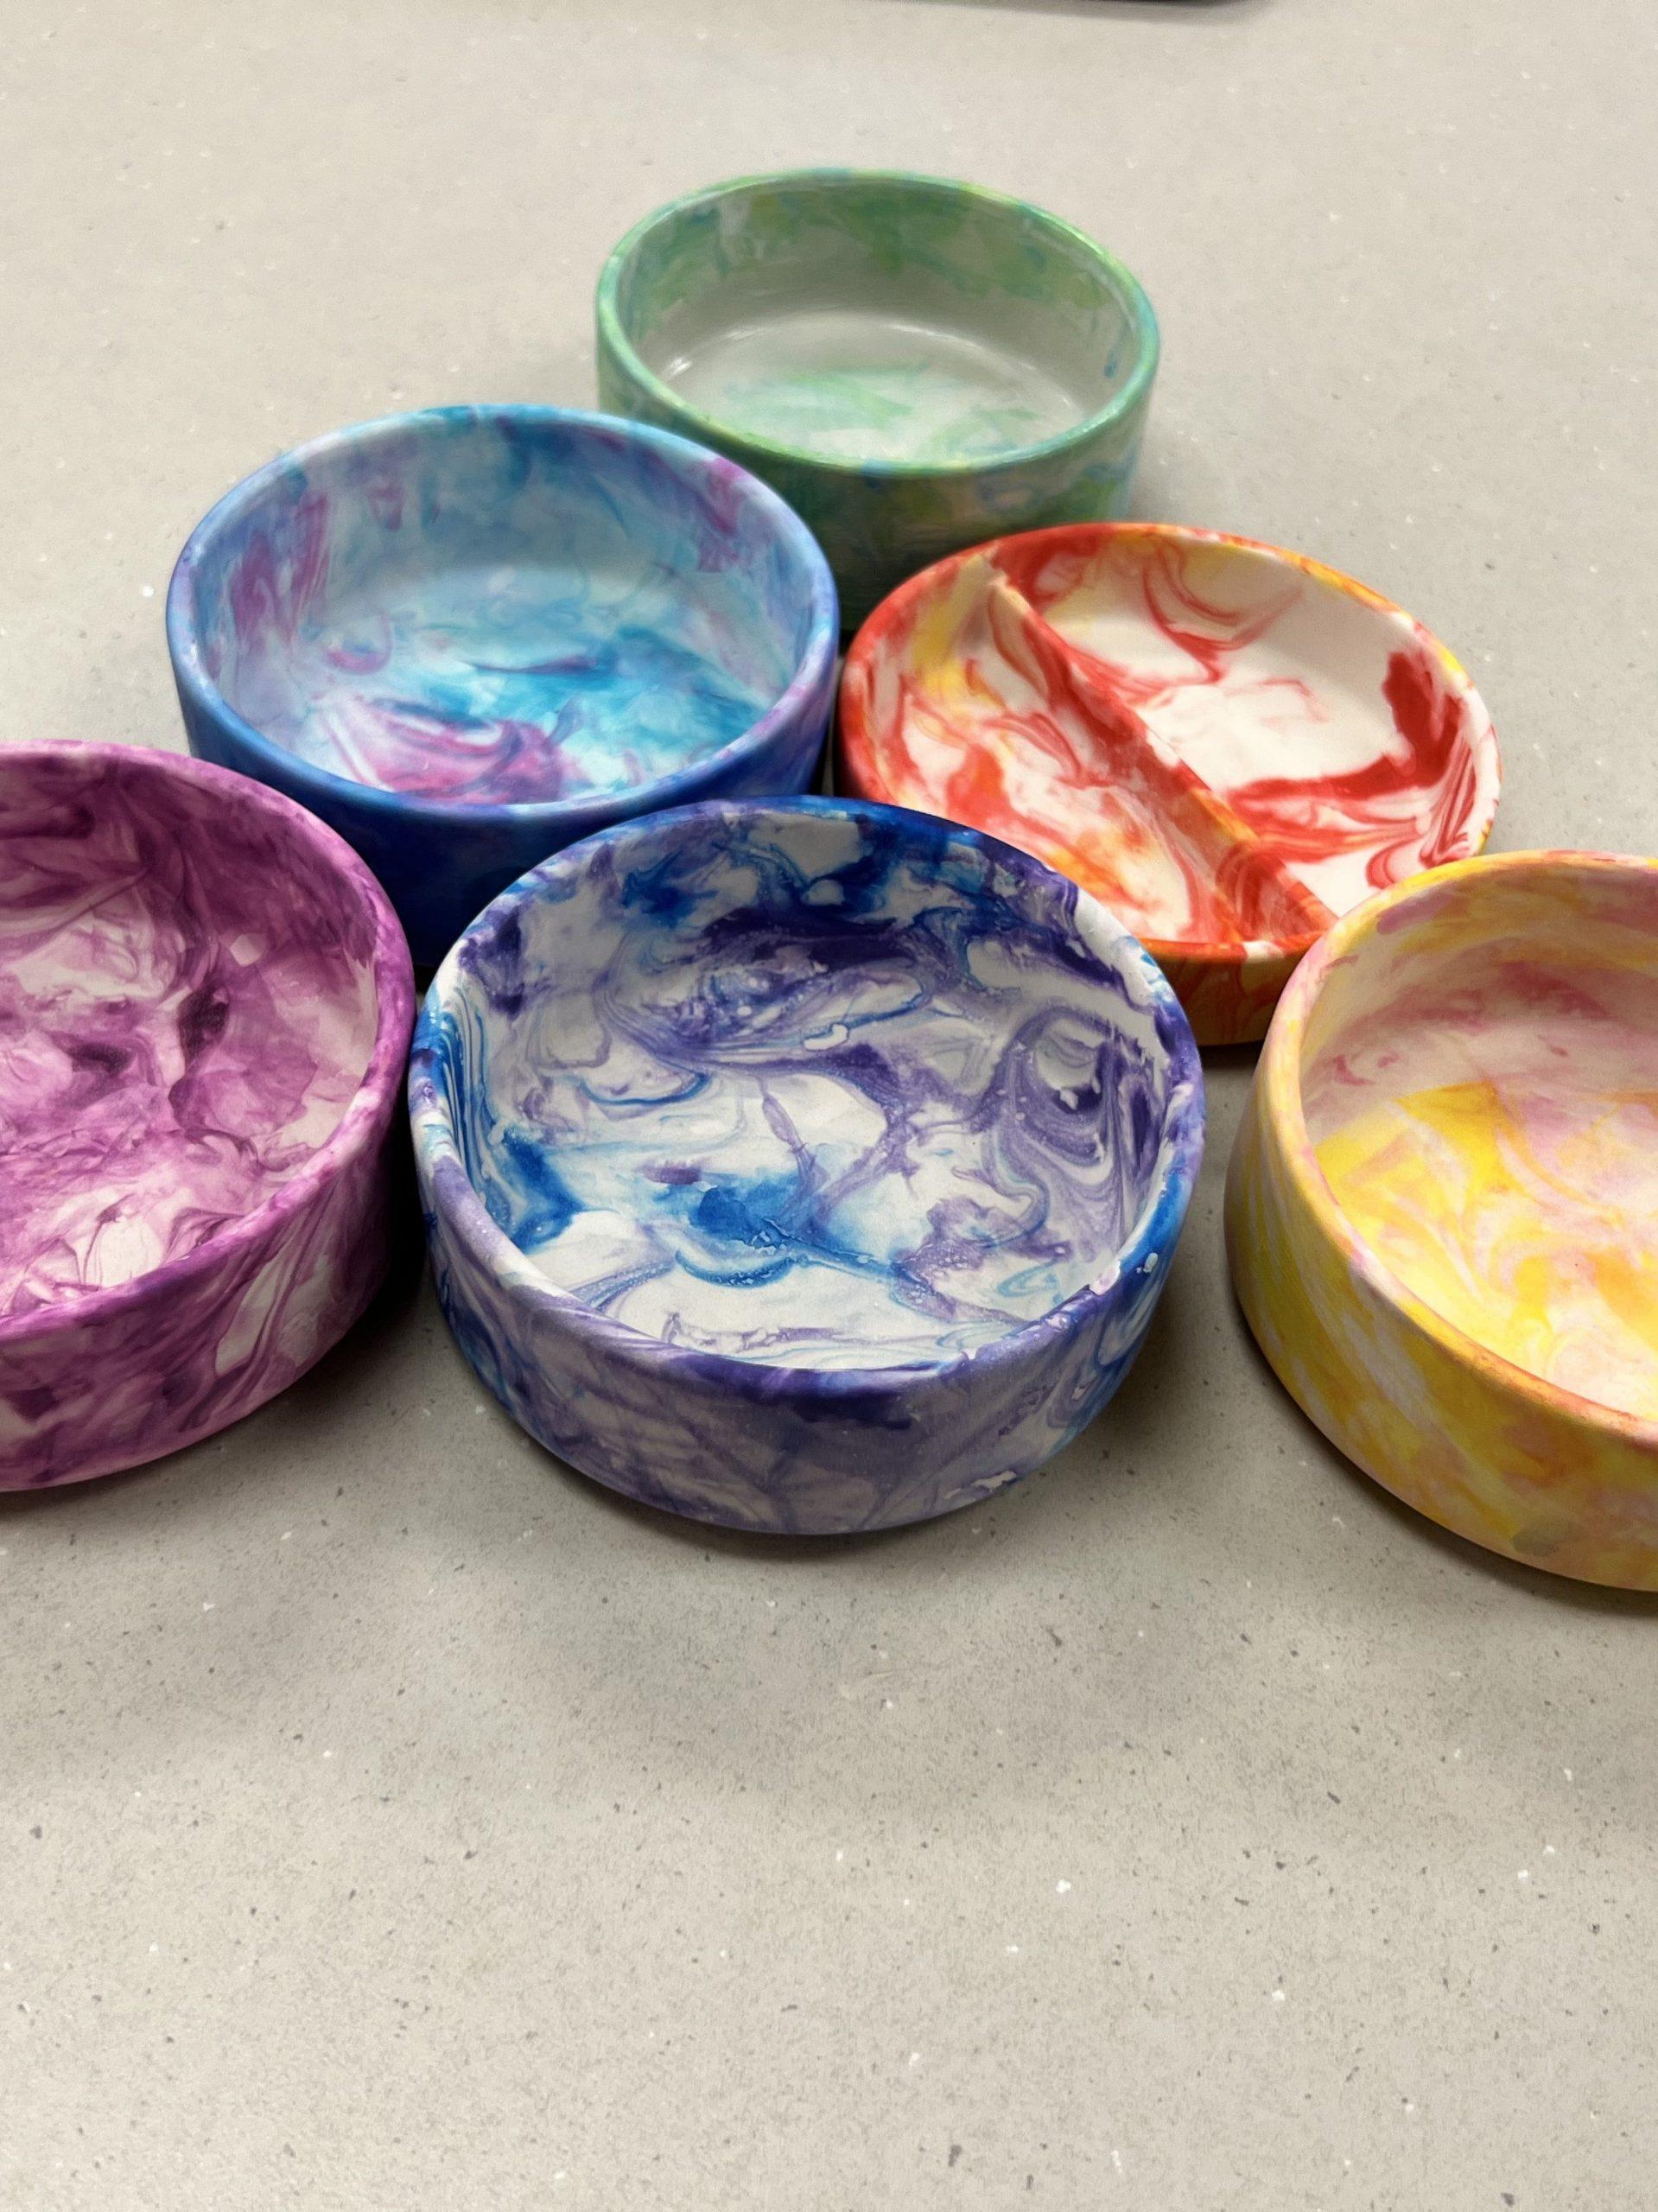
Carefully roll the unglazed ceramics into the paint-covered shaving cream and let the shaving cream mixture sit for about 5 minutes. For flat objects, you can simply push the object into the foam. For bowls, you can scoop up your shaving cream and push it directly onto the unglazed ceramic piece.
*glazed ceramic pieces do NOT work. The shaving cream needs a porous material in order for the ink to really sink in.
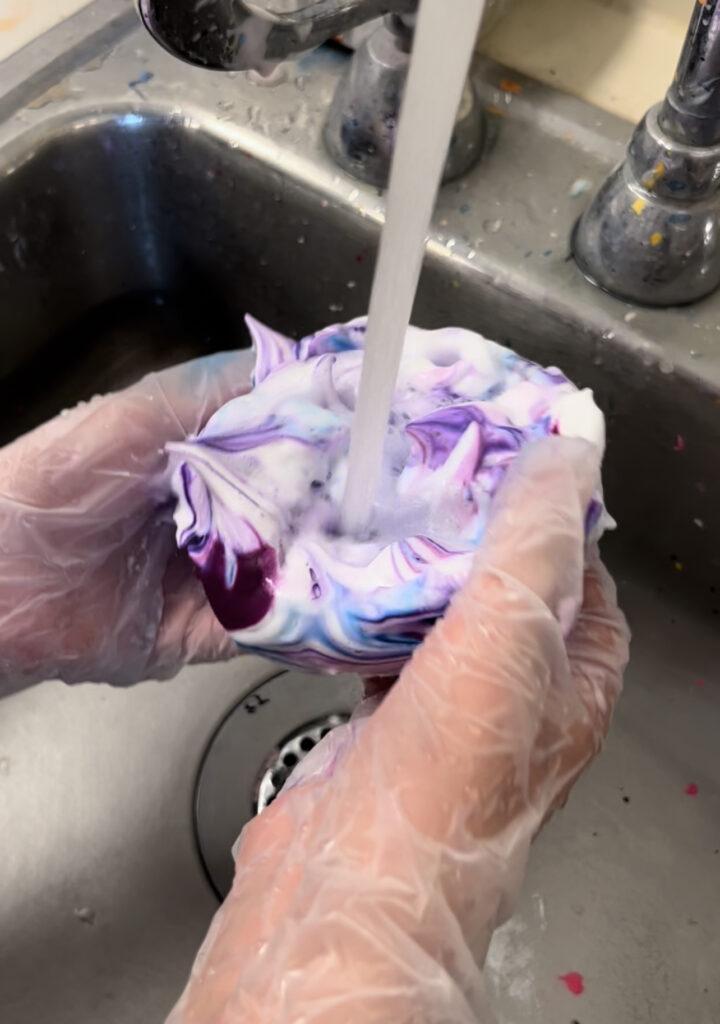
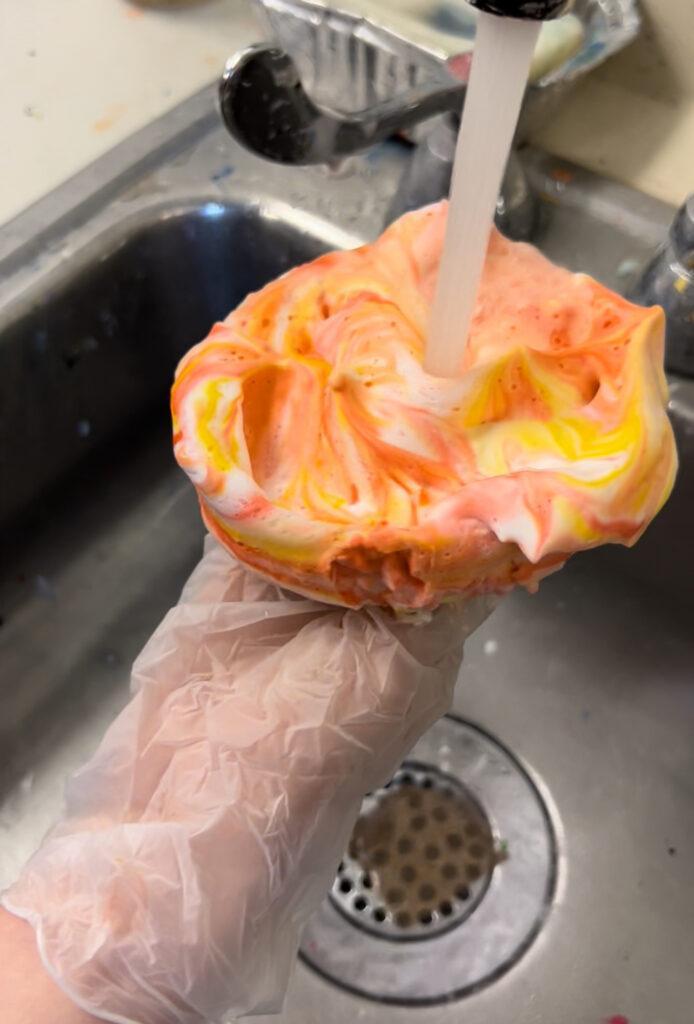
5. Rinse off
Take your masterpiece to the sink and wash off all of the excess shaving cream. Wash off your ceramics to reveal the beautiful art you’ve just created.
6. Repeat!
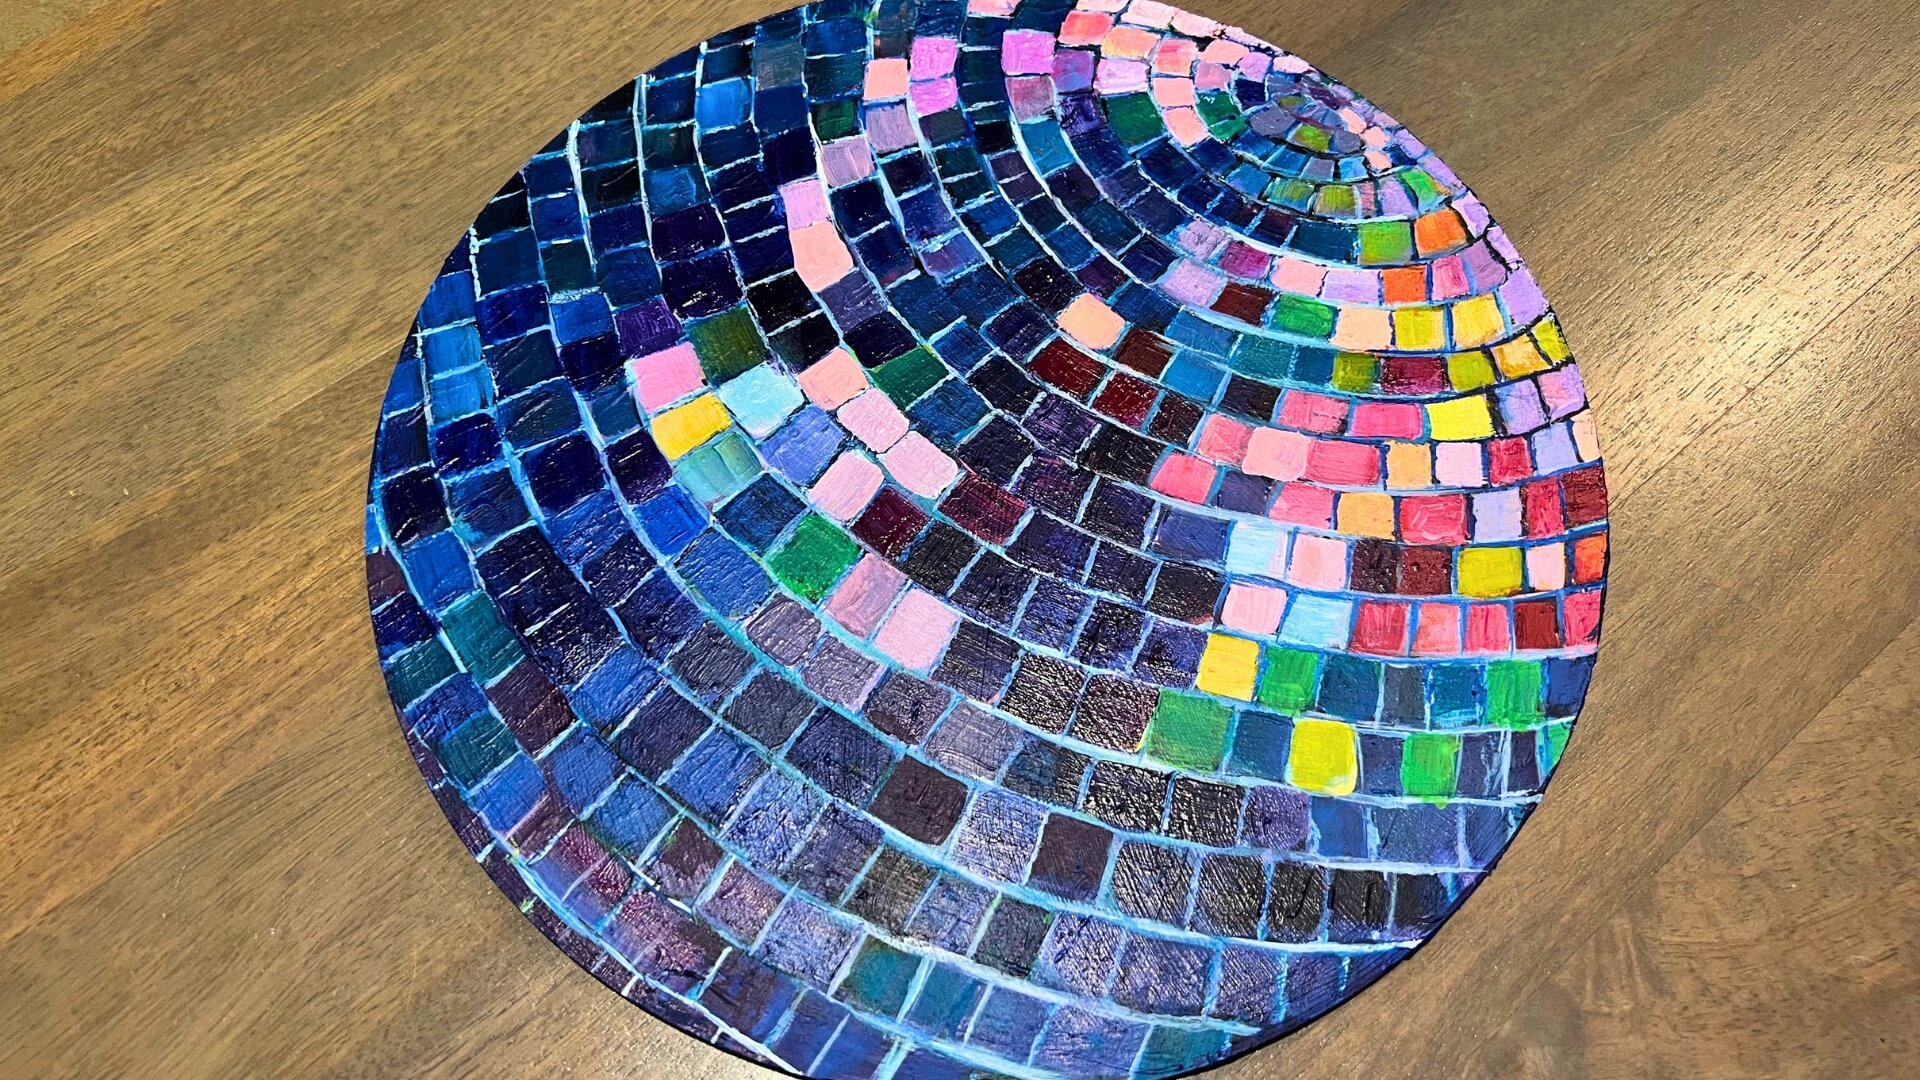
You can marble several pieces – this works with ceramics, natural fabrics, watercolor paper, and more. I encourage you to experiment with your marbling projects! Keep adding different colors and see how they pop.
7. Seal
If you don’t love the way unglazed ceramics feel (sensory issues are real), I recommend sealing your piece with Mod Podge and a foam brush. I personally love the glossy Mod Podge, but it is personal preference as to what you like best! Let dry on wax paper or plastic tablecloth for 24 hours.
These shaving cream marbled trinket dishes make a great handmade Mother’s Day gift or Father’s Day gift. Check out this post for some more handmade gift ideas!