I’m sure you’ve seen the viral melted crayon art project all over Instagram lately. I’ve done these countless times with my classes and I think I’ve discovered the secret sauce for mastering this technique.
Melting crayons with different colors is so much fun. I’ll share how to get the best results from your crayon colors in this post. Plus, it won’t take a lot of time. Don’t forget to have a sheet or drop cloth under your project in your work area to keep it clean!
In the world of crayon projects, DIY crayons melted onto a piece of paper or a canvas is one of my favorites. It is ideal for a rainy day activity.
First, let’s talk about the crayons. It really doesn’t matter which brand of crayons you use because they truly all look beautiful when the project is complete. Also, you can decide; do you want to peel the crayons, use broken crayons or crayon shavings on your canvas? I’ve tried them all and they all come out beautiful in their own way.
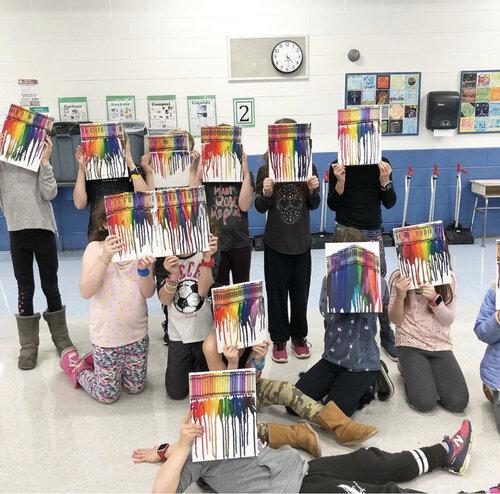
For this tutorial, I’ll be showing you a few different ways to use new or old crayons to make a beautiful piece of art work. I’ve notice throughout my years of teaching that most parents end up hanging these up in a playroom, bathroom or kids’ bedroom. They’re extraordinarily colorful and sure to make any visitor smile. So…let’s get to the meat of the project…how do you make these and what do you need?!
What you’ll need to make the melted crayon canvas art
Affiliate disclaimer: Full disclosure: Although I stand by all of the products I use, I can receive a small commission from any products purchased via my affiliate links.
- Canvas (any size but I think no bigger than 12×18″ is good for your first run)
- Crayons
- Painter’s Tape
- Aleene’s tacky craft glue
- Heat gun
- Cardboard Box
Here’s How to Make the Melted Crayon Canvas Art
Before you begin, equip yourself with paper towels, and a table covering. If you splatter any wax on a surface other than your canvas, try adding ice first and then using a butter knife or an old toothbrush to remove the wax. Learn from my mistakes and never ever try this on foam board or poster board. The paper burns and it is a total disaster!
- The first thing to do is to grab a canvas and decide whether you want to hold it vertically or horizontally. I like to say that you are the artist, so you should do whichever direction makes you happy. Or if you discover a fun way that you want to experiment with – I say go for it!
- Sort your crayons into the order that you want them to go. Rainbow order looks beautiful but so does a random mix of colors. You’re the artist! Be mindful of the Crayola logo – do you want it to show? Do you want the color name to show? All personal preference. A great way to know what you like best is to organize the crayons first and see which color combinations look best for your canvas. This is an easy step – do not skip it!
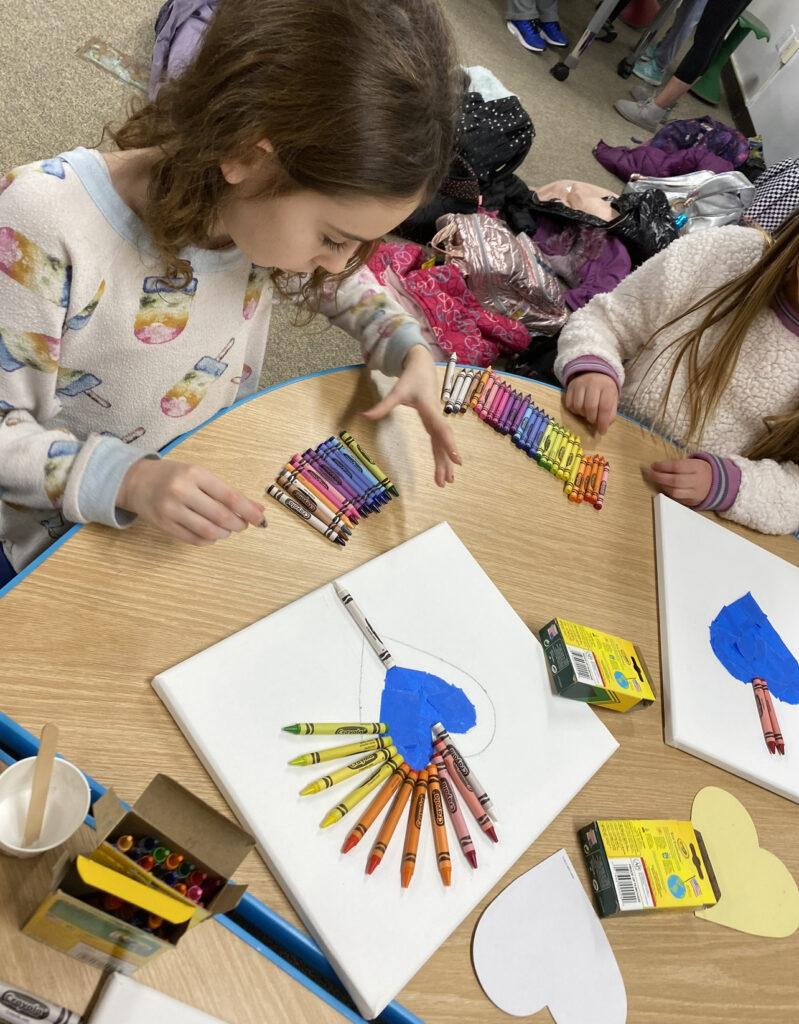
Sorting crayola crayons - Glue the crayons onto the top of the canvas. You do not need to use a lot of glue – just a small amount works great. Also, I would not recommend using a hot glue gun because the hot glue will melt the crayons before you’re ready for them to melt. Also, if you use a low heat glue gun, the glue bond might not be strong enough to hold the crayons into place. I’m sure there are a variety of ways to do this, but experience tells me that the easy way is the least frustrating!
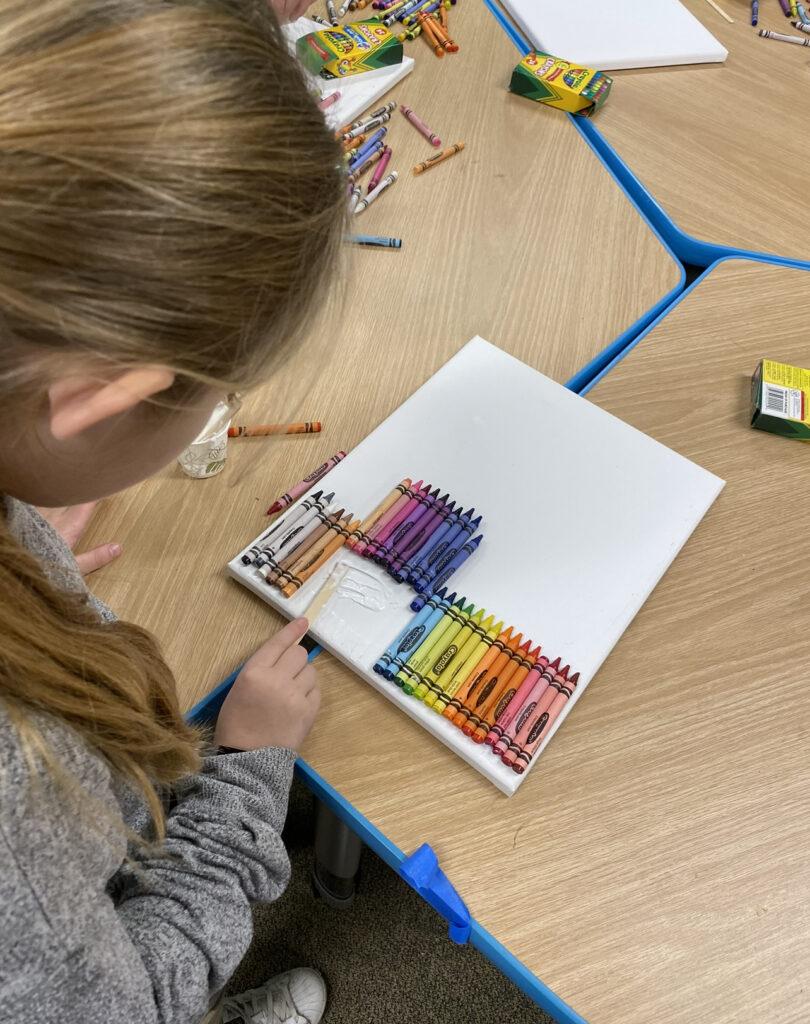
Gluing down the crayons - Let the glue dry at least for 20 minutes or so. You do not want the crayons to slide down the canvas. I like using the Aleene’s glue for this project because it dries super fast and is strong enough to hold the weight of the crayons. I have melted crayon canvases from ten years ago and they still look great and the crayons are securely on the canvas.
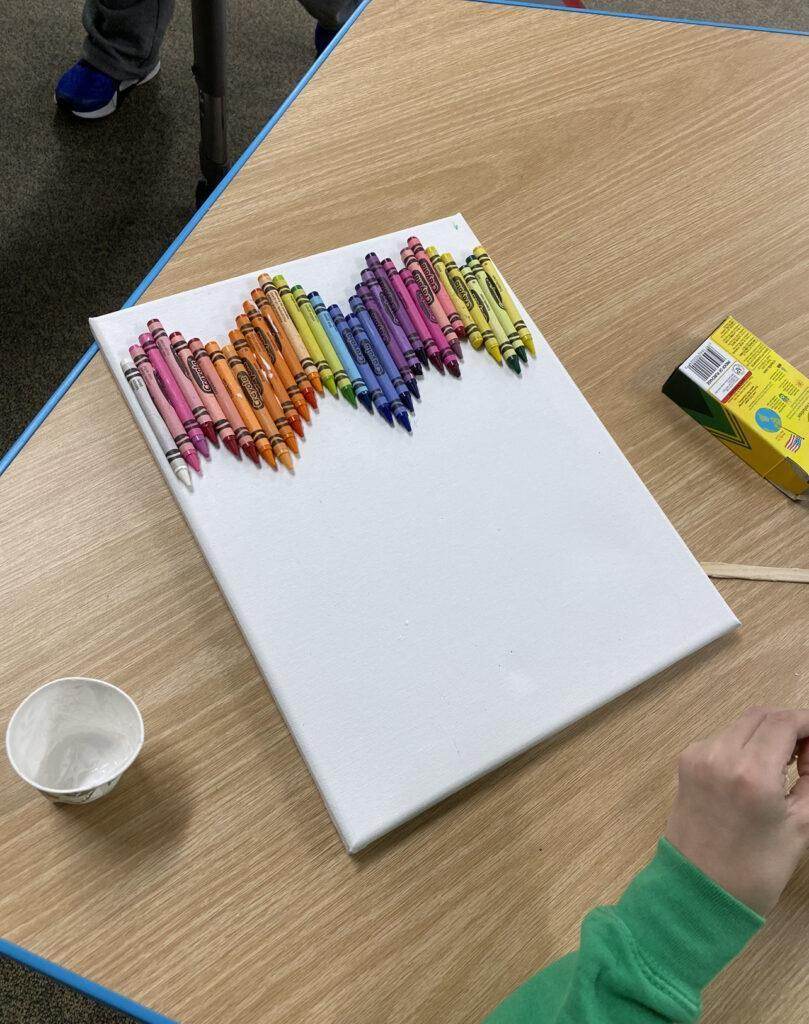
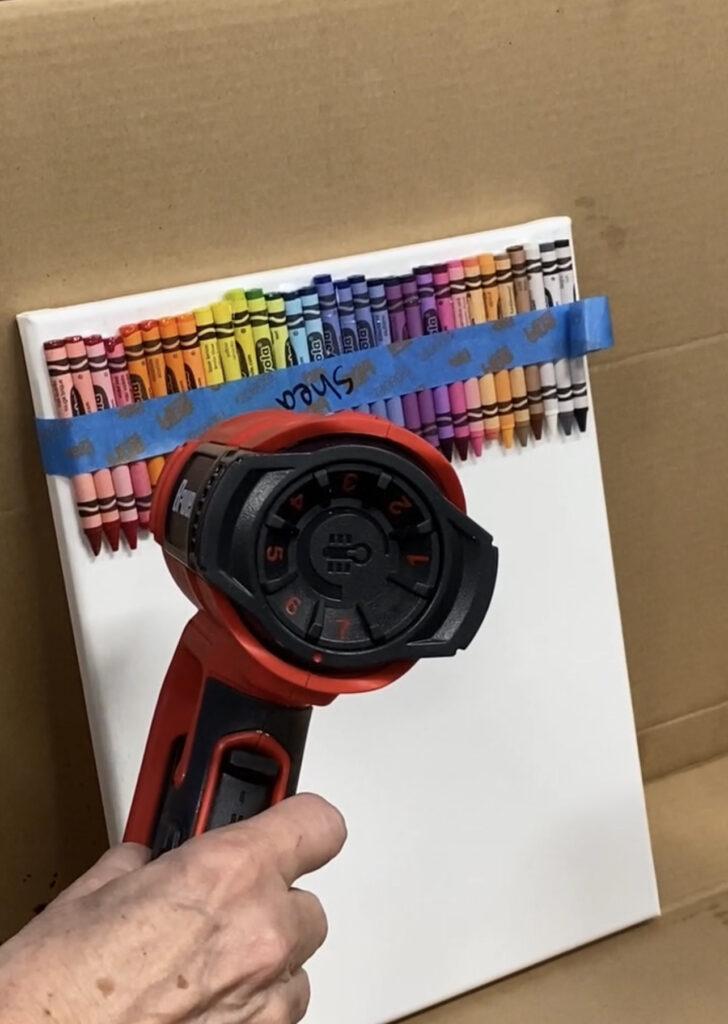
Students getting creative with their crayon designs - Once the glue is dry enough, take a piece of painter’s tape and lay it across all of the crayons. I think this step is important just in case things don’t go according to plan. I am not sure if other artists or teachers recommend this step, but I have discovered after doing this for years – you won’t regret adding a strip of tape. Also, I do not recommend using masking tape because it sticks to the crayon paper and can ruin the craft project when you attempt to release it.
- Place a cardboard box on it’s side with the opening facing you. Place the crayon canvas into the box. Place it far enough into the box so that the melted crayon wax can’t splatter on your work surface. I’ve seen people use garbage bags instead of a cardboard box. I do not recommend this because the plastic can melt and smell very bad!
- Now comes my secret trick…I do not use a hair dryer for this project. I have found that a blow dryer causes the crayons to splatter and not drip. We want drippy people – not splattery (is that even a word)! Well, unless you do indeed want the splatter effect. I do not recommend splattering hot melted wax around kids though. Use a heat gun instead. Start it out on the lowest setting. Older children and adults can do this on their own, but I do not let younger kids handle the heat gun because the metal is very hot and can cause severe burns (also learned this the hard way). The secret trick is to keep moving the heat tool horizontally across the crayons for just a few seconds. This is the easiest way to achieve an even heat situation. Keep going…it sometimes takes a long time for the crayons to warm up but they will. The wrong way to do this would be to start with the high heat settings. The crayons need to melt gradually and the hot air needs to be applied evenly.
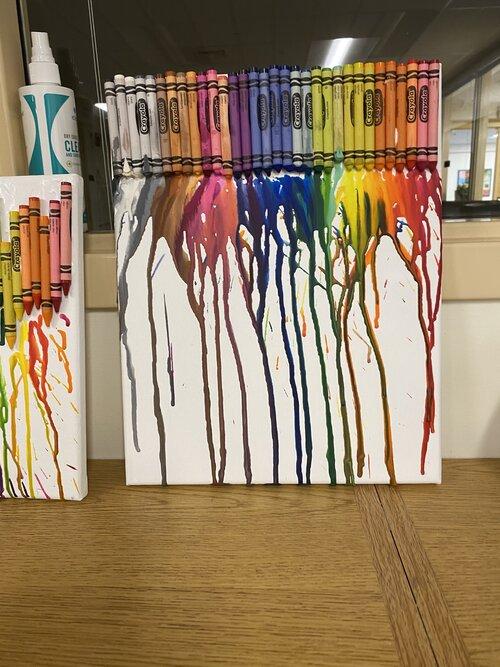
Using the heat gun to melt the crayons - Once the crayons start dripping, you’ll want to be pretty strategic about how you angle the heat gun. Again, adult supervision is required. Angle the heat gun at around 45 degrees so that the wax drips directly down onto the canvas. If it is melting too fast, use a lower setting because you do not want the crayon wrappers to burn either. Keep going until at least some of the crayon wax has melted all the way to the bottom of the canvas.
- And…that’s it…you have completed your beautiful masterpiece! Go ahead and hang it up in your craft room.
Melted crayon art
Creative Ideas for making melted crayon art
- If you decide to peel the crayons, the easiest way is to soak the crayons in a warm glass of water for about 30 minutes. Use a utility knife to remove the paper. You can really hurt your fingernails if you try to peel them on your own. If you leave the crayons in the water long enough, the paper will just completely separate. This works better with newer crayons.
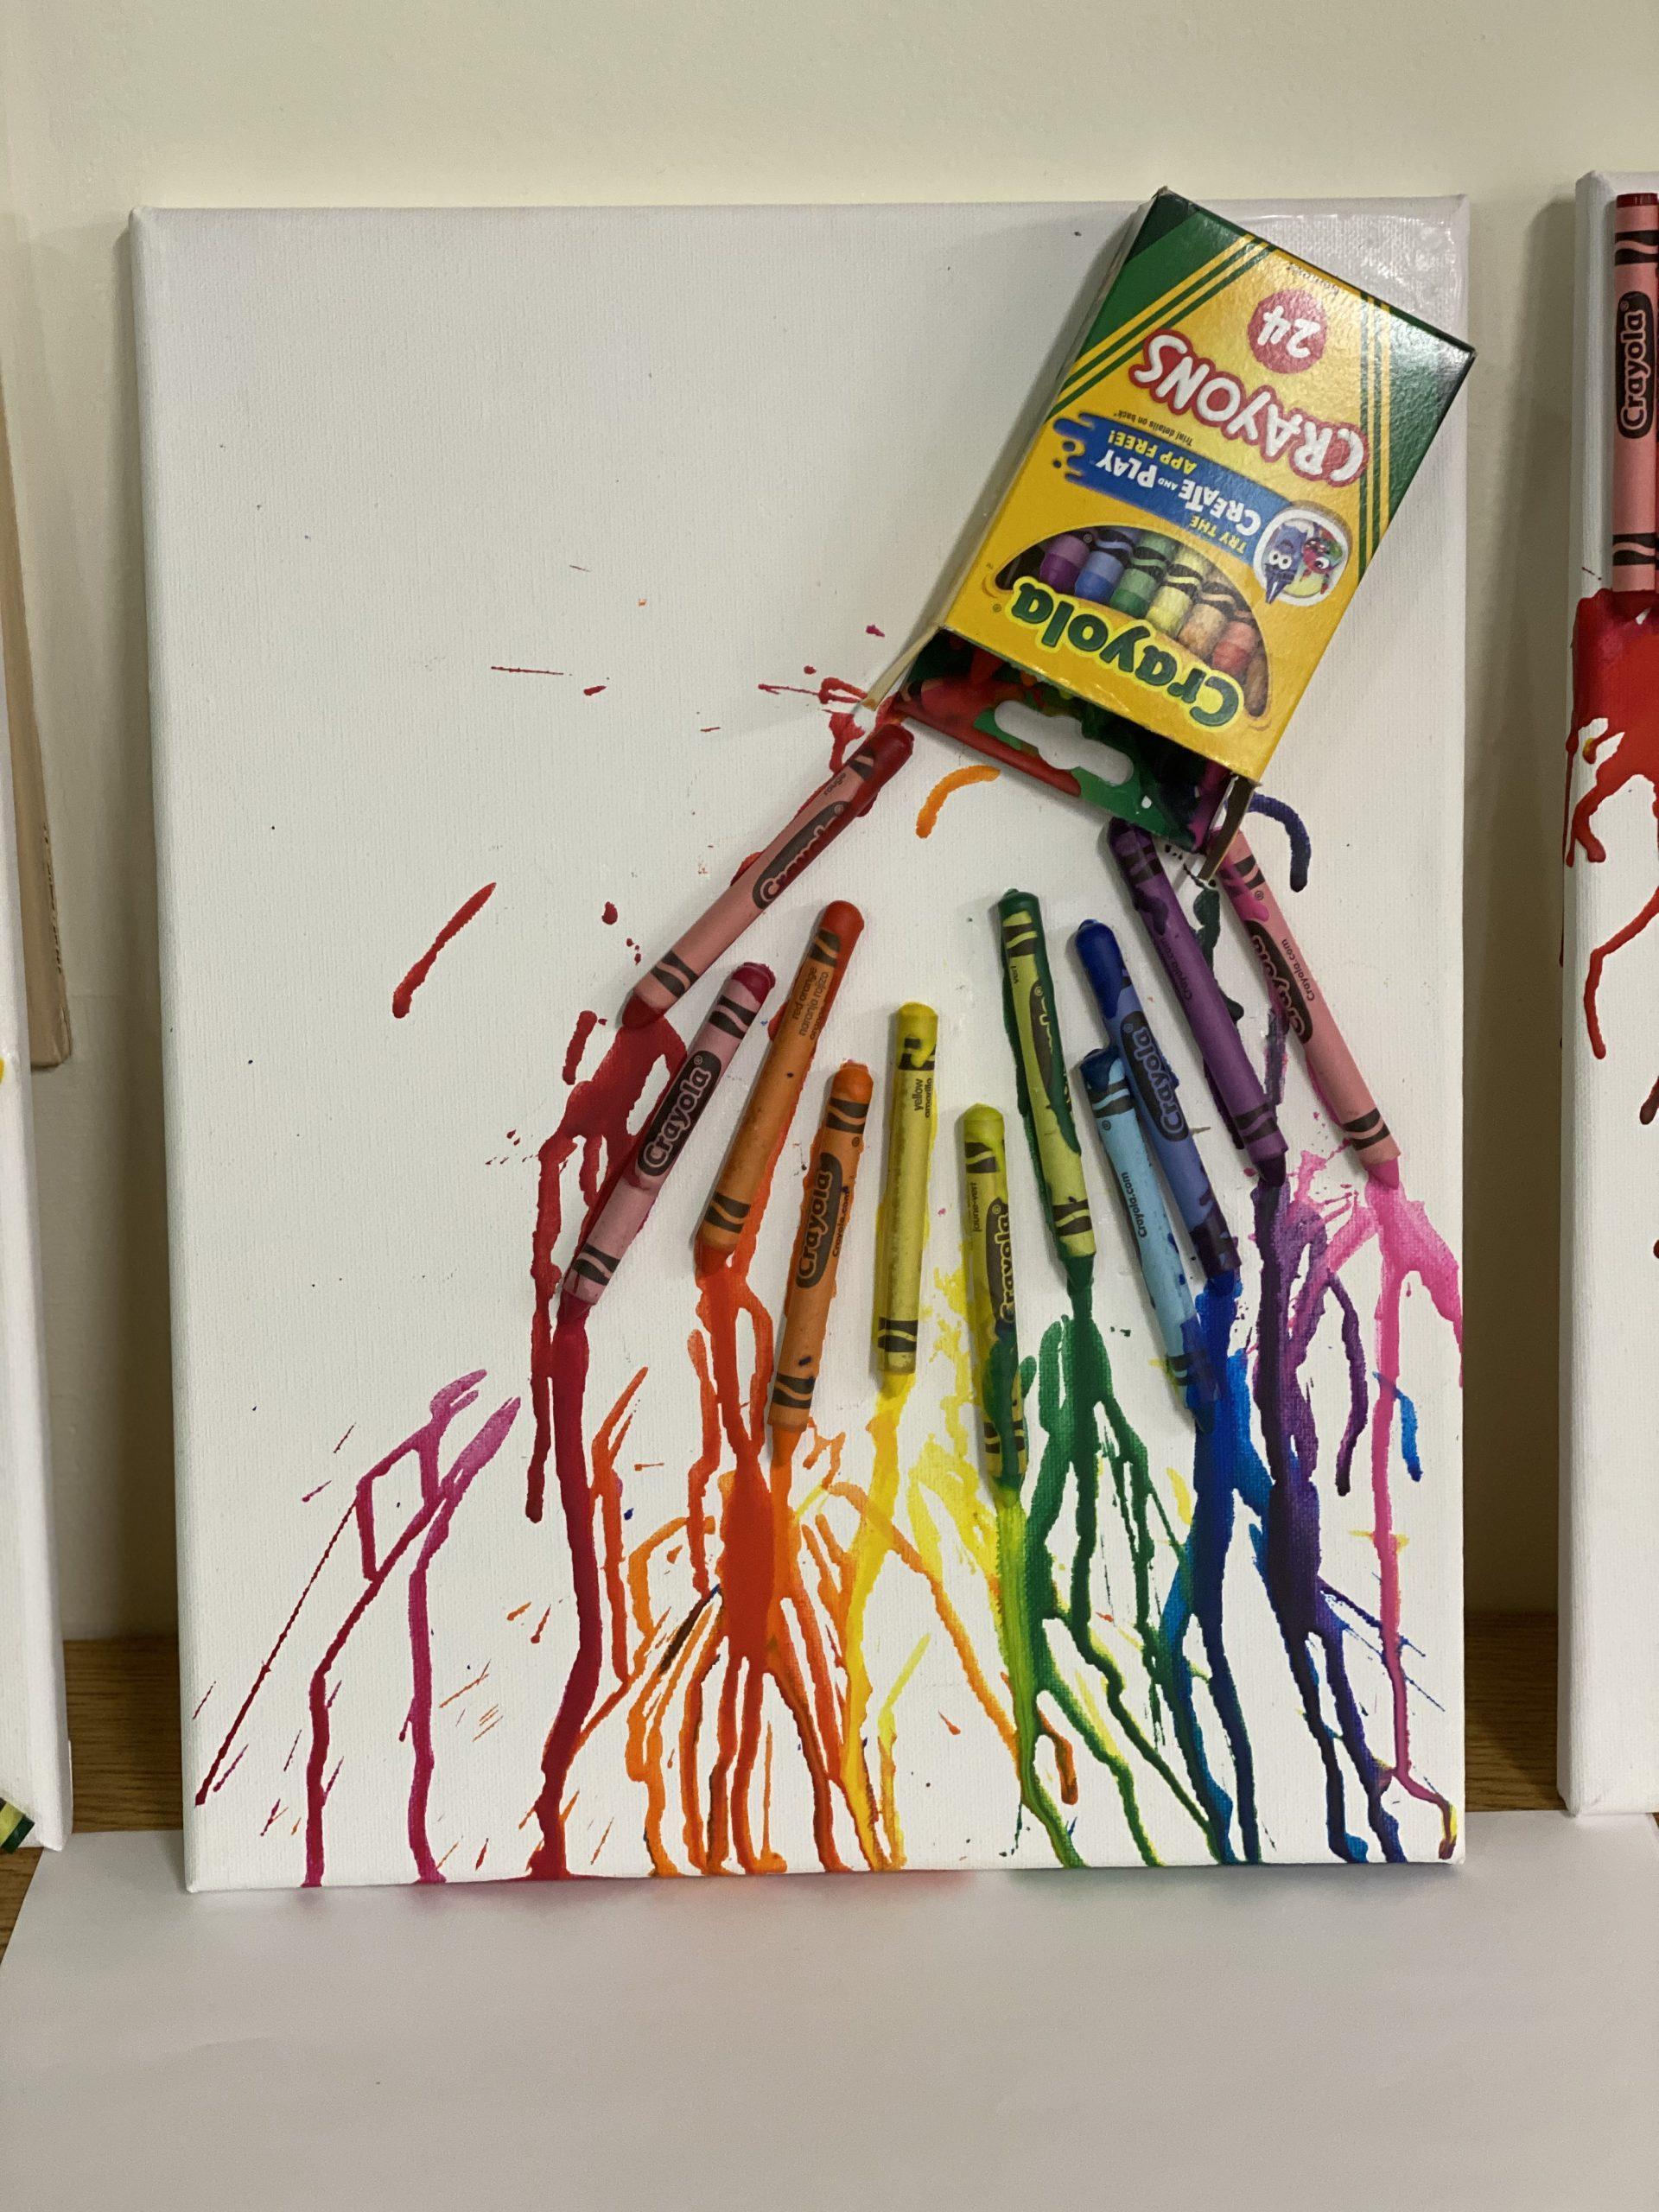
- I had a class that used a new box of crayons each (one year they were on sale for 50 cents and I bought a ton of them. So glad I did because I don’t think I will find that deal again. I’ve noticed that crayons are usually cheapest in August before school starts. This class decided they wanted to glue the crayon box onto the canvas, too and have the crayons look like they are pouring out of the box. This was a pretty cool work of art
- Experiment with things other than a canvas. Try using hot rocks instead. Have the kids heat up the rock with the heat gun and then take crayon pieces and color onto the rocks. Watch them melt!
- Another great idea is to take a large flat rock and add colorful wax crayon bits onto the rock. Place the wax onto a baking sheet and pop it into the oven. Watch the wax drip. You can even use these to color with once they are cool. The craft project ideas are endless!
- For younger children, it might be fun to have them shave the crayons using a pencil sharpener. Have them make designs on a piece of parchment paper. Iron the paper and watch out for the end result – a huge burst of color! The best part is always the reactions when the melting begins. If you want to pre-prepare the sharpened crayons, feel free to use a cheese grater. These are readily available at the Dollar Tree.
- Take two different color crayon parts and put them onto a piece of wax paper. Iron and watch a new color form on the paper. The fun part is the magic that happens!
- Another crayon project is to make shapes. You can use crayon parts to fill silicone molds. Make sure they’re silicone otherwise they will not separate from the mold when they cool. You can make letters of the alphabet, numbers, animals and more. My kids once gave these out as party favors. They looked like beautiful products purchased in a store – the best part is that we involved the entire family!
- Make holiday shaped crayons like pumpkins or hearts. If you can find the right mold, you can make crayon heart pencil toppers. Stick the pencil into the melted crayon wax while it is still hot.
Do you have any melted crayon crafts that I’ve missed? I am always looking for new rainy day craft projects. Even though I have a 15 year old daughter and a 17 year old son, they still love making easy crafts with me (when they’re not socializing or studying)…
Either way you make this project, you will enjoy it! If you love projects using traditional crayons, check out my DIY crayon pencil holder tutorial here.
HAPPY CRAFTING!!!